Page 17 of 38
Re: 750 Sport restoration project
Posted: Thu Jul 31, 2014 8:29 am
by Andrew2
Ok,the horn is painted.It was blowing a gale here today and it shows in this crappy paint job.Never mind,no one will see it.
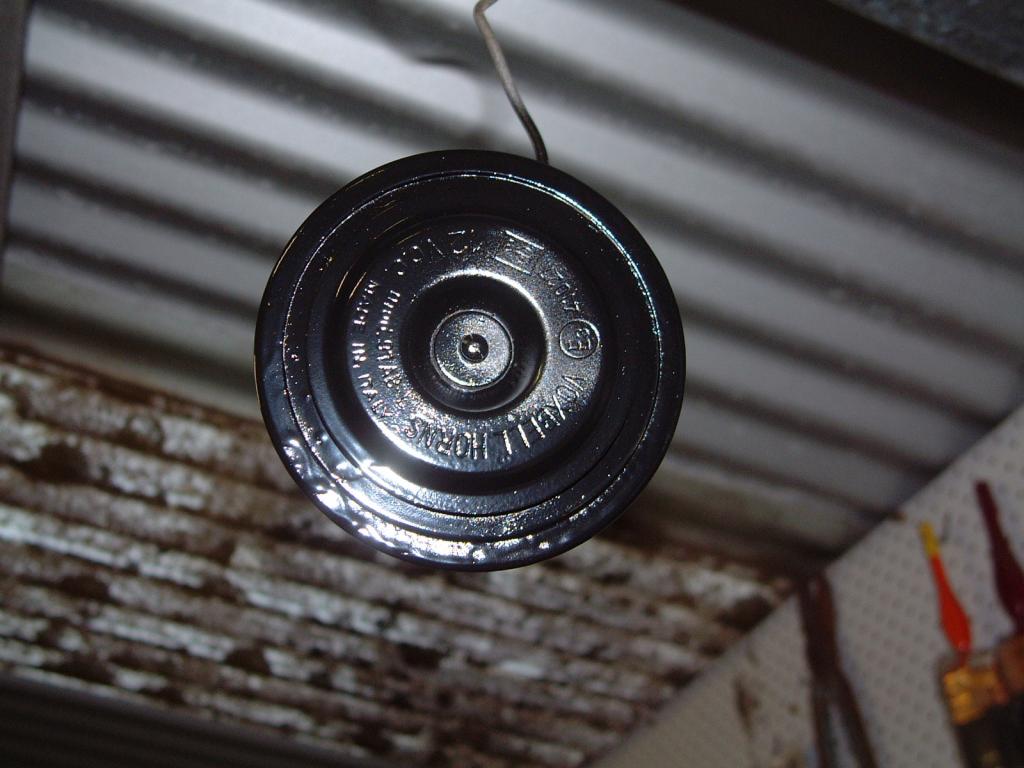
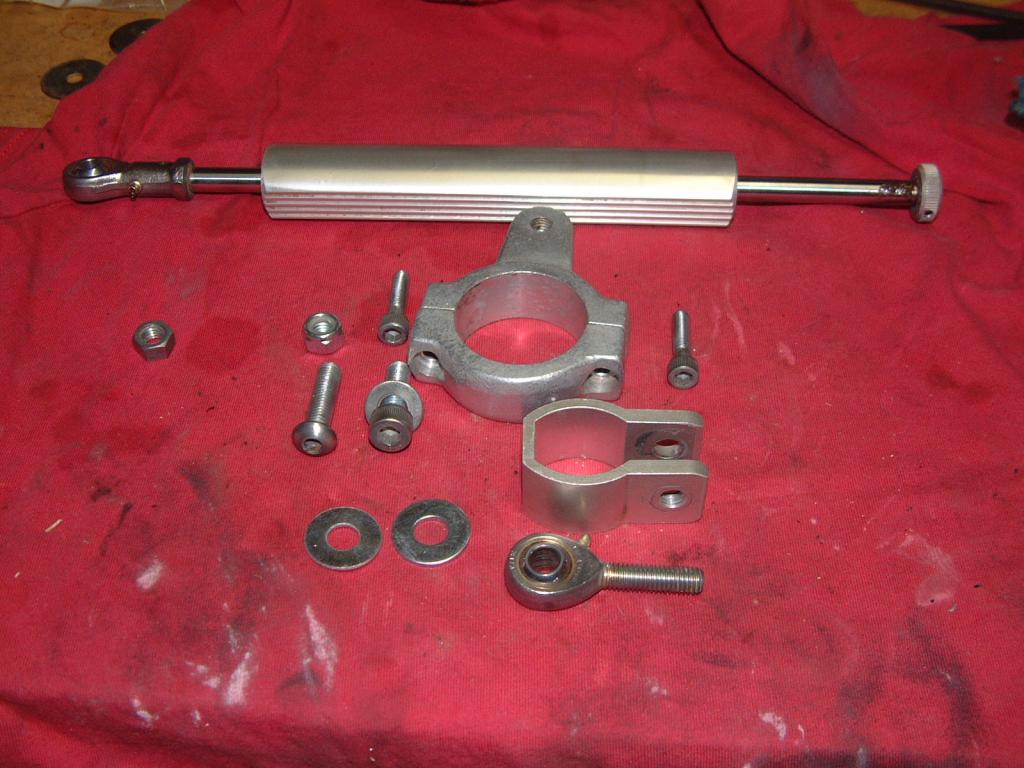
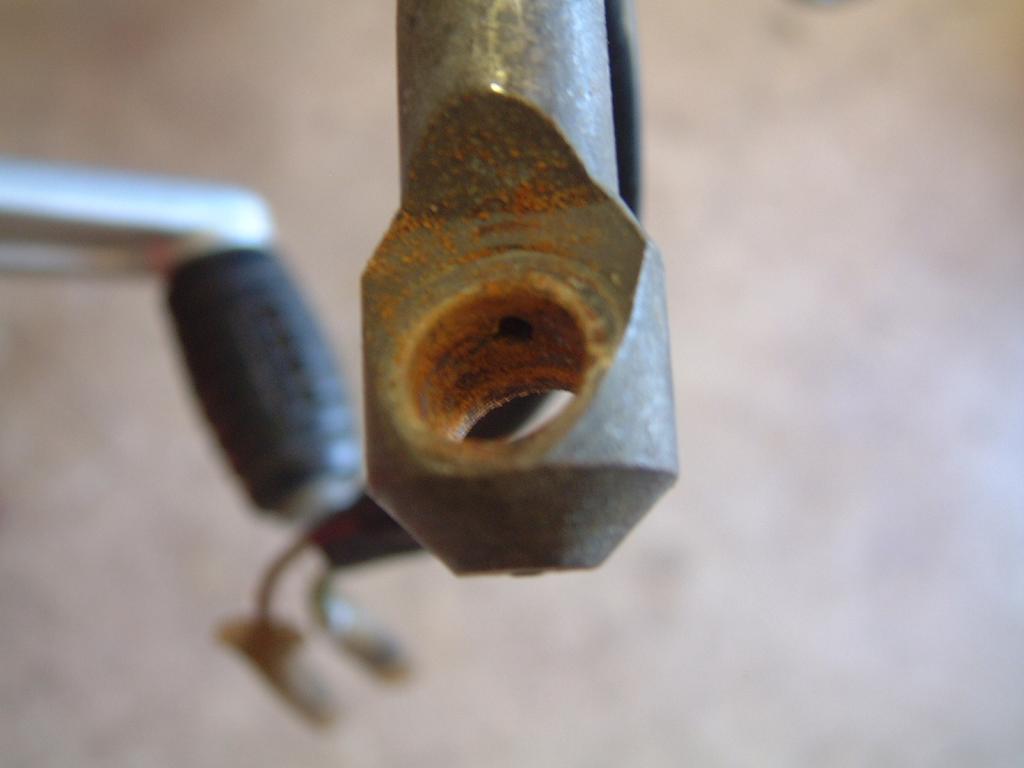
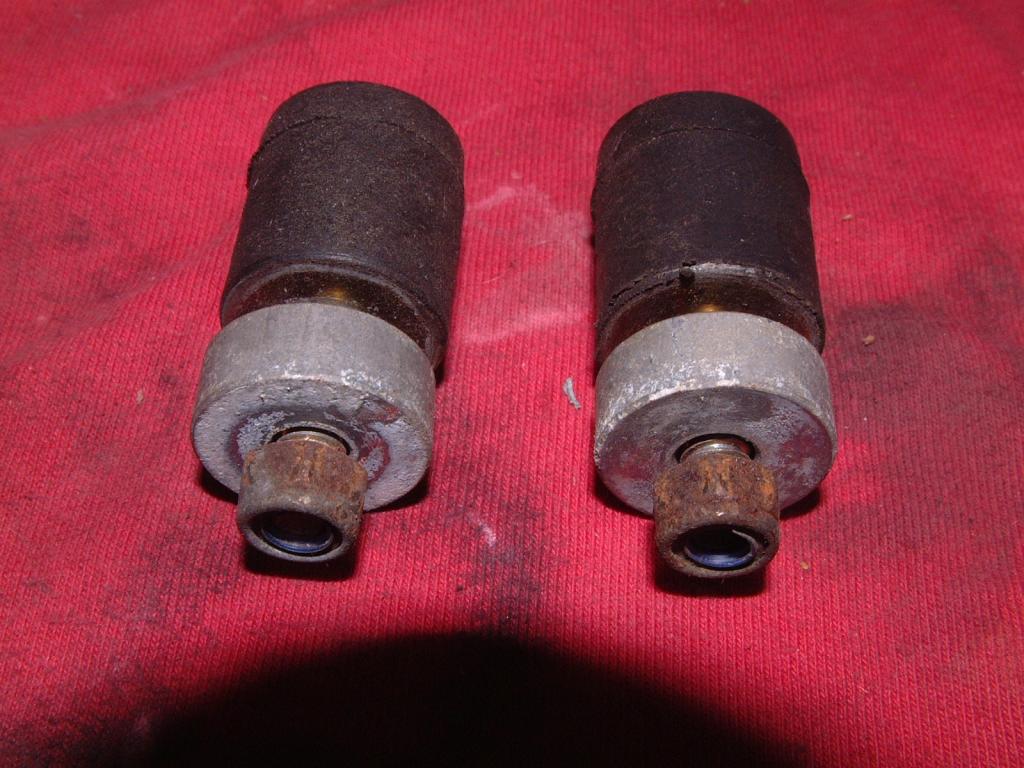
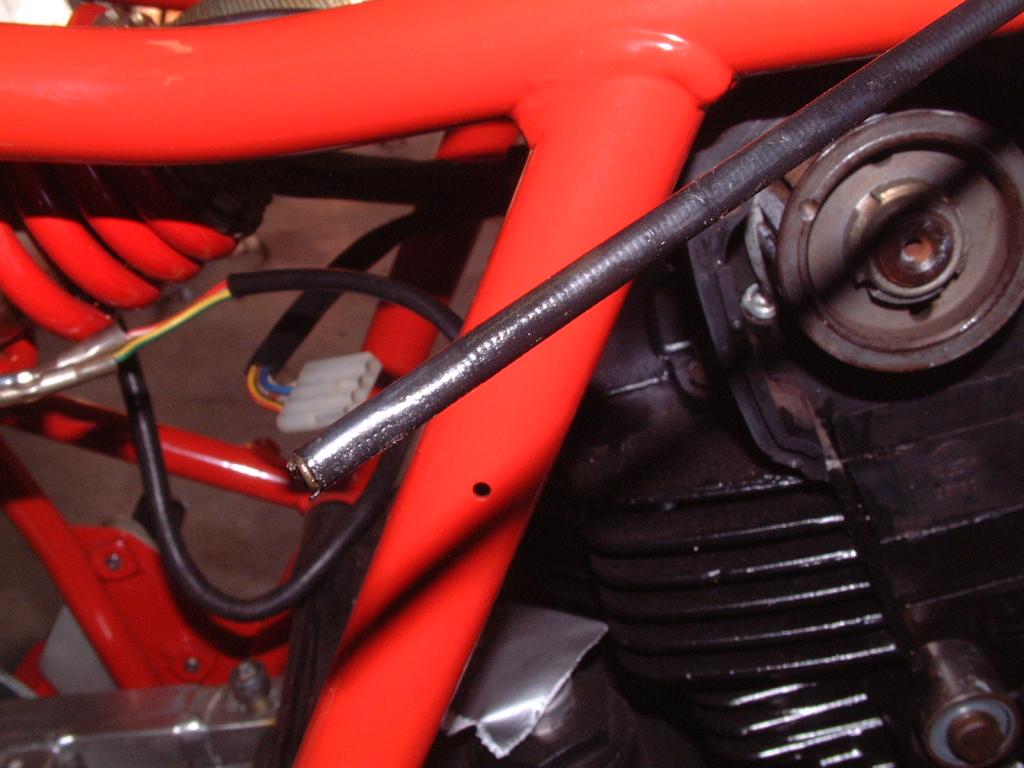
Next up the
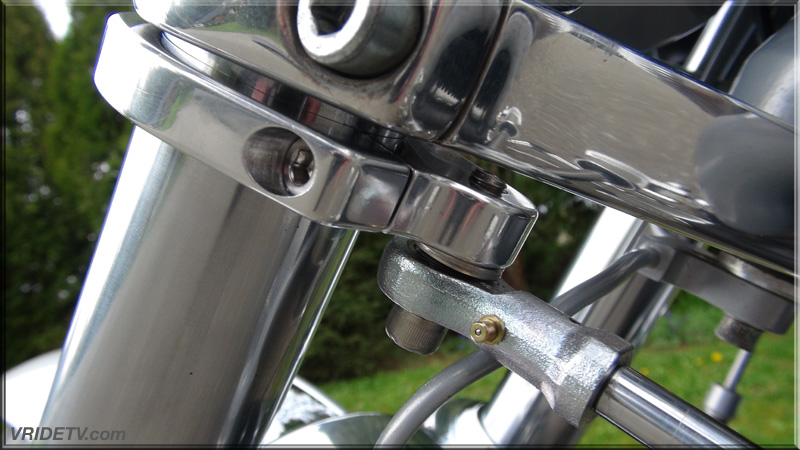
steering damper.
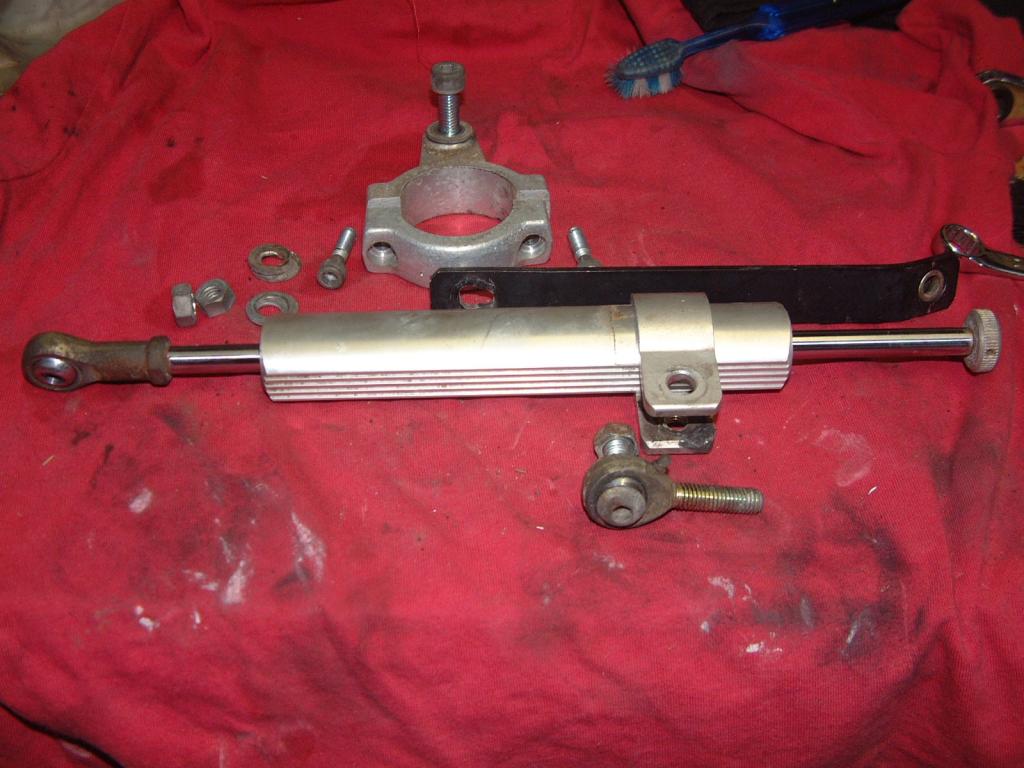
You can see the rust at the very end of the shaft.I'll remove as much as possible but I don't think it will effect the
damper anyway.
I still have to look at the rust on the shaft but it's better...
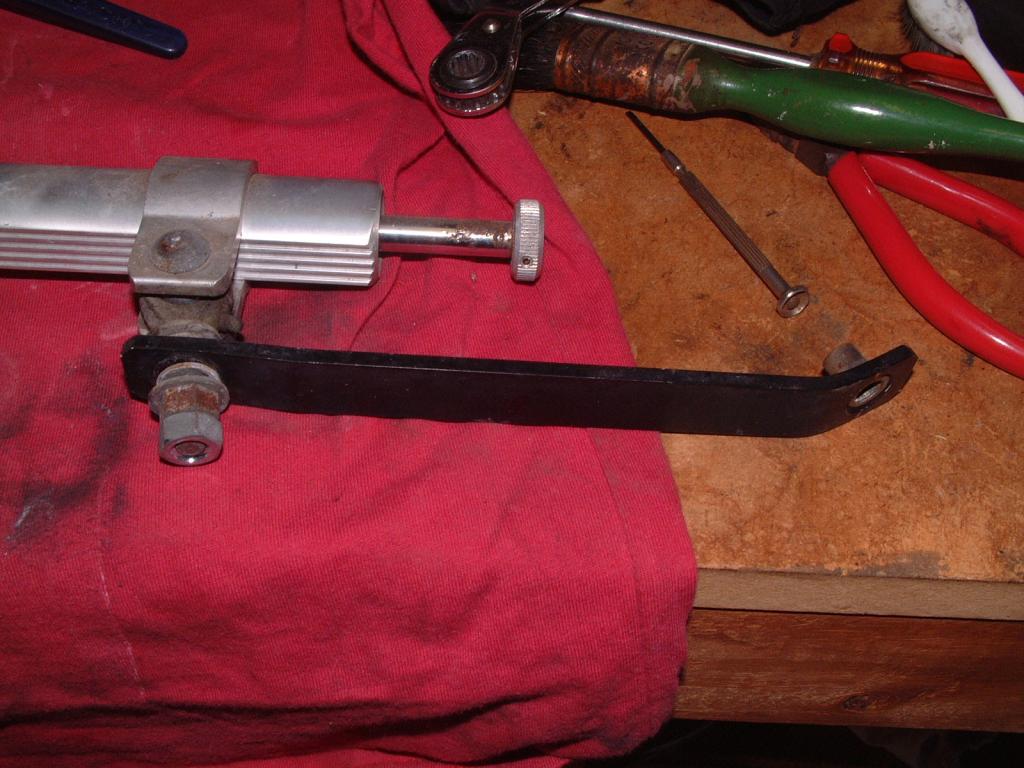
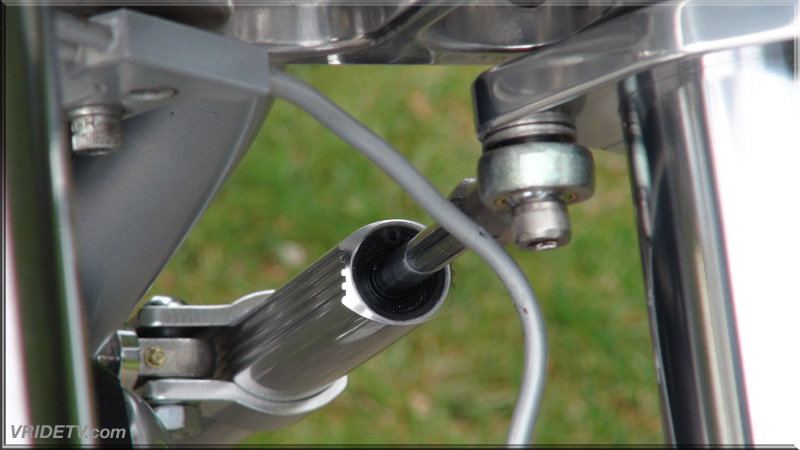
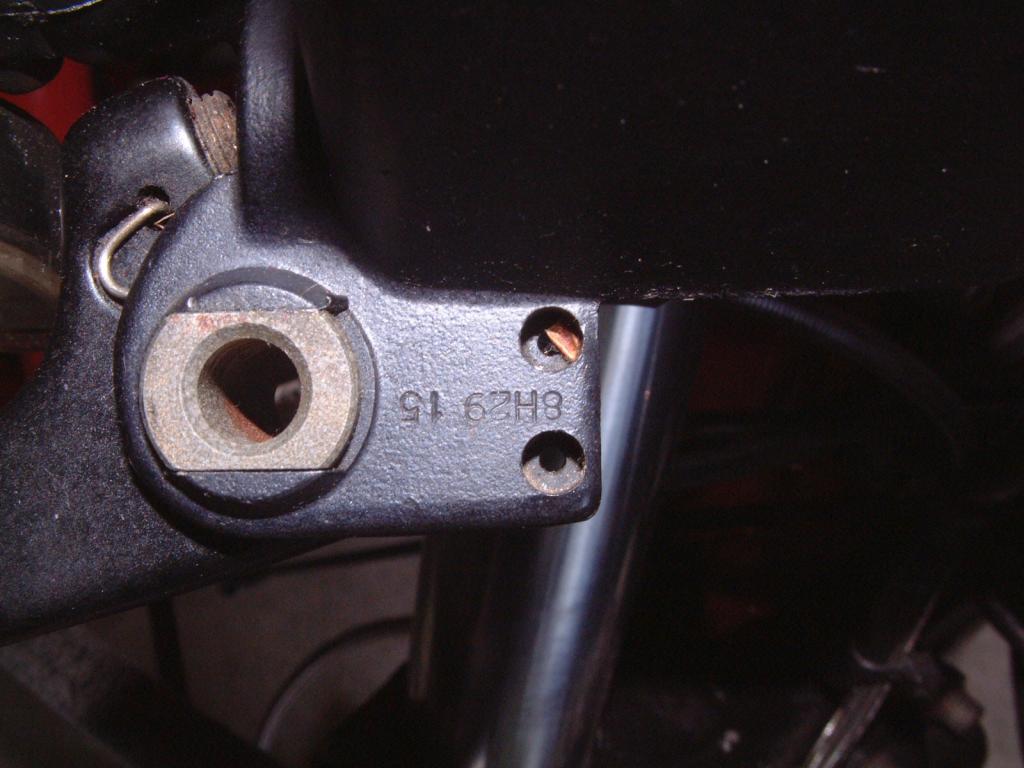
...except this.
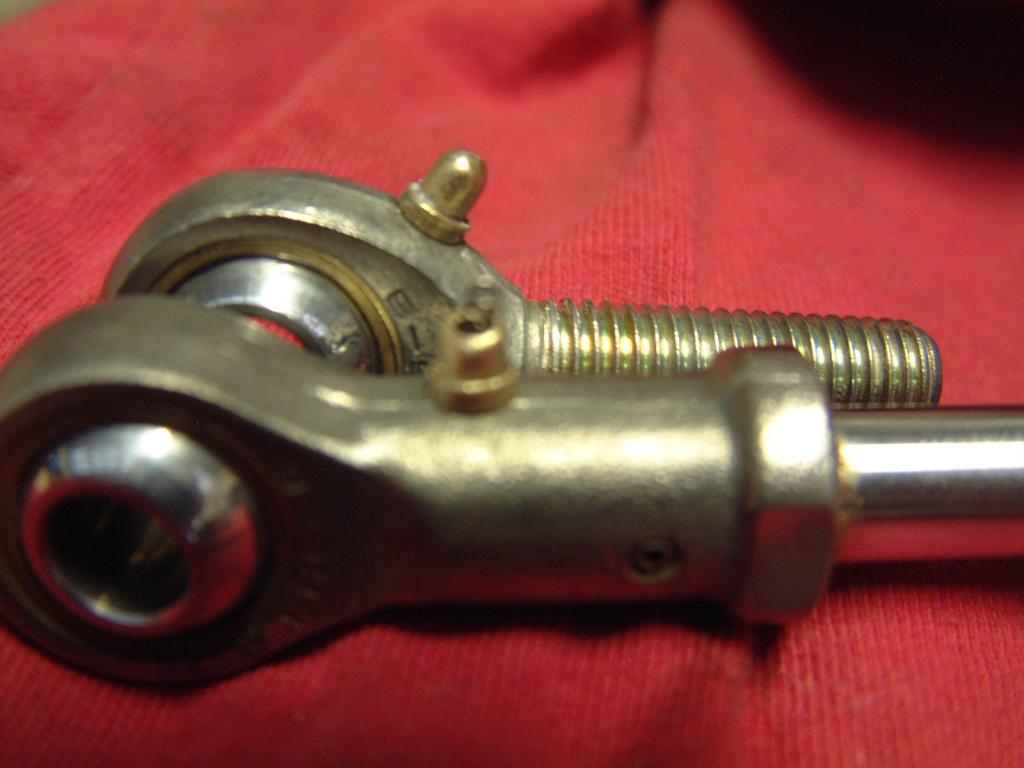
It's a bad photo but basically I got over excited with the wire brush and wore through the brass? cap and out pops a spring."So what does the spring do" and how can I repair it.A dab of solder ( not sure if solder would stick to brass ).Find another cap.I would'nt even know where to start looking for a cap.
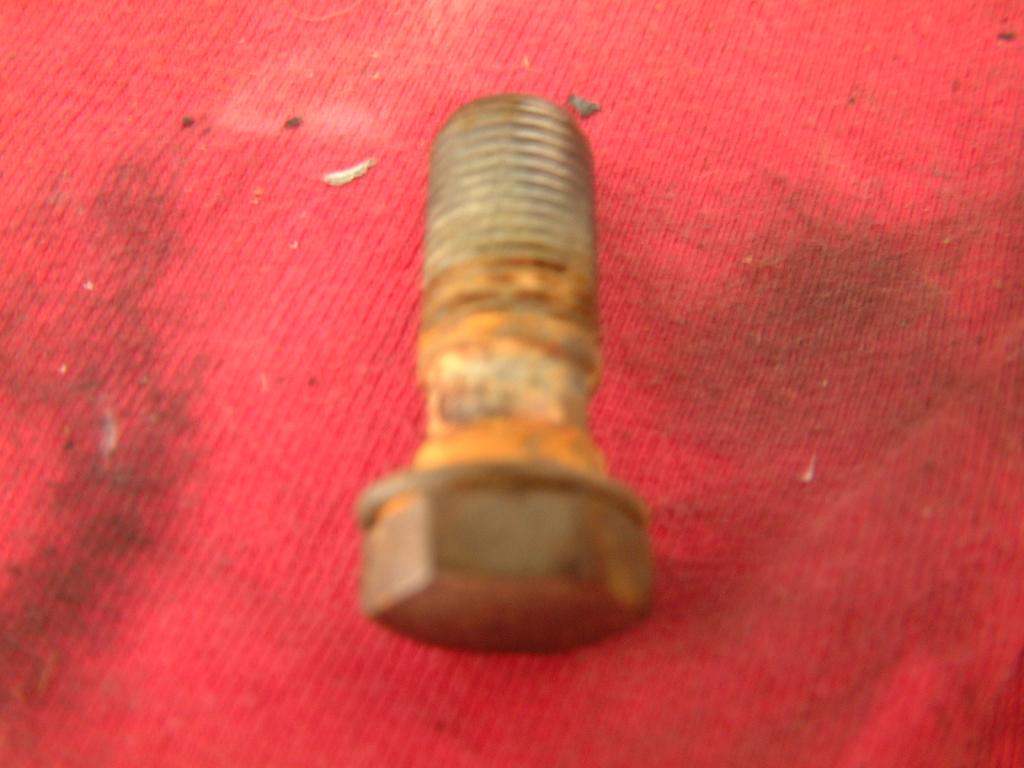
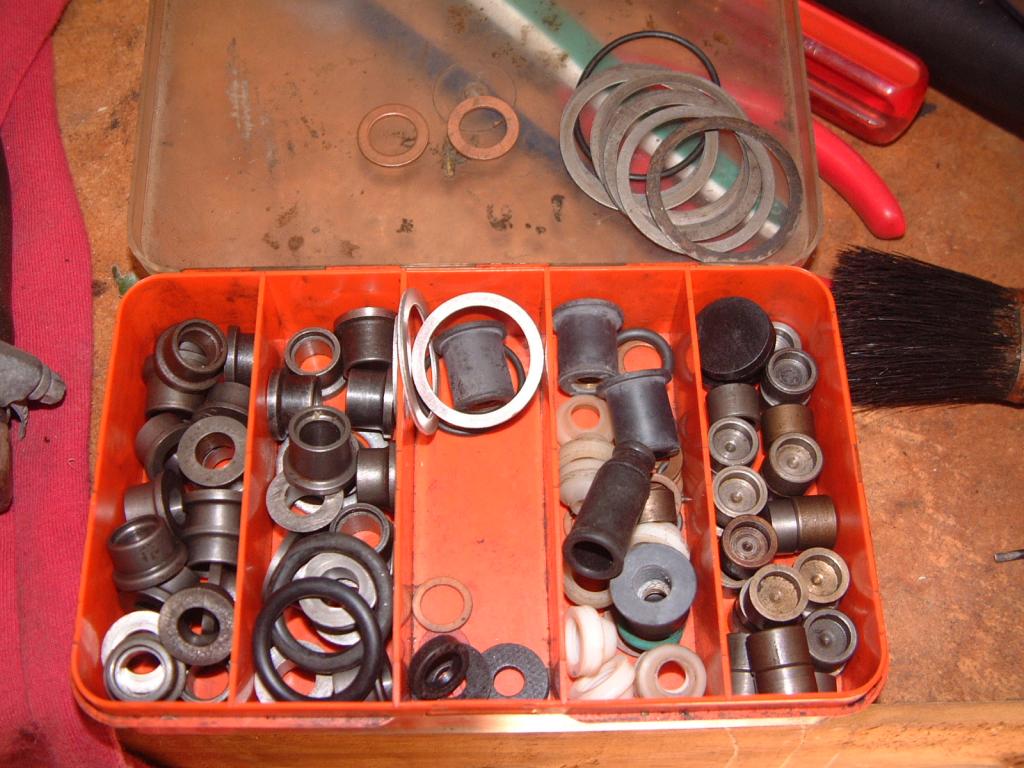
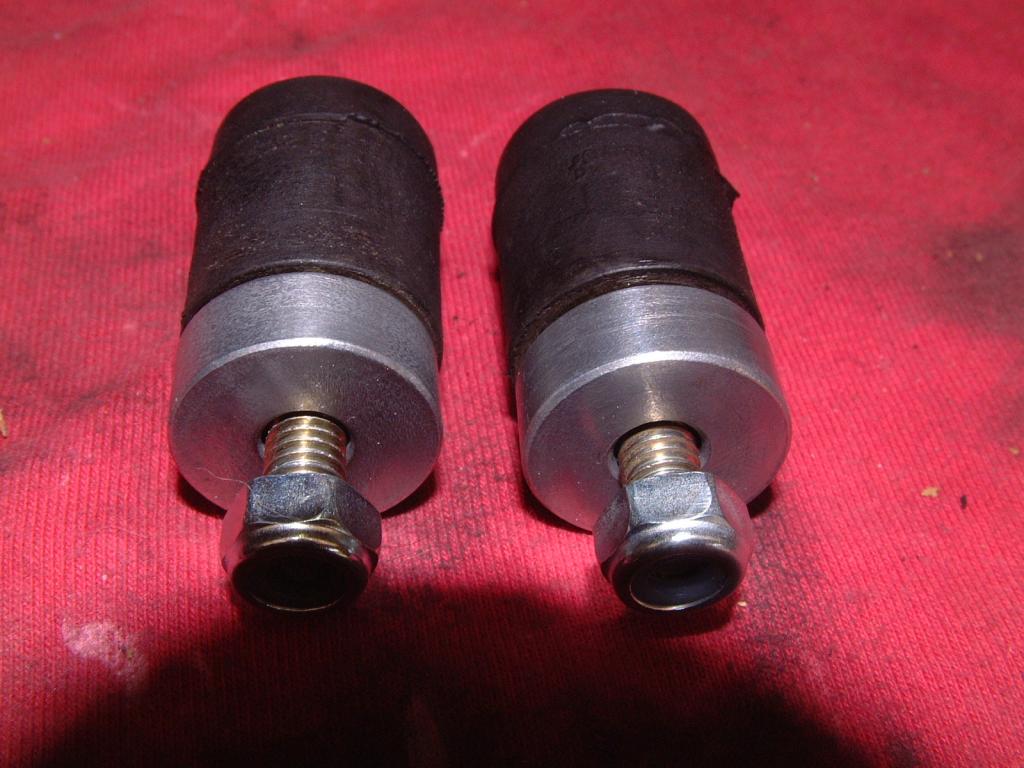
Next job is cleaning these.
I don't want to remove them so I'll have a crack with the dremel and wire brush tomorrow.
Cheers
Andrew
Re: 750 Sport restoration project
Posted: Thu Jul 31, 2014 9:32 am
by paso750
if there`s a spring there`s usually a tiny steel ball which is being pushed down by it.
Re: 750 Sport restoration project
Posted: Thu Jul 31, 2014 9:57 am
by Andrew2
paso750 wrote:if there`s a spring there`s usually a tiny steel ball which is being pushed down by it.
Any idea what it's purpose is on the heim joint?
Re: 750 Sport restoration project
Posted: Fri Aug 01, 2014 12:44 am
by Andrew2
I have a question.What parts need to be grounded to the frame and what's the best way of going about it without wrecking paint on the frame?.
Cheers
Andrew
Re: 750 Sport restoration project
Posted: Fri Aug 01, 2014 5:52 am
by Andrew2
The timing belts came in today but i did'nt buy them. They were even thinner than the ones i took off. I'll order some Exactfit ones next week.
Edit:ordered
Cheers
Andrew
Re: 750 Sport restoration project
Posted: Fri Aug 01, 2014 9:25 am
by Derek
It's a bad photo but basically I got over excited with the wire brush and wore through the brass? cap and out pops a spring."So what does the spring do" and how can I repair it.A dab of solder ( not sure if solder would stick to brass ).Find another cap.I would'nt even know where to start looking for a cap.
Solder will stick to brass no problem. Or you could tap a suitable thread in the hole (M4/3.5/3?) and fit a small grub screw to retain the spring.
Re: 750 Sport restoration project
Posted: Fri Aug 01, 2014 9:40 am
by Andrew2
Derek wrote:It's a bad photo but basically I got over excited with the wire brush and wore through the brass? cap and out pops a spring."So what does the spring do" and how can I repair it.A dab of solder ( not sure if solder would stick to brass ).Find another cap.I would'nt even know where to start looking for a cap.
Solder will stick to brass no problem. Or you could tap a suitable thread in the hole (M4/3.5/3?) and fit a small grub screw to retain the spring.
G'day Derek,nice to hear from you.How's the 907 going?.Thanks for the advice.I'm still wondering what that spring is actually doing in there.There must be a reason but I can't seem to fing an answer.I might pop into the local engineer next week and ask him.It's got me intrigued now.
Cheers
Andrew
Re: 750 Sport restoration project
Posted: Sat Aug 02, 2014 8:00 am
by Andrew2
I started off by dragging the wiring through the frame..then back through the frame when I got it wrong...then back...never mind

[/url]
I forgot to take a photo of the wiring at the front but it's all back together.I'm not happy with the way it all gets jammed in there so I might pull it apart yet and try and neaten it up.
What next.I know I have to bare some paint on my frame for the earth but I'm really putting it off...I don't want to take any paint off

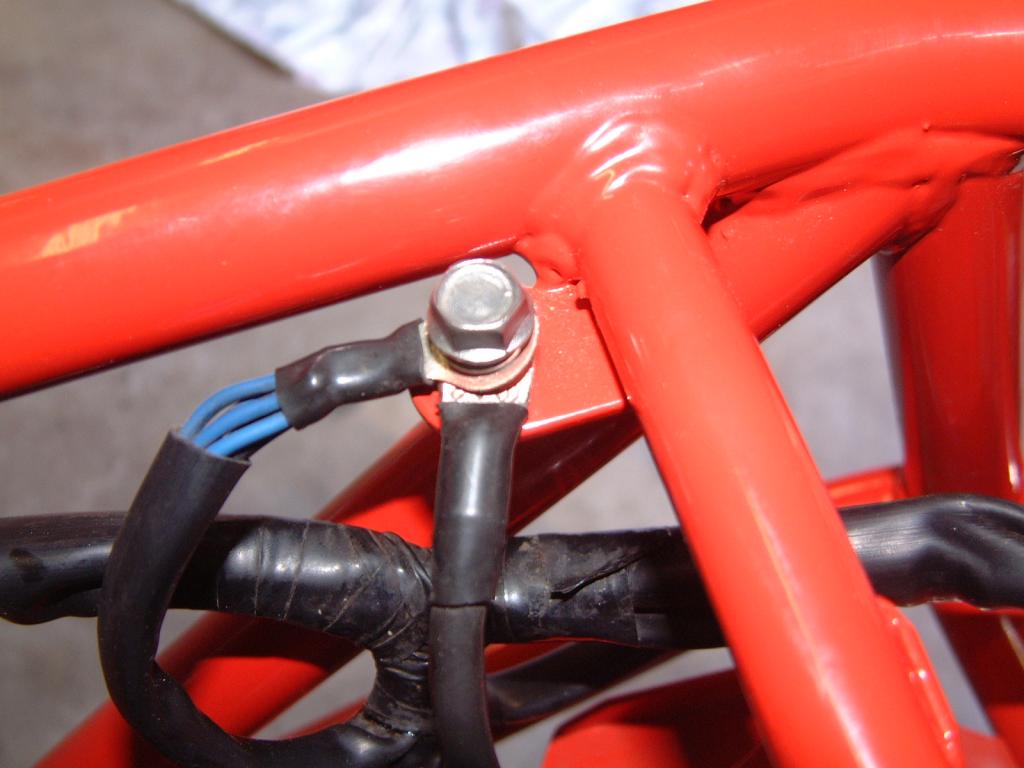
[/url]
I suppose it's got to be done.There,it's done....well one of them anyway.
The engine looks like it needs a clean already.
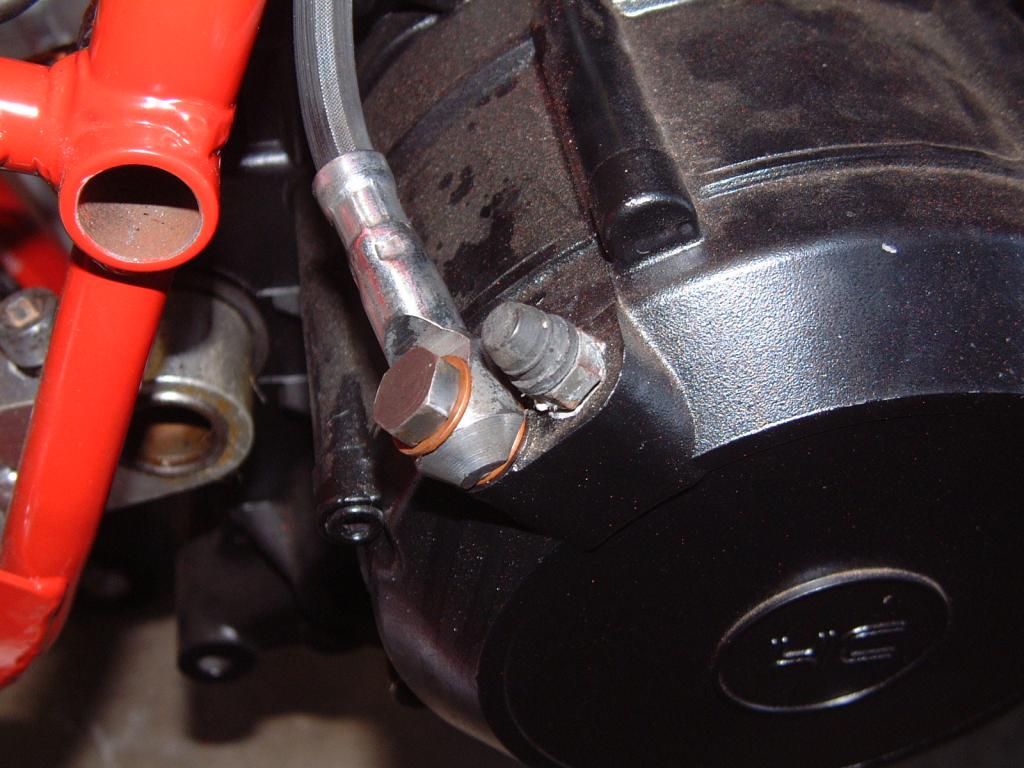
Time to attach the clutch to the motor.This is grotty

And badly photographed

A couple of new copper washers and it's done.
There's that dusty motor again.
The coils took a while to put on.Mainly because I did'nt take a photo of them when I took them off and could'nt remember wher they went.Hiding them under the battery tray did'nt help

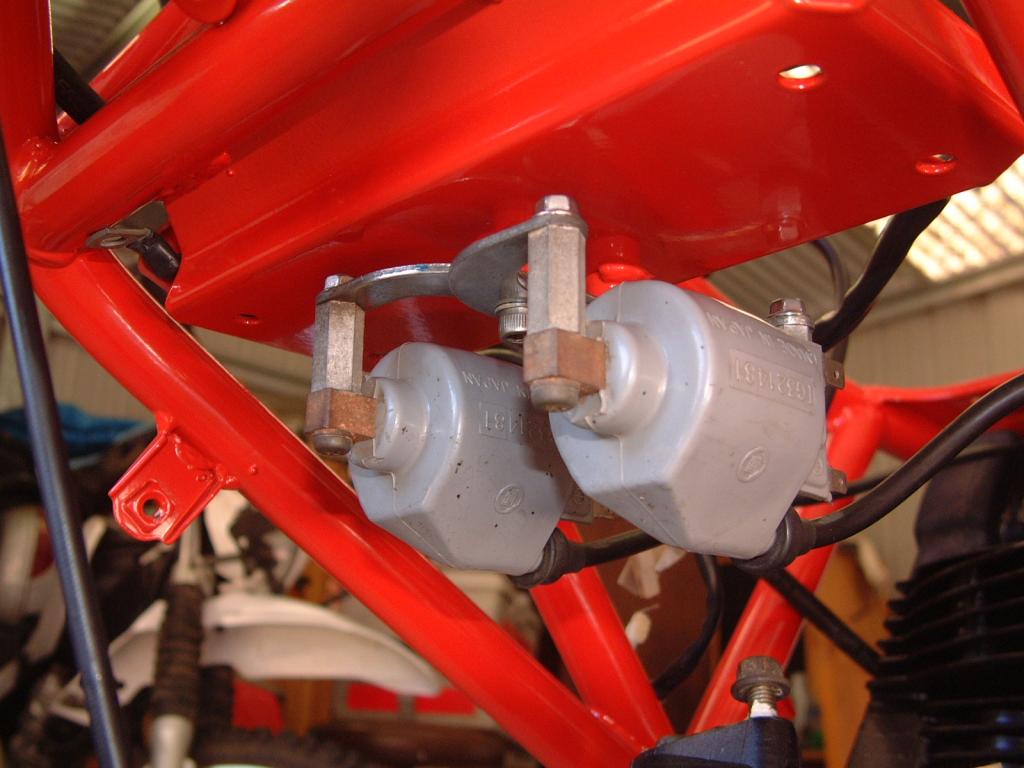
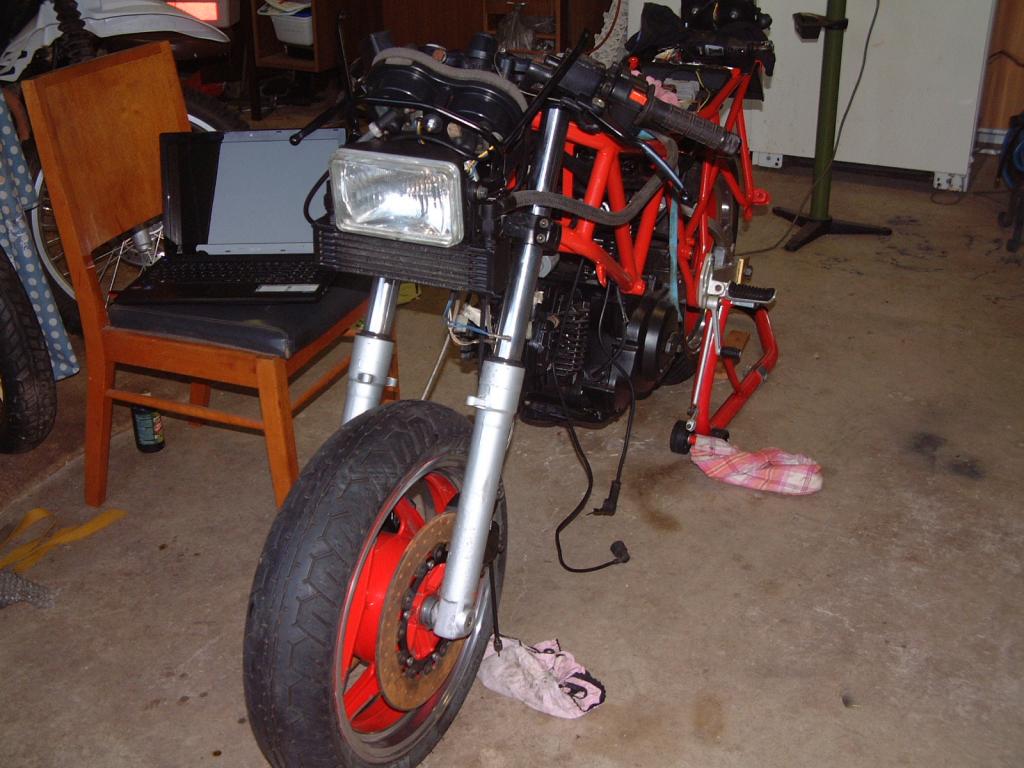
Where she up to now.For 5 hours work this arvo it does'nt look like I got much done.
Tomorrow I'm going to paint the valve covers.I'm just going to paint them black for the moment until I can find out the proper colour gold for them.
Until next

Cheers
Andrew
Re: 750 Sport restoration project
Posted: Sat Aug 02, 2014 12:40 pm
by Derek
Andrew2 wrote:G'day Derek,nice to hear from you.How's the 907 going?.Thanks for the advice.I'm still wondering what that spring is actually doing in there.There must be a reason but I can't seem to fing an answer.I might pop into the local engineer next week and ask him.It's got me intrigued now.
The 907 is running just fine thanks. One wee thing I need to sort out though. I fitted a bi-xenon HID unit to the headlamp. It works really well with loads more light output for only 35W. However, at switch on there is sudden current surge which I'm finding drops the battery voltage enough to cut the engine. It's only momentary and I if the battery is up to charge it doesn't happen but if the bike's been sitting for a week or 2 it will kill the engine. I guess either the battery is past it's best or there is still a poor ground path somewhere. The feed for the HID is by a relay with a fused supply direct from the battery.
Thinking about your mystery spring. Those pips that the spring sits under wouldn't be grease nipple for the spherical bearing would they? If so there would be a ball at the top of it with the spring below to keep it sealed. When you broke through with the wire brush the ball would have flown off into oblivion.
Re: 750 Sport restoration project
Posted: Sun Aug 03, 2014 5:37 am
by Andrew2
I wish I could help you Derek but my knowledge of electrikery leaves me in the dark
.
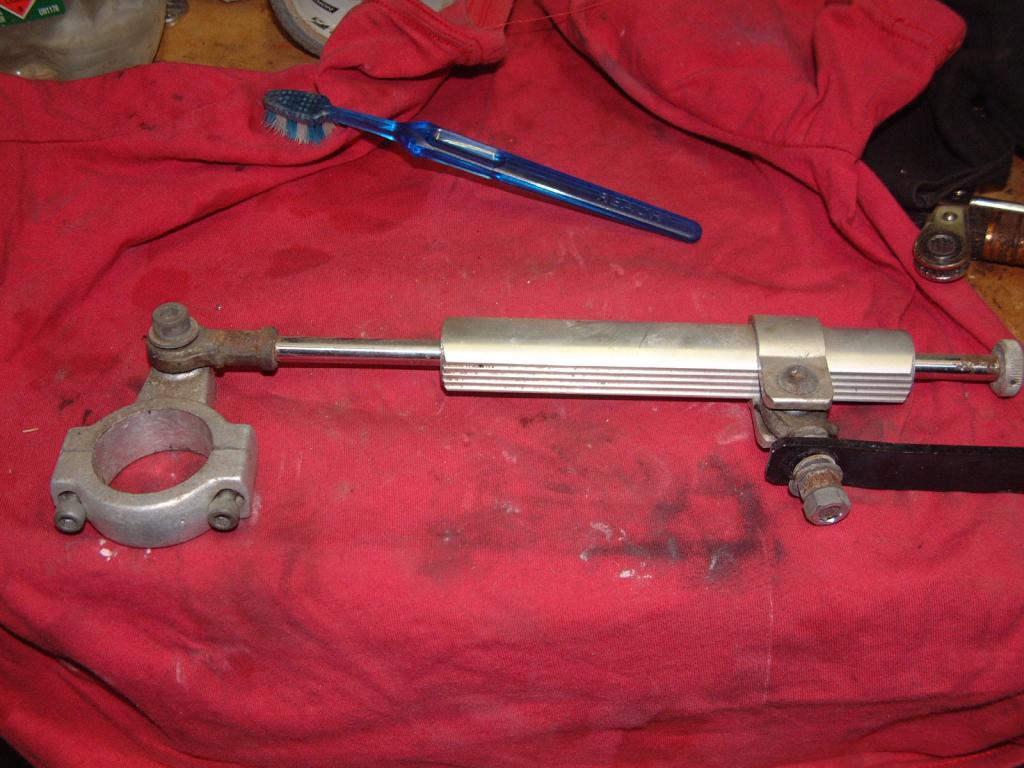
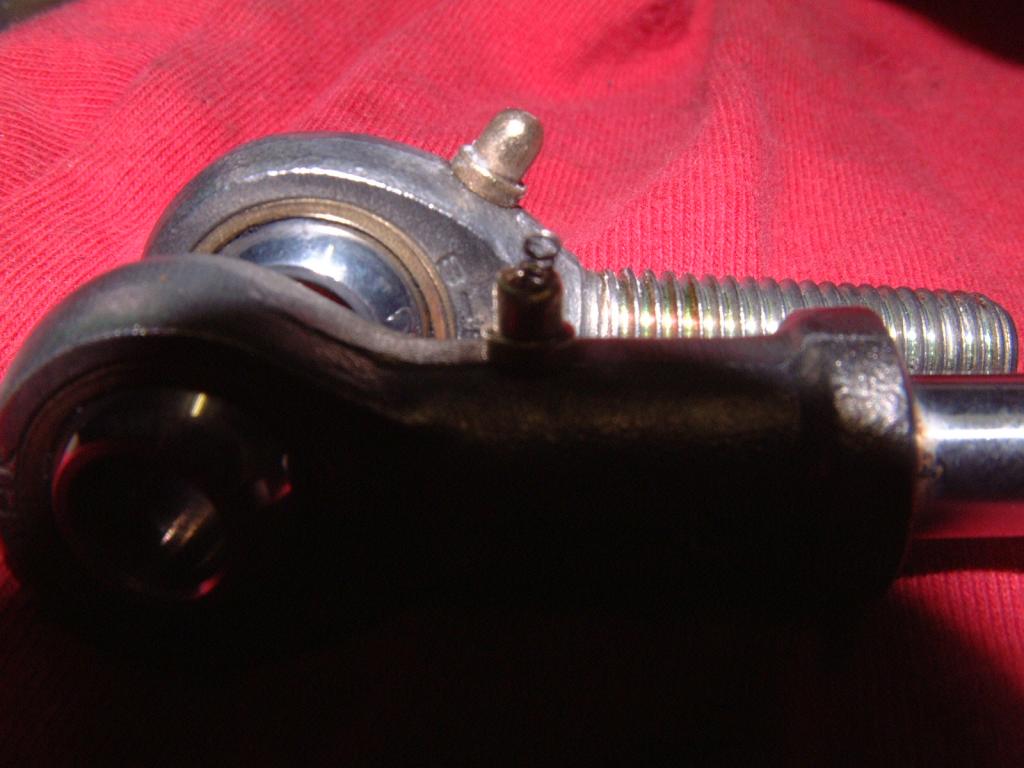
You could be right about the grease nipple.This looks to be the make of my
steering damper,a Pingel.You can see the grease nipple on it.Maybe it was ground down before I got it as I don't recall seeing a proper grease nipple on it before.
How hard are they to remove and replace?
Cheers
Andrew
Re: 750 Sport restoration project
Posted: Sun Aug 03, 2014 8:51 am
by dkd
Hi Andrew,
A grease nipple it is, but there are a myriad of types, patterns and styles just to add to the fun.
Remove the existing (damaged) one (should just unscrew but will be a very fine metric thread), find one that fits your grease gun and the thread and bob's your auntie.
David
Re: 750 Sport restoration project
Posted: Sun Aug 03, 2014 9:52 am
by Andrew2
Hi David,
welcome to the forum mate.I hope your looking after Peters baby.He said she went to a good home...in between sobs
.
Thanks for the info on the grease nipple.It sure looks different to the one on mine but it could have been damaged by the wire wheel.I'll go to the engineers shop tomorrow and see if I can find a new one.Saying that though there was'nt a smear of grease inside it.
Cheers
Andrew
Re: 750 Sport restoration project
Posted: Mon Aug 04, 2014 8:27 am
by Andrew2
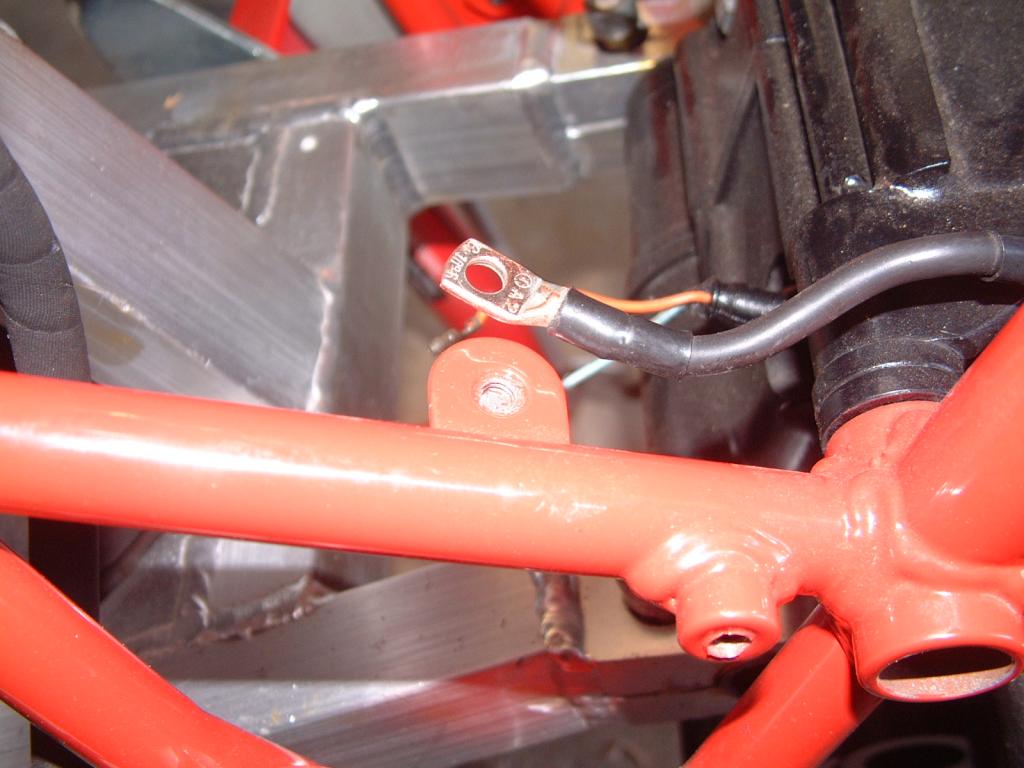
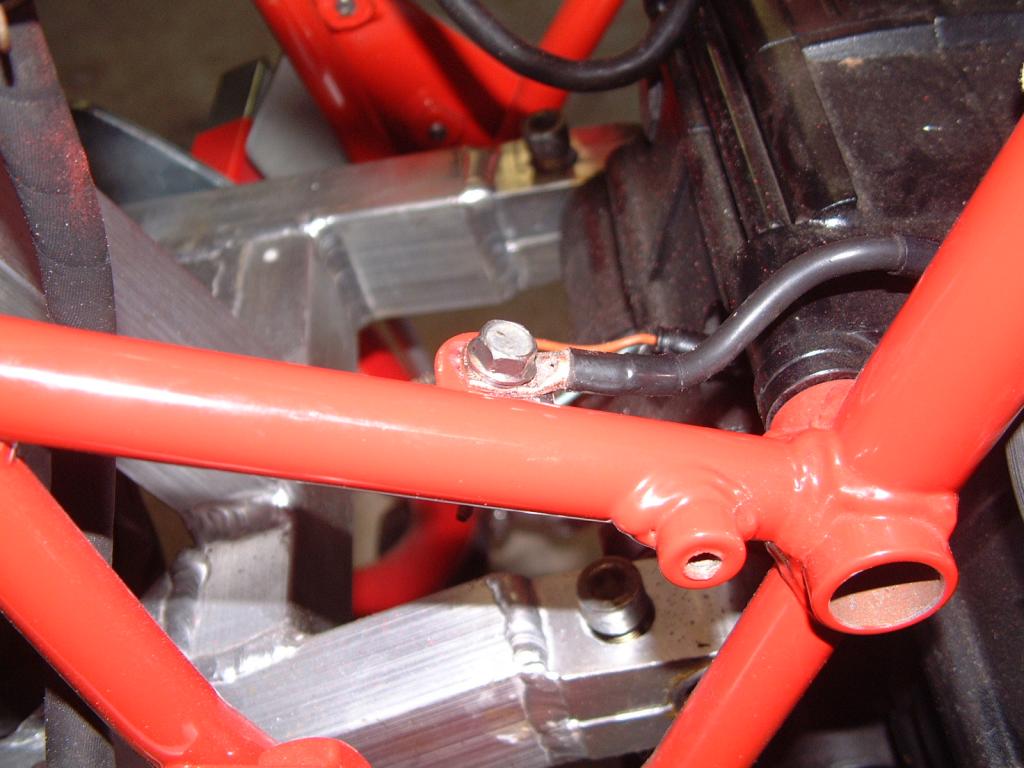
I ground a bit more paint away today for the other earth
.
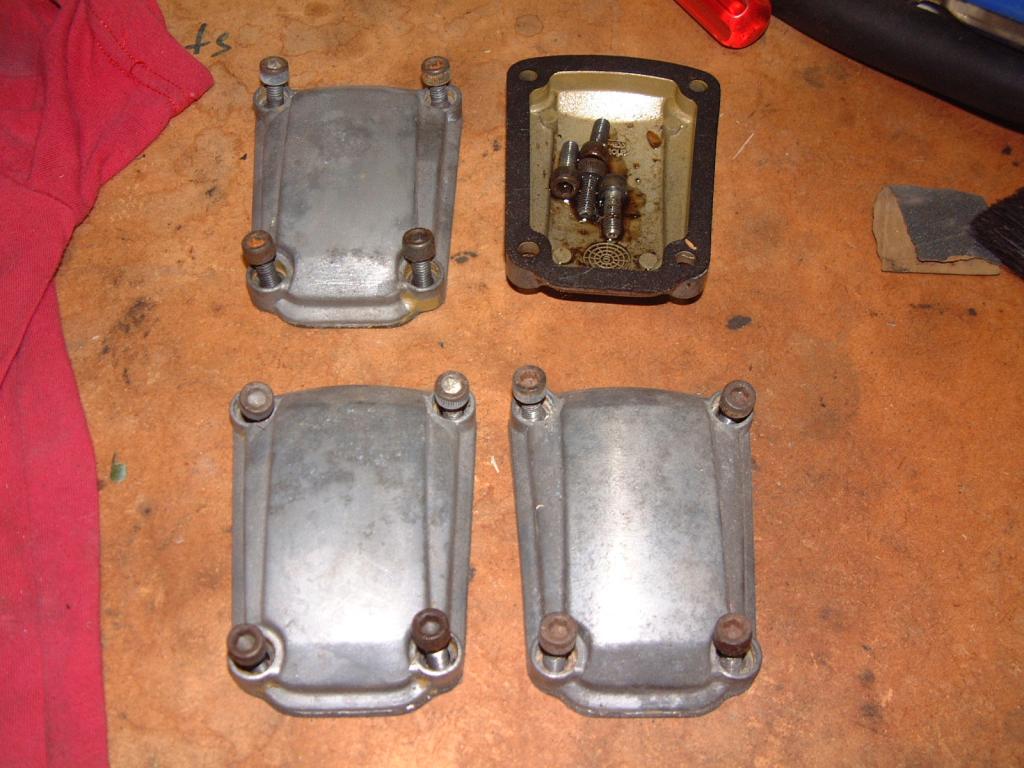
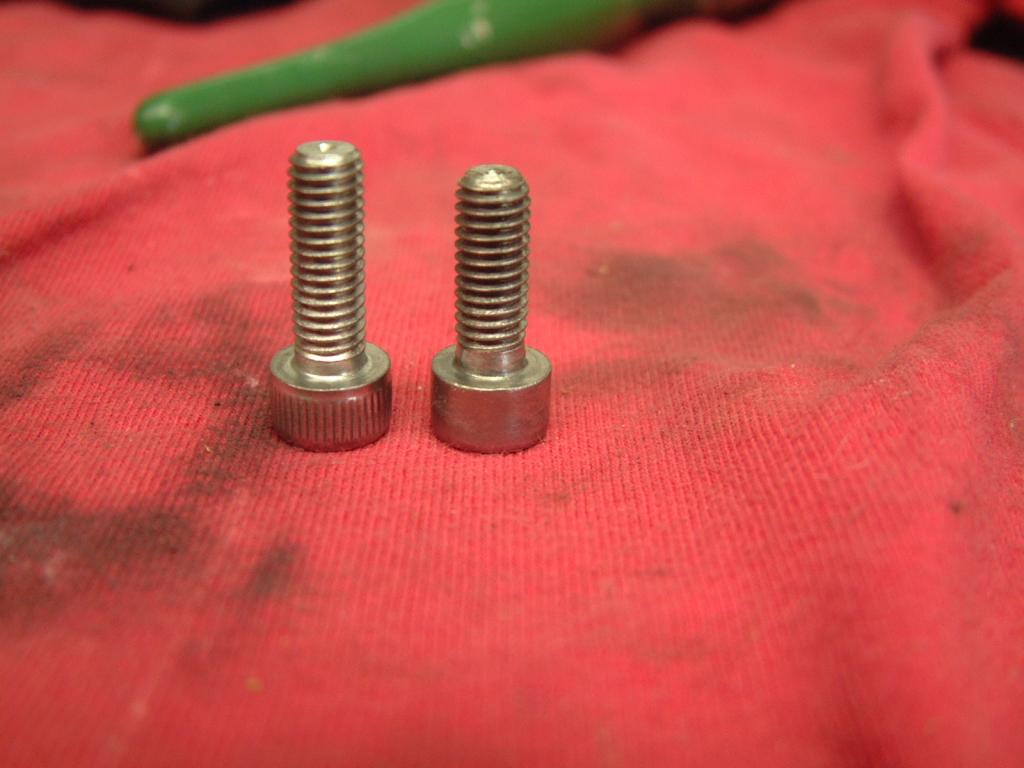
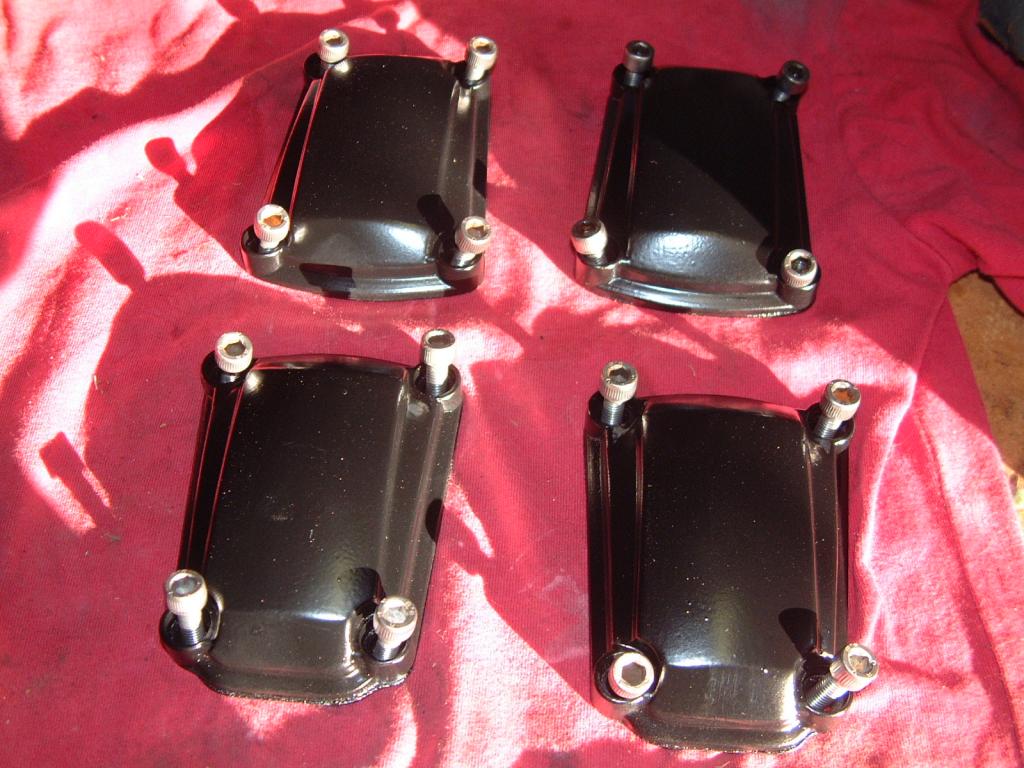
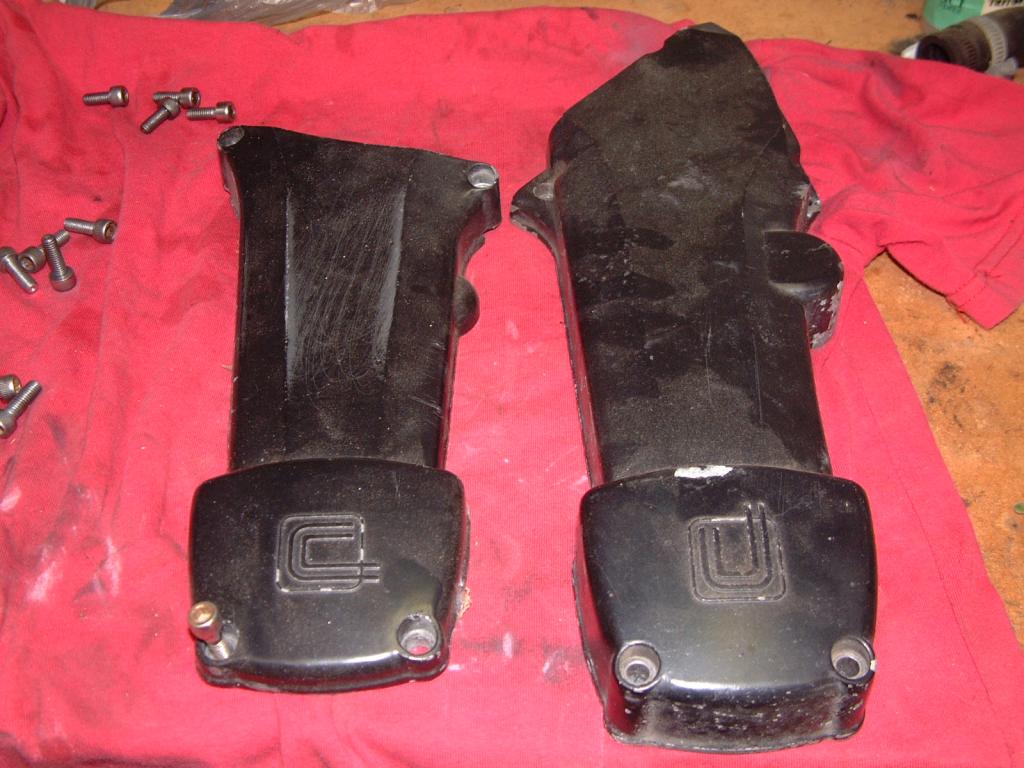
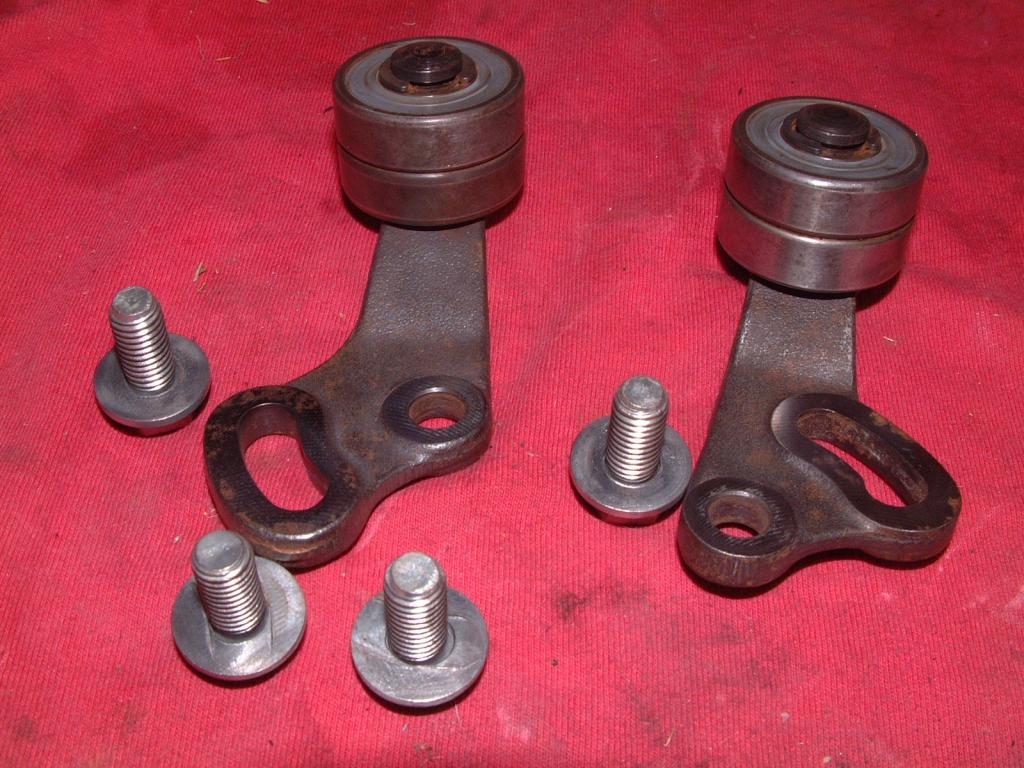
When cleaning the rocker covers I noticed the bolts for the front bottom cover were different from the other covers bolts.The odd one on the right.
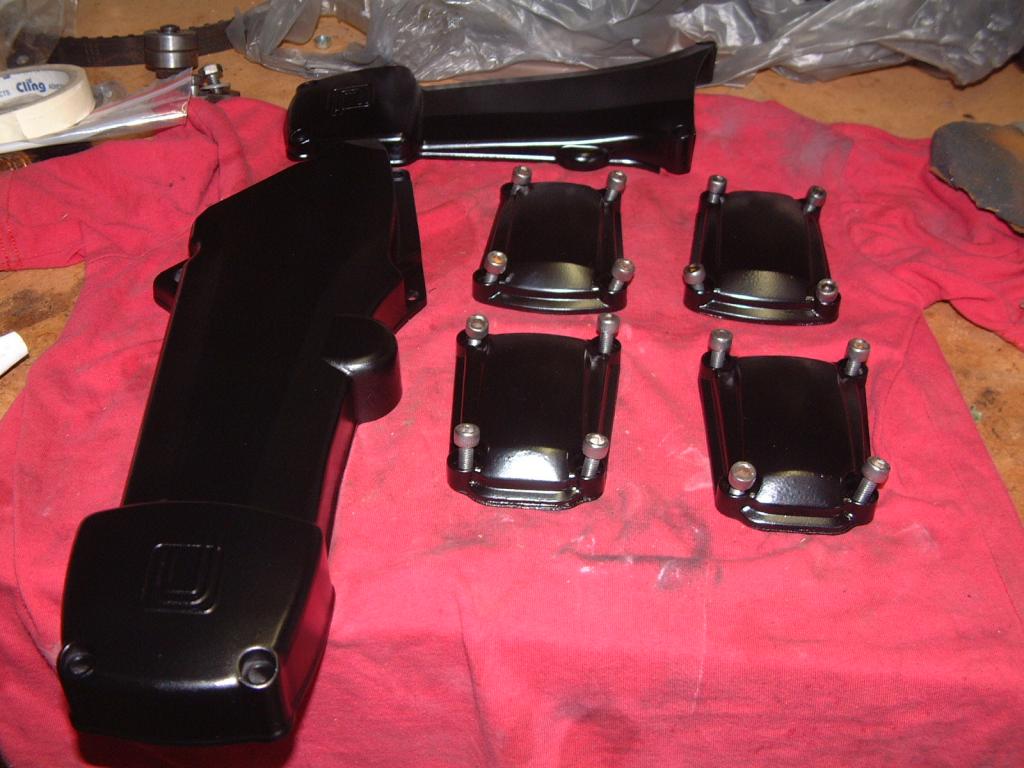
New paint on the covers..
...and the belt covers.
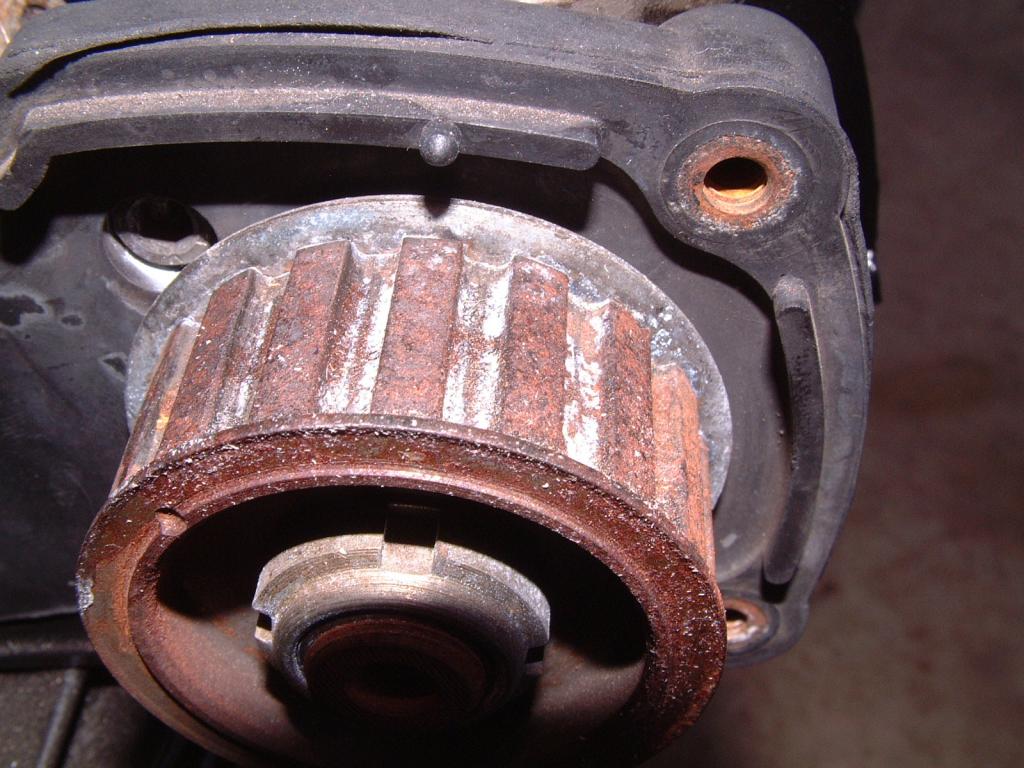
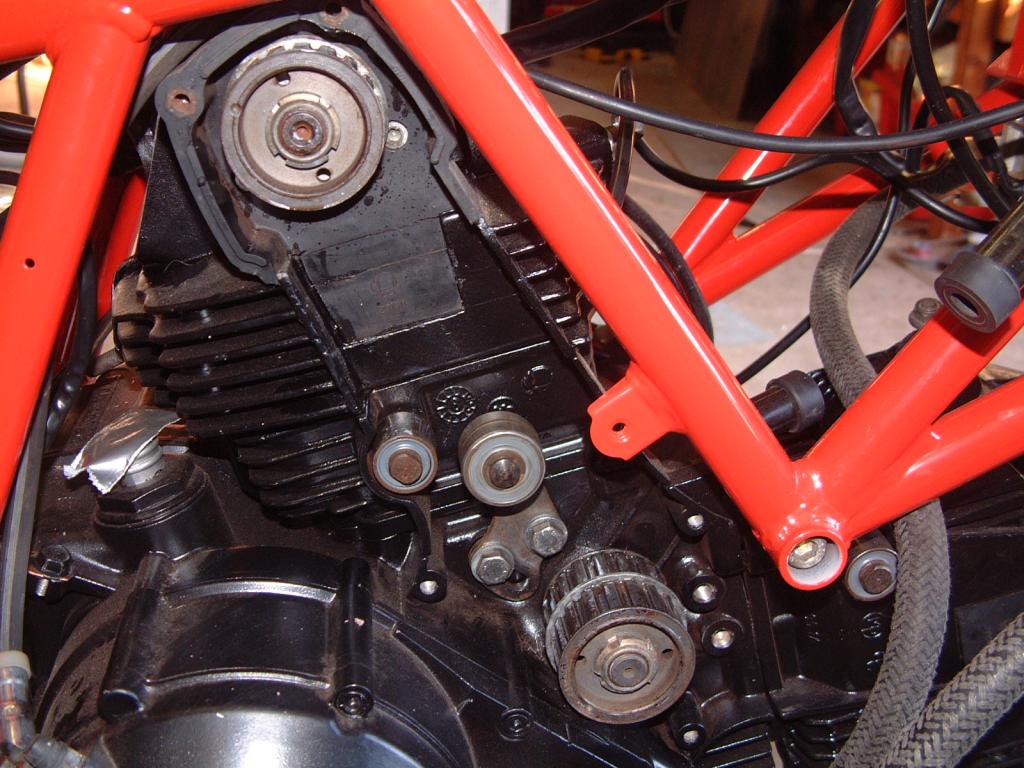
The timing belt adjusters needed a good cleanup.The belt covers were off the bike when I got it so most parts had some surface rust.I decided to just clean them and not repaint.
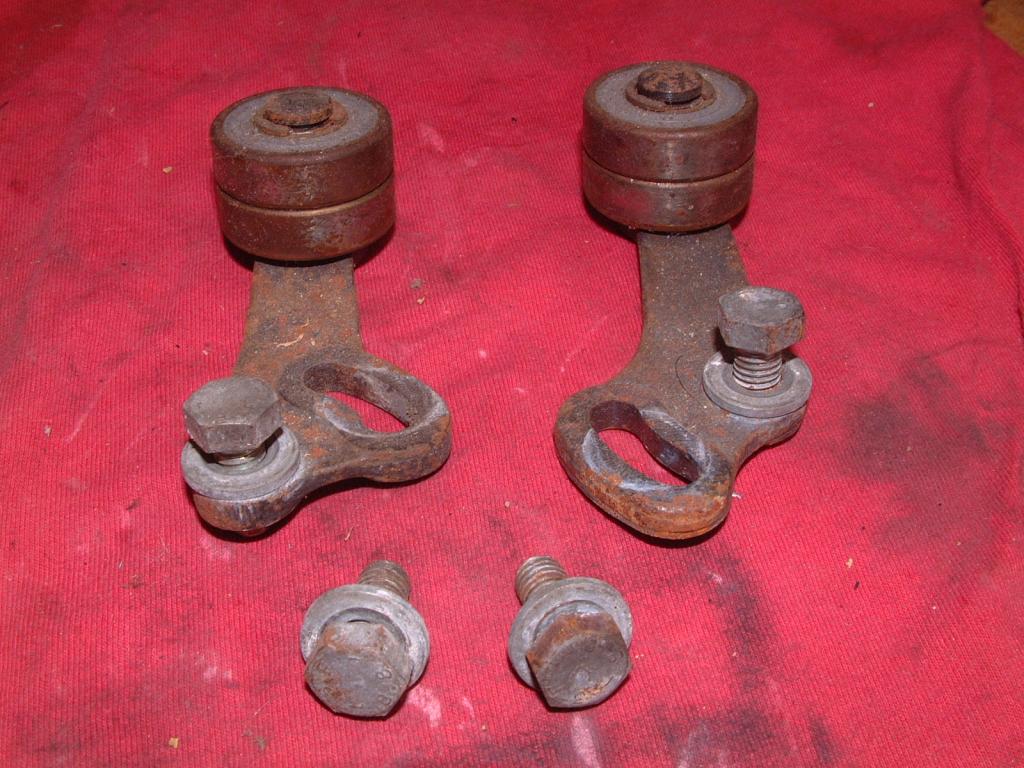
They spin freely so should be good.
One in place.I've started cleaning up the timing pulleys as well with some rust converter and a wire brush on my Dremel.Hopefully I'll get these done tomorrow brfore the timing belts get here.
The tank supports.
I'm not sure how they got the nylocks on these...in fact I'm not sure how I got them off
.I might have to get a nut and lock washer.
So what's missing here....yep,the inner cable.It's the choke cable which drcided to disappear up it's own.....outer sheath

.Being frayed on the end meant it would'nt slide back out so it was out with the whole thing and cut the frayed end off.Let's hope I still have enough length to still attach it.
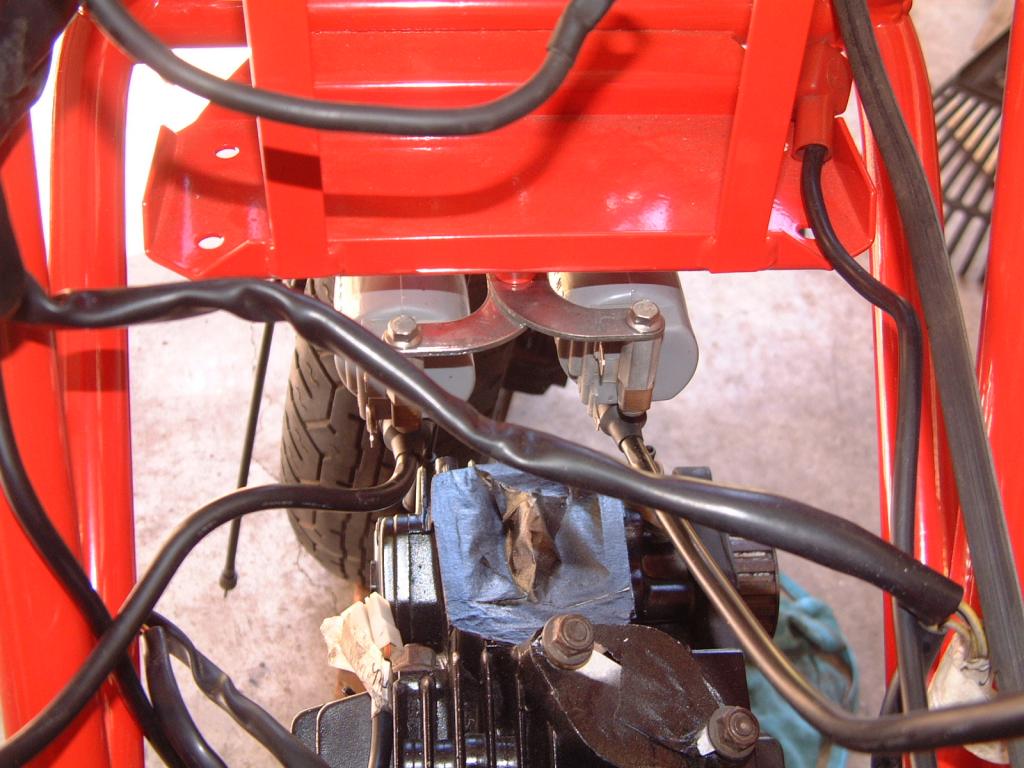
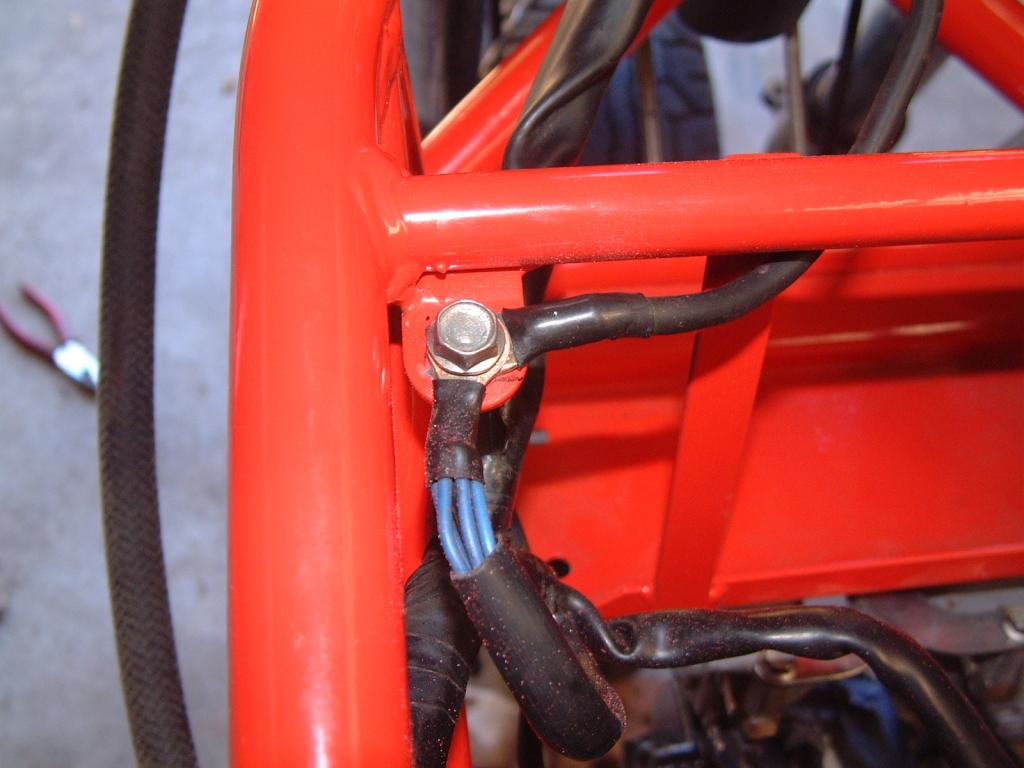
And lastly today is to connect up the brake light switch to the appropriate wiring.Mmmm...this does'nt look good
.
Looks like I'm off the the electronics shop tomorrow for a new micro switch
.
I hope I'm not boring everyone with all these photos of mundane cleaning etc.I'm hoping that some of the photos may be useful in the future if anyone needs to see how a part is attached etc.
Cheers
Andrew
Re: 750 Sport restoration project
Posted: Mon Aug 04, 2014 9:35 am
by Andrew2
Andrew2 wrote:
And lastly today is to connect up the brake light switch to the appropriate wiring.Mmmm...this does'nt look good
.
Looks like I'm off the the electronics shop tomorrow for a new micro switch
.
I hope I'm not boring everyone with all these photos of mundane cleaning etc.I'm hoping that some of the photos may be useful in the future if anyone needs to see how a part is attached etc.
Cheers
Andrew
Thanks G for pointing out the pressure switch under the triple clamp
Cheers
Andrew
Re: 750 Sport restoration project
Posted: Mon Aug 04, 2014 12:57 pm
by lane1feathers
Certainly not boring mate. It's like a soap opera. I check in every day to look at the pics and check the progress...and I don't even own a sport

...and it's definitely making my Paso rescue look very...very...ordinary. But it just goes to show...you don't need a lot of money and you certainly don't need an expensive ducati dealer to resurrect an old classic. That was my point, to do it on the cheap and make parts fit from other sources if they were unobtainum. It was originally just to be a cheap Duke to thrash around on until I could afford a decent one...but I've fallen in love with the damn thing

Hats off to you and all your efforts on this rescue Andrew. And don't skimp on the pics, it would disappoint more members than me...me thinks