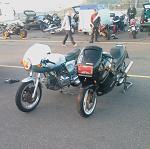
my Paso - a never ending (love) story ...
-
paso750
- paso grand pooh-bah
- Posts: 5574
- Joined: Sun Jul 18, 2004 12:00 am
- model: 750 Paso
- year: 1987
- Location: southern Germany
Re: my Paso - a never ending (love) story ...
Thanks, Terry that is what I thought. Puh, then I didn`t forget it ... ")
-
paso750
- paso grand pooh-bah
- Posts: 5574
- Joined: Sun Jul 18, 2004 12:00 am
- model: 750 Paso
- year: 1987
- Location: southern Germany
Re: my Paso - a never ending (love) story ...
Winter a good time to take care off things like cleaning parts
Being the only parts on the whole bike I didn`t strip I did that with the brakes, too. Even though rather simple I wouldn`t recommend this to anyone who isn`t sure about what he`s doing. It`s unnecessary in most cases, too!
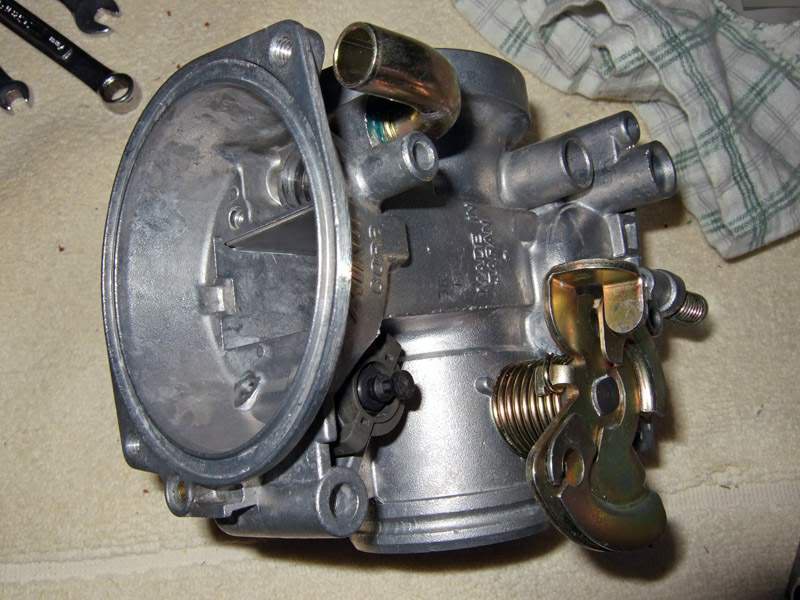
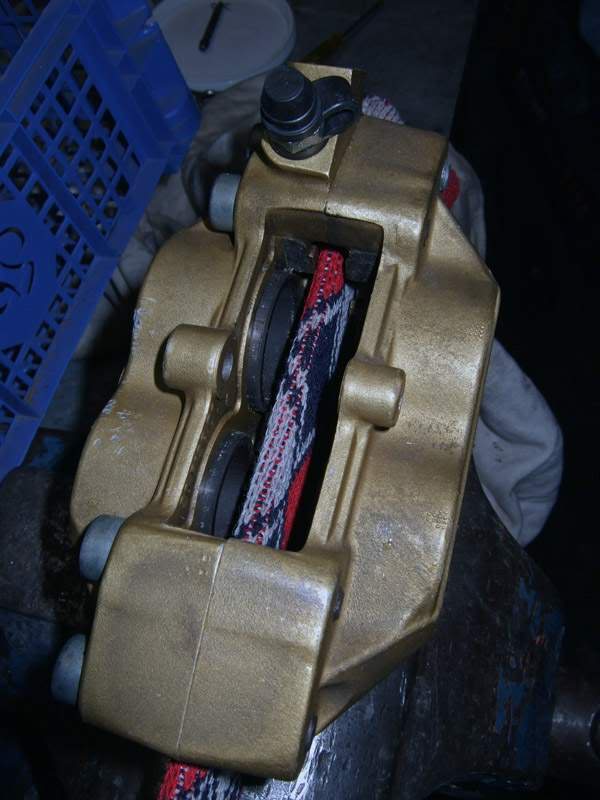
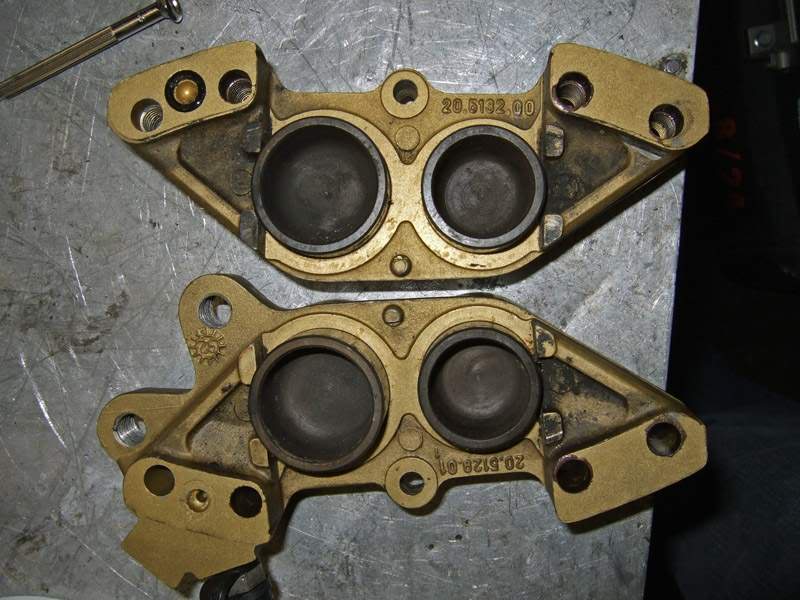
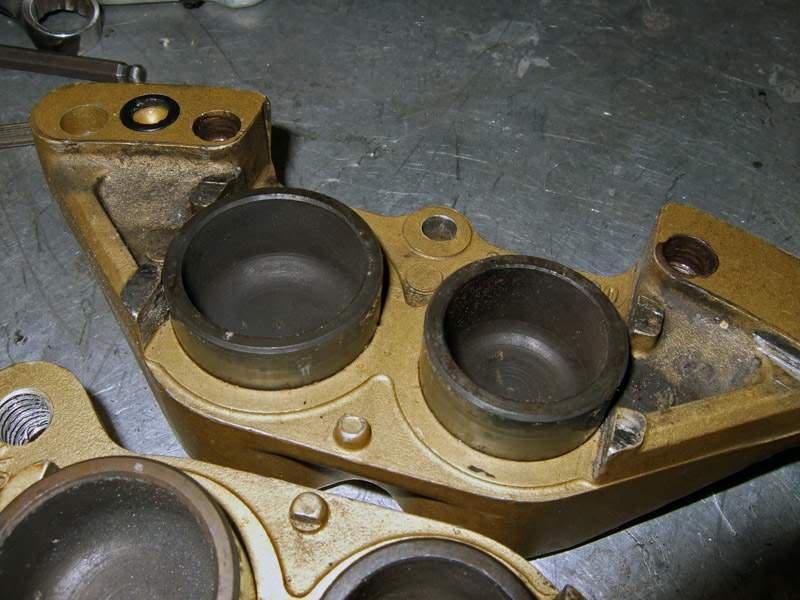
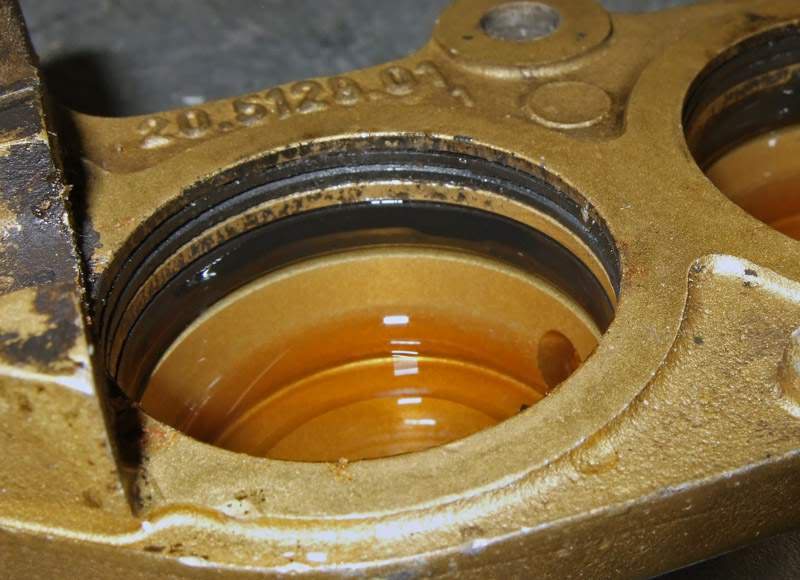
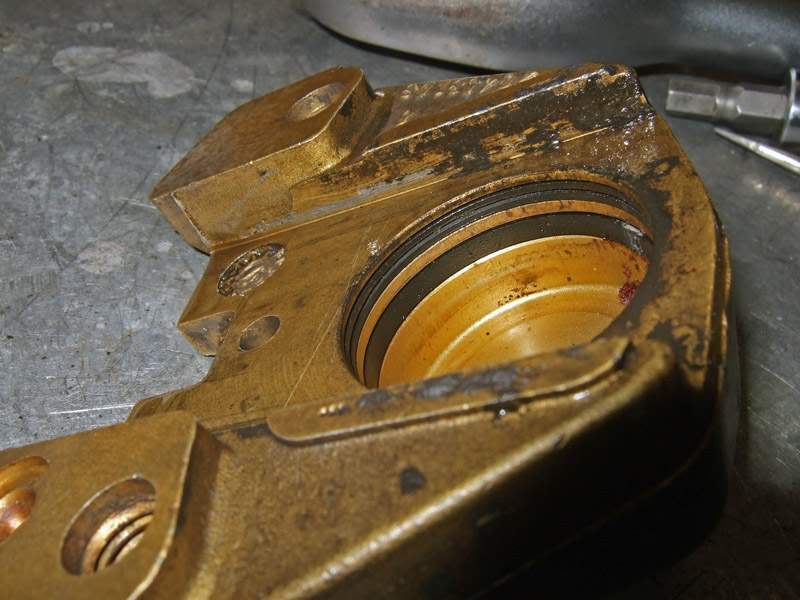
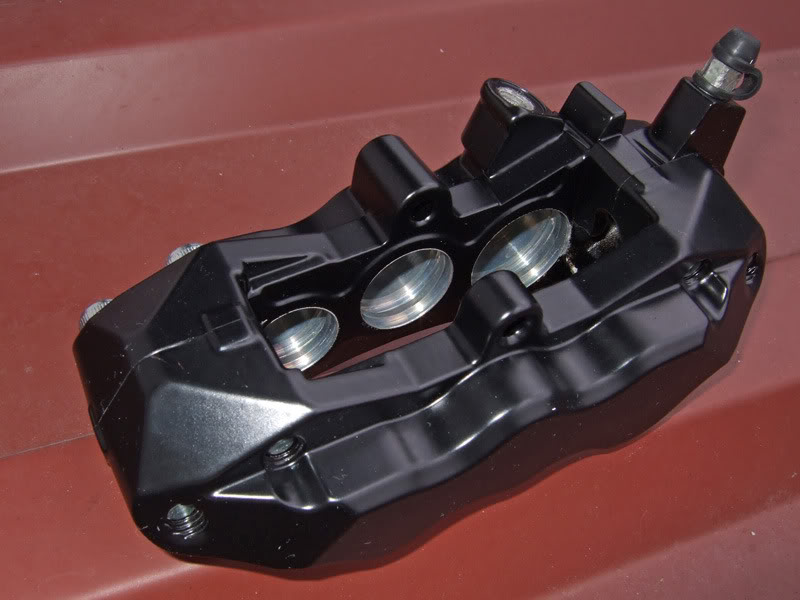
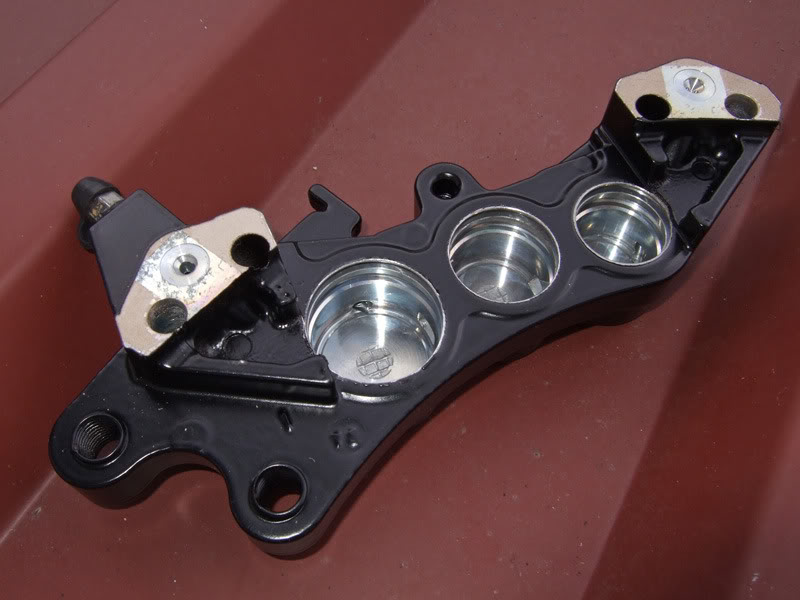
The 907ie/851 calipers:
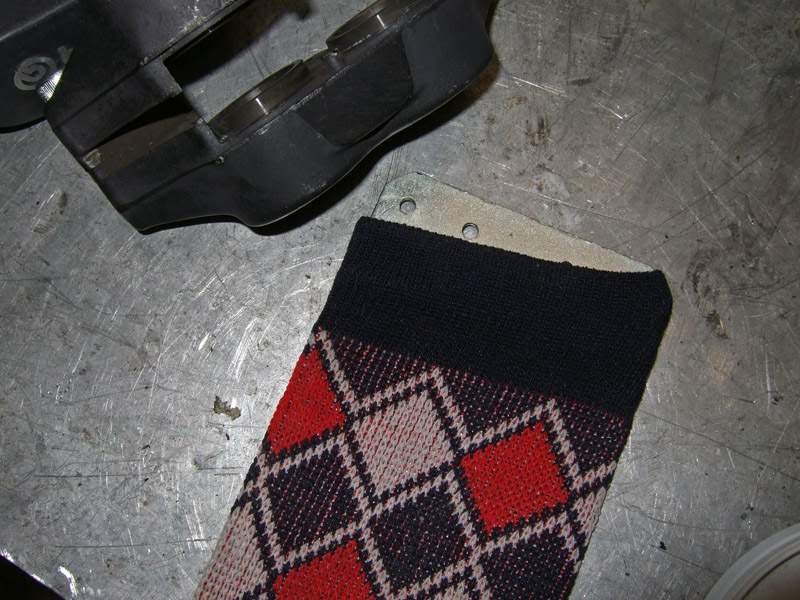
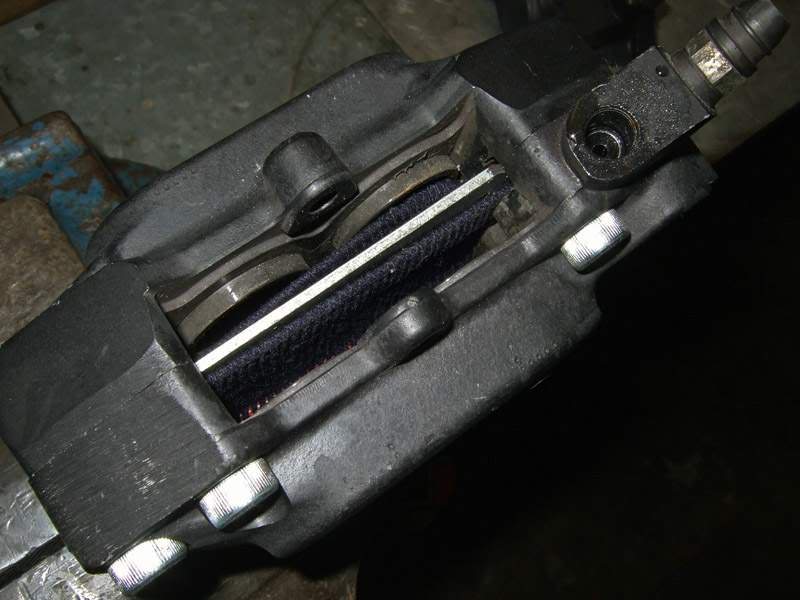
To get the pistons out I used a thin steel plate with an old sock over it. A piece of wood will be fine, too. The thinner the better as the more the pistons will come out the easier it will be to remove them.
Better wrap a rag around the nozzle to prevent brake fluid to be sprayed all around. If a piston doesn`t move out enough try spraying some WD40 in the gap, wait and press it back in; by hand or with a screw clamp. (In case of a screw clamp put some rag under not to scratch the housing).
Try again, if it doesn`t move more than before try again and push it in and out until it comes out. If the calipers are fine such a problem won`t occur.
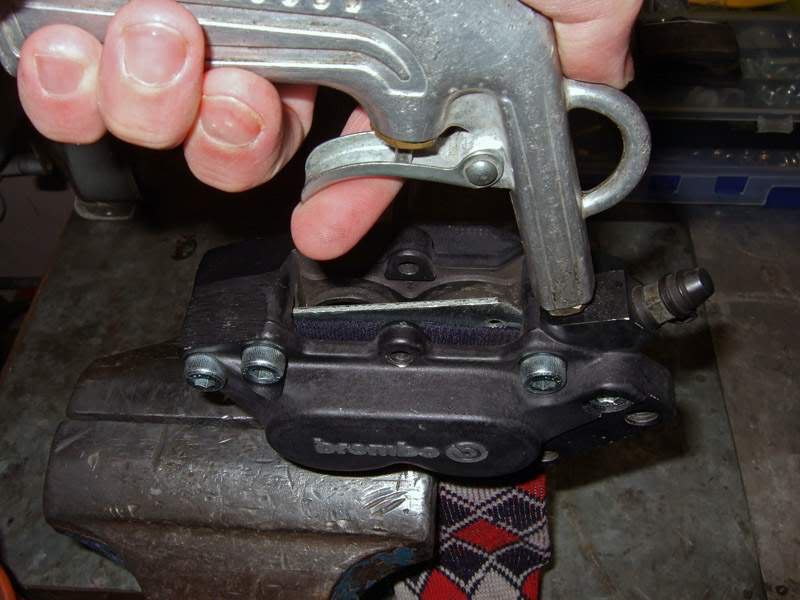

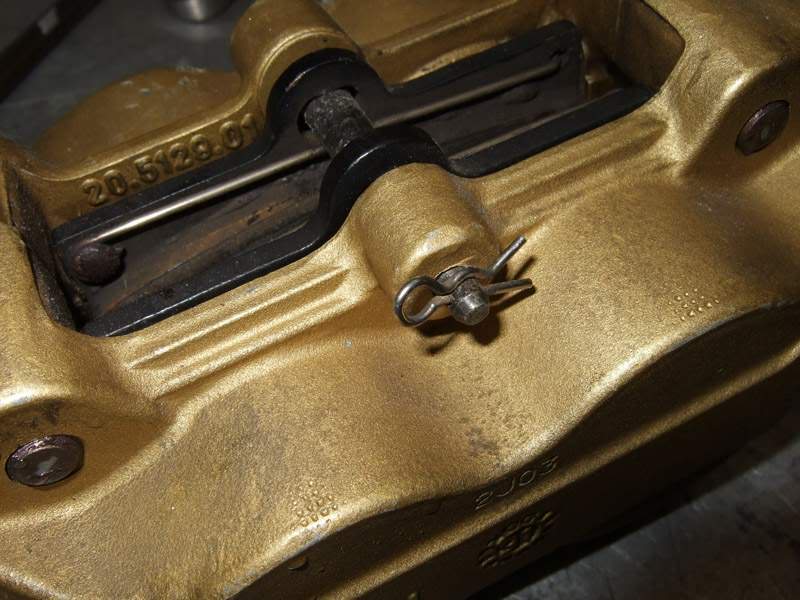
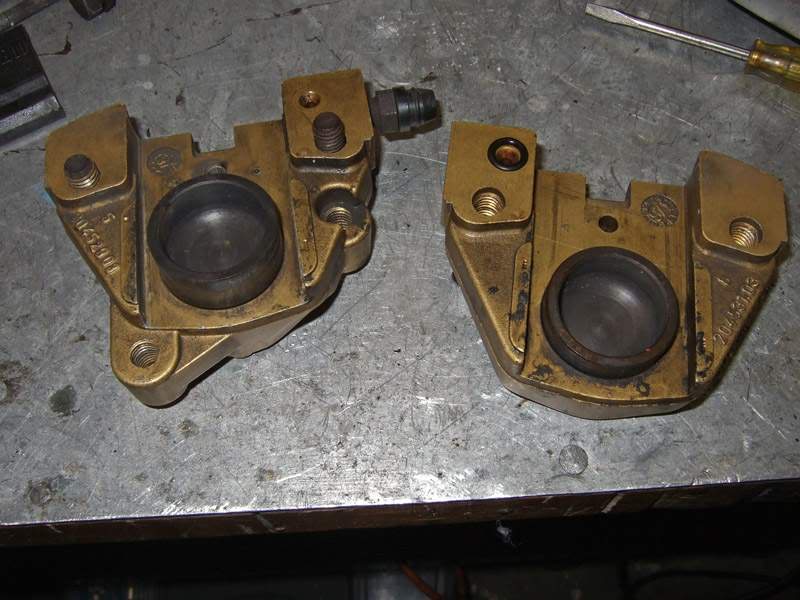
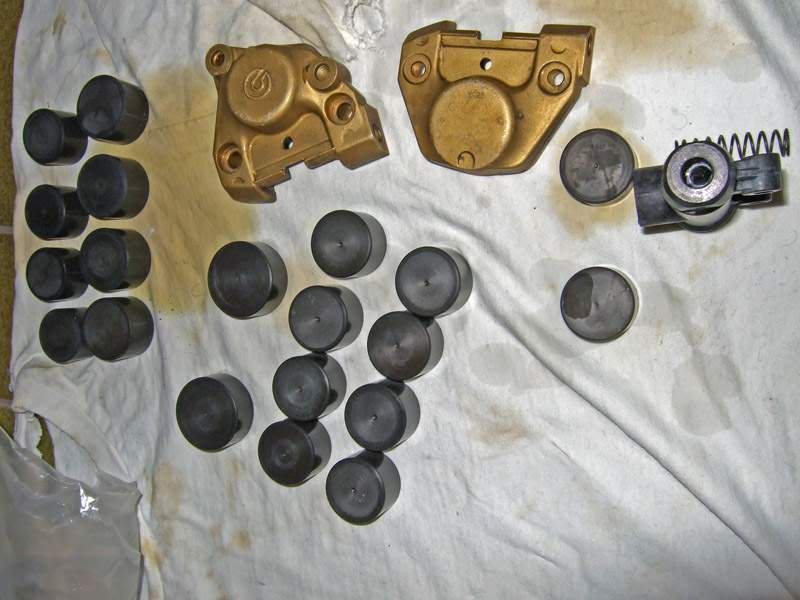
The four bolts removed, the calipers split, o-ring saved. The pistons can be pulled out by hand with some wiggleing. Do not use pliers as chances are very high you will damage the piston.
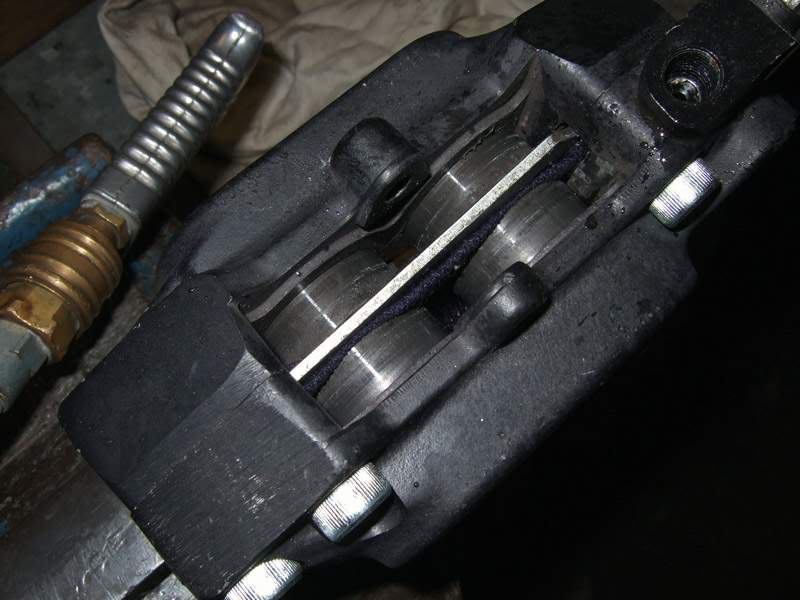
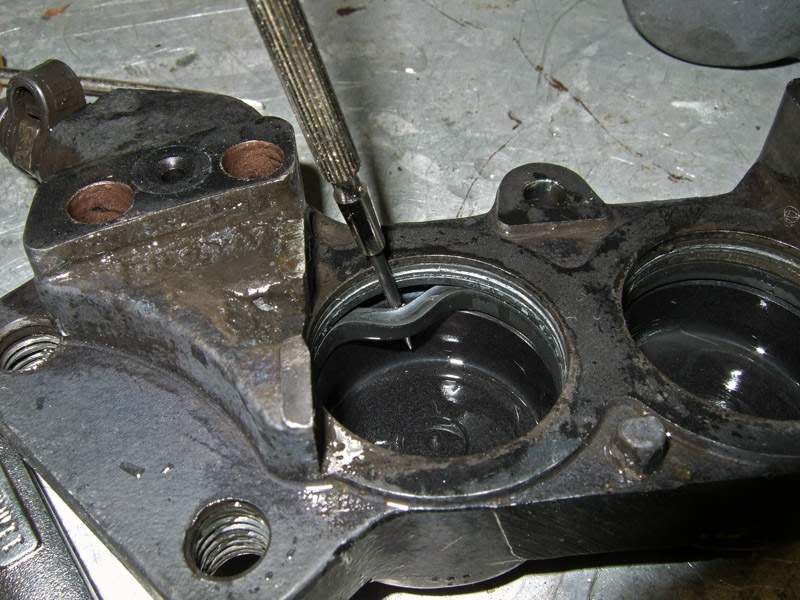
Each cylinder has two seals. A larger one on the inside and a double lip one as dust seal.
Use a needle or a very thin screwdriver in a flat angle to get in the seal groove and lever it out carefully. Don`t pinch it if you don`t replace it and don`t slip and scratch the cylinder wall!
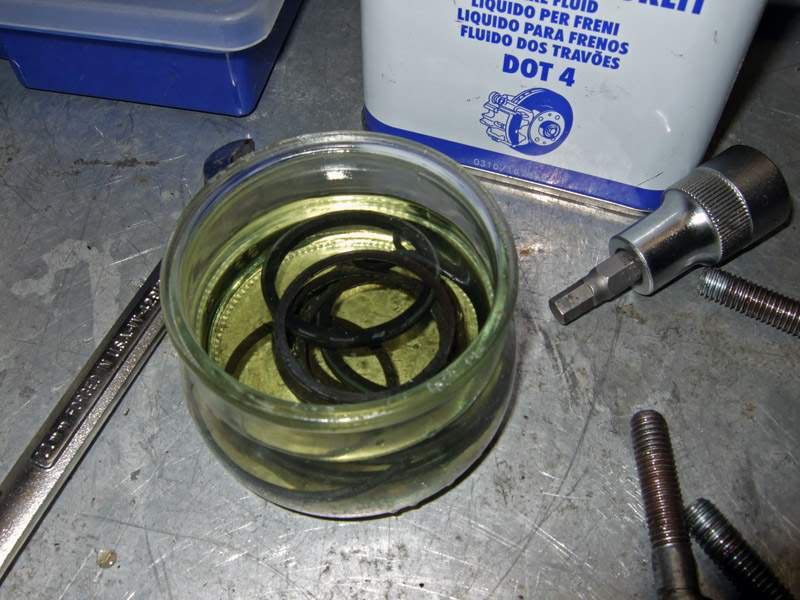
If reusing all parts store them in brake fluid and don`t let them dry as you may have problems when assembling.
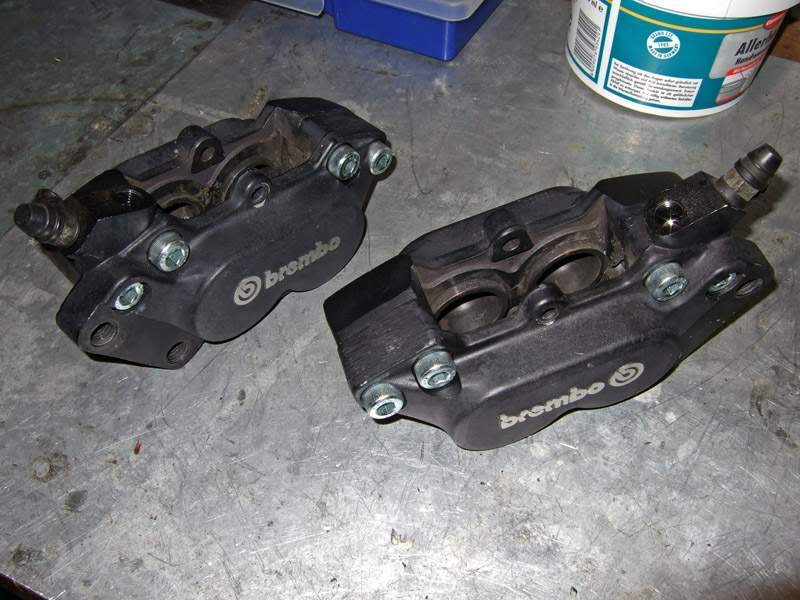
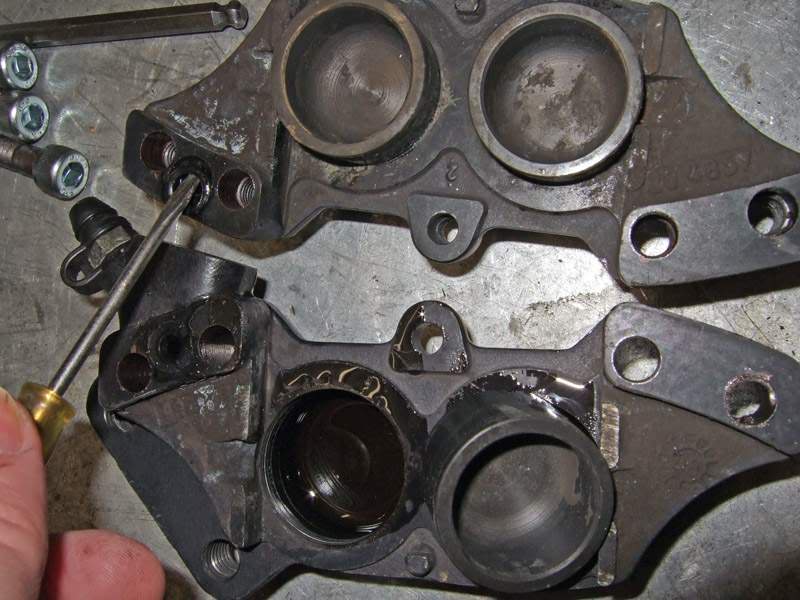
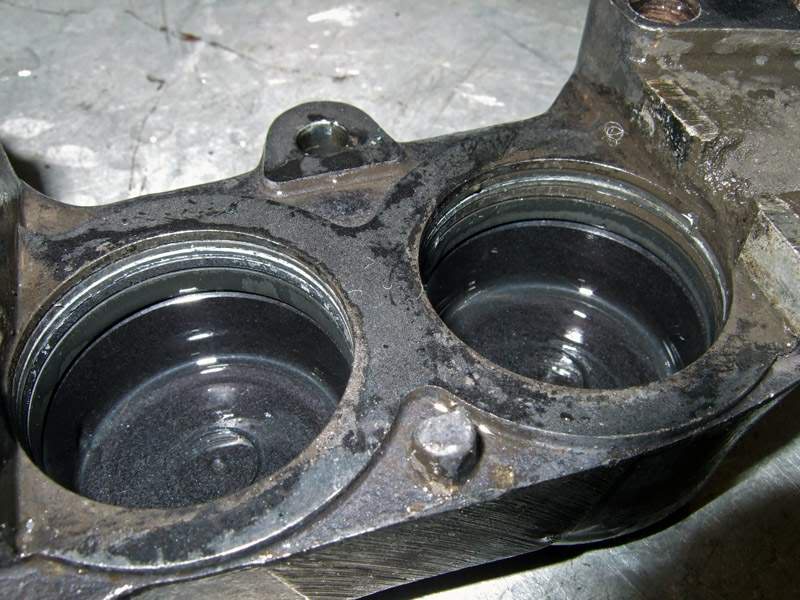
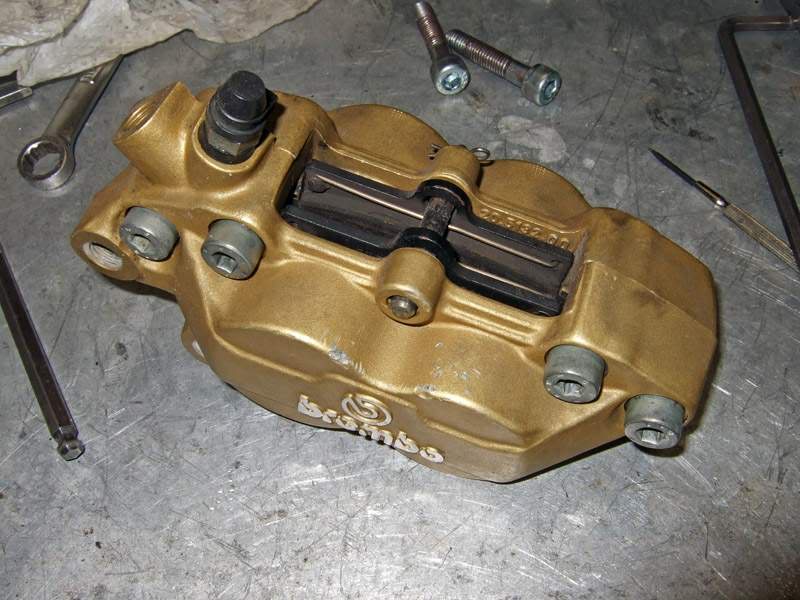
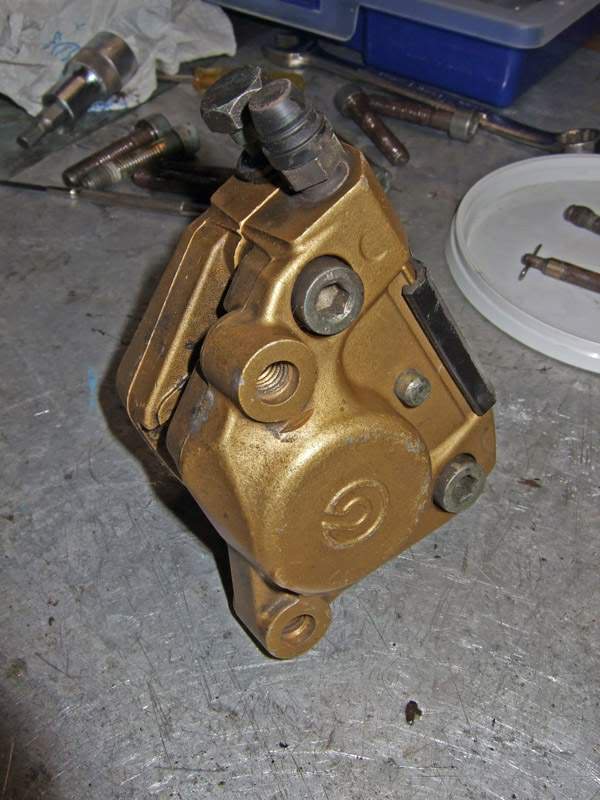
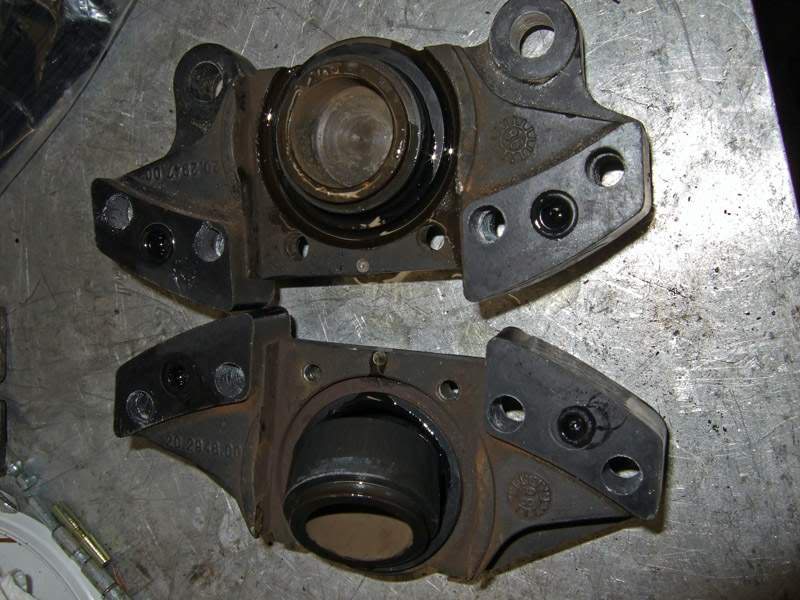
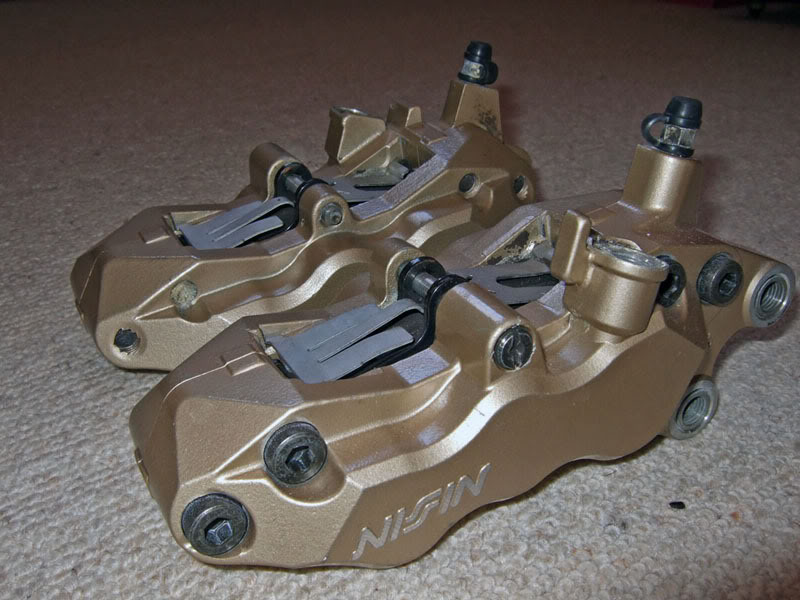
The newer type Brembos. Basically the same but with different sized pistons for better brake response.
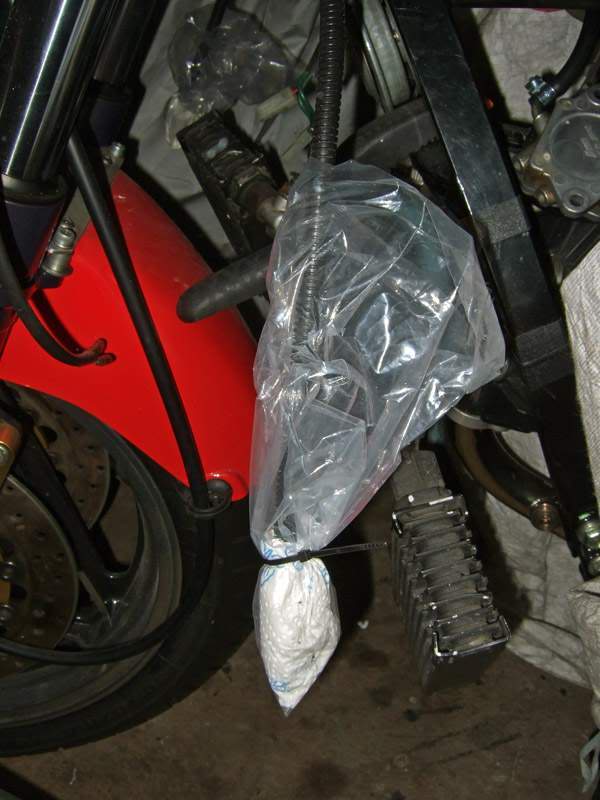
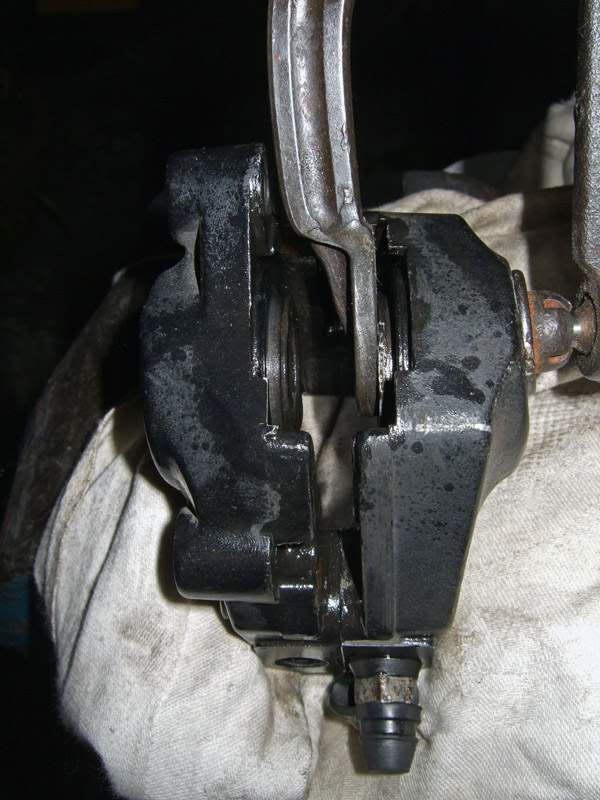
After the calipers were removed and the brake fluid was drained, the brake lines were secured to prevent any fluid getting on the rims or fender.
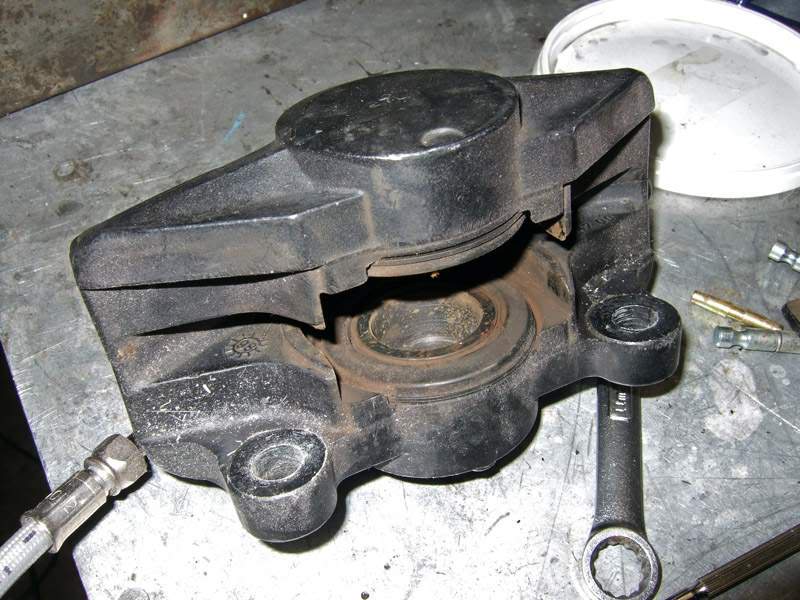
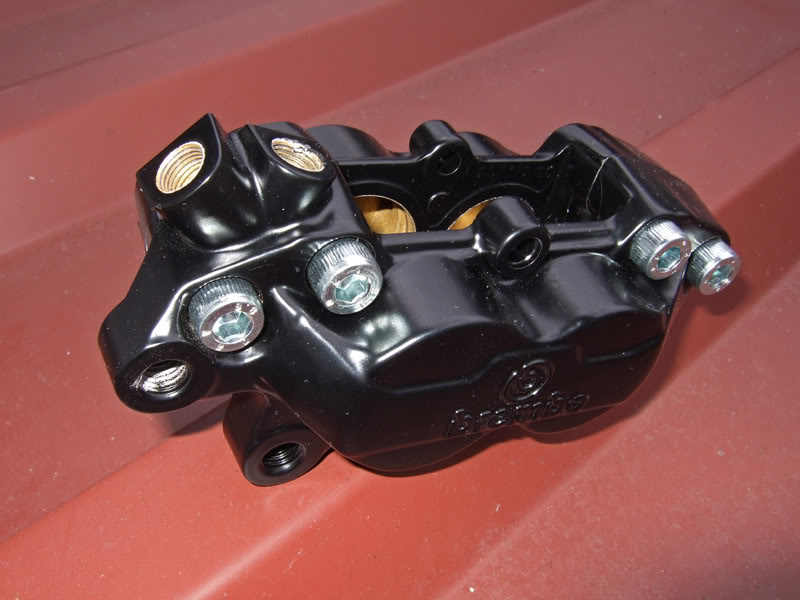
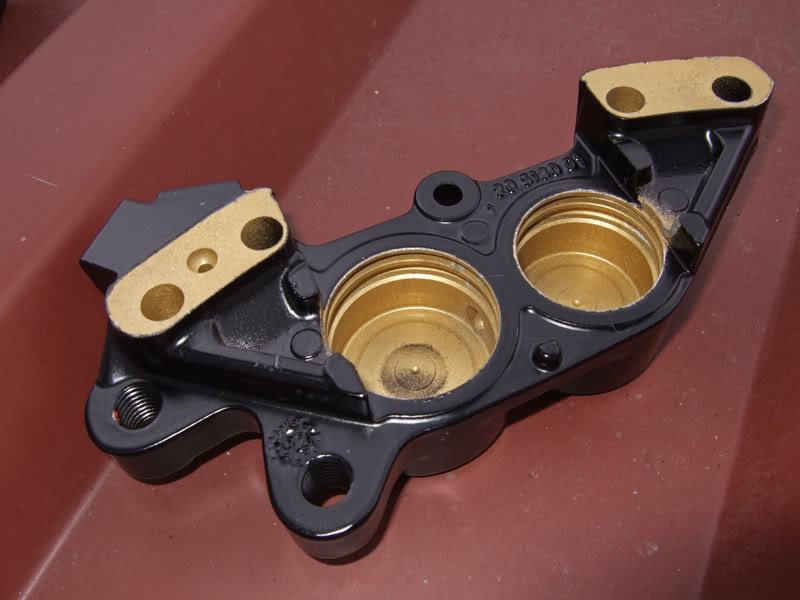
A rear caliper from another bike. Internals always the same; two seals per cylinder and an o-ring.
If one pistons is seized the other one will pop out so you can secure this one with a screw clamp and try again. A thin piece of wood should be put inbetween so the piston won`t hit the screw clamp in case it does finally move. This one didn`t. The only way to get it out is to attach it to a brake or clutch pump and try it hydraulically as this`ll create a much higher pressure.
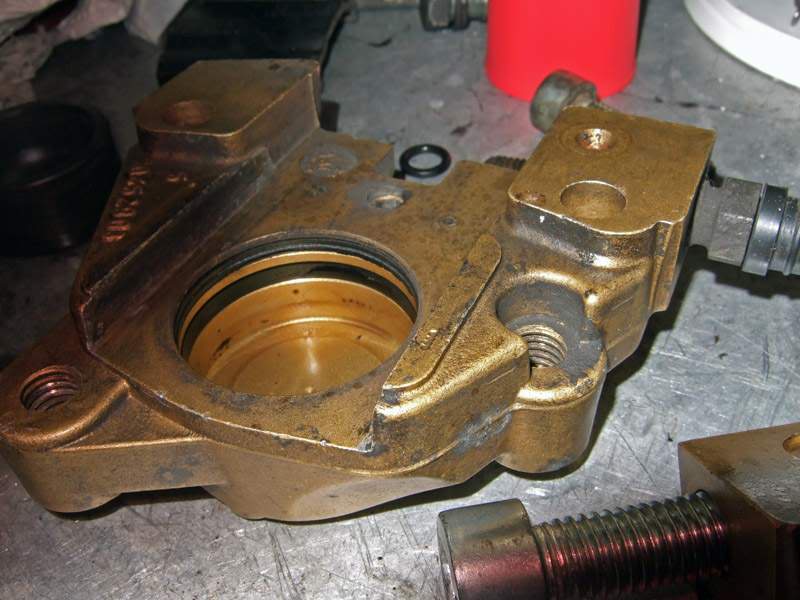
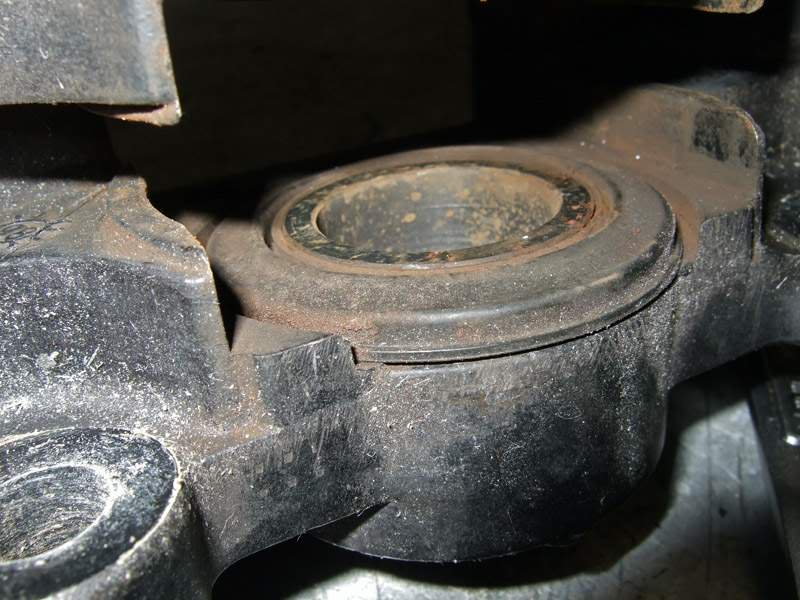
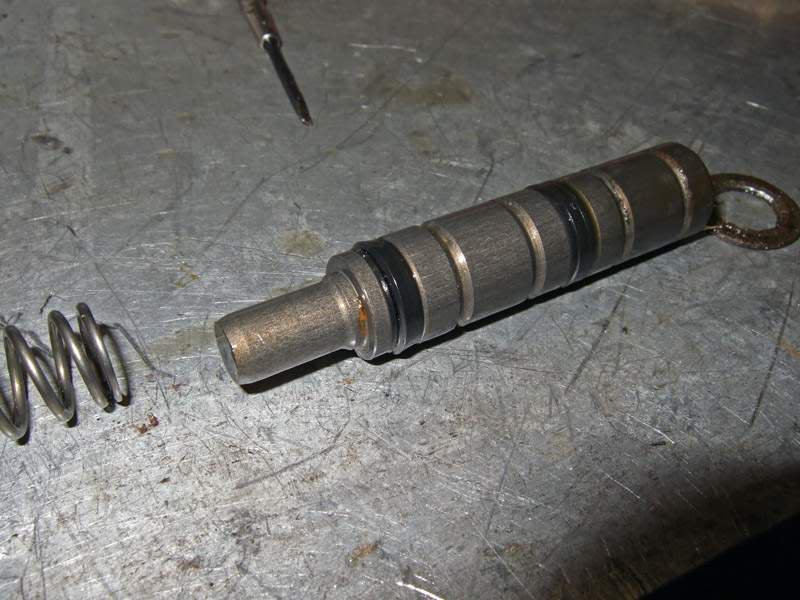
The rear brake caliper. Being the old type it has only one seal in the cylinder and a dust seal plus two o-rings. Other than on many car brake calipers there`s no spring to secure the dust seal which eventually will punch a hole in it when trying to get it off. This seal comes off very easily. It`s important it is ok and not rottened dry as entering brake dust may cause piston seizure sooner or later. In worst case the brake will lock or become smoking hot. (May not be bad to replace these even though they look ok. Afterall they are from 86)


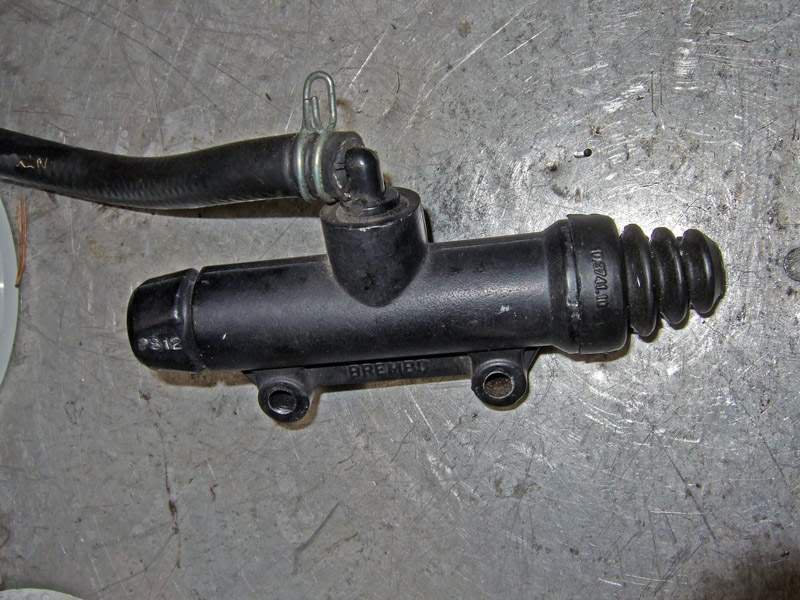
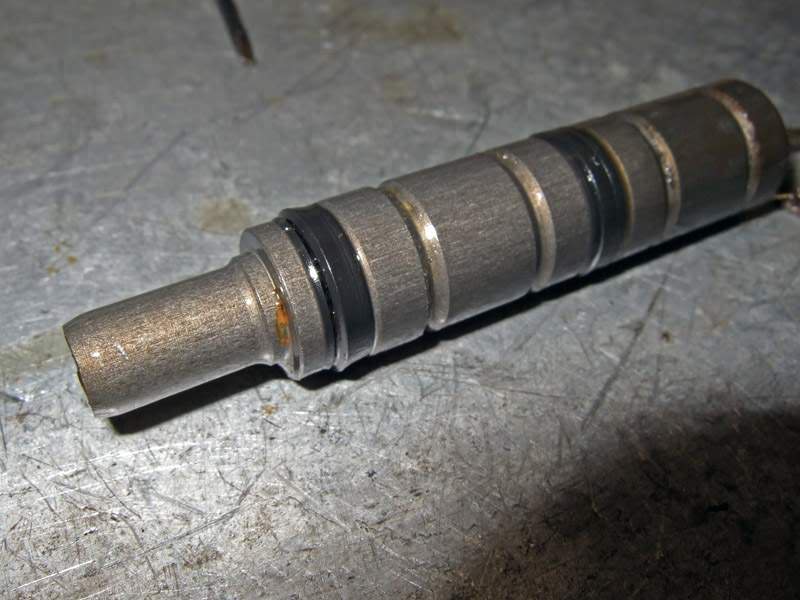
The rear brake pump. Don`t remove the plastic ellbow if it isn`t really necessary, you`ll just mess up the paint and mark the pumps surface.
Remove the rubber boot and the circlip. If you don`t have circlip pliers use a thin screwdriver put it in the circlip groove, in the gap between its two ends and try to lift one end out of the groove. If that works use some flat pliers to pull this end towards the other and it will come out.
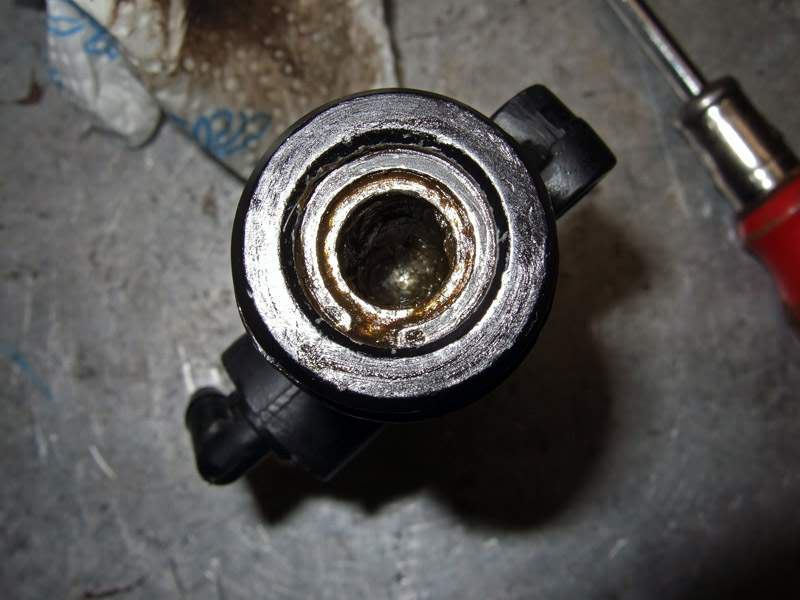
If the piston doesn`t come out it`s because the washer has rusted and is sticking to the housing.
Do NOT try to hammer anything through the opposite side to push the piston out as there`s only a very tiny hole ! Spray some WD40 on the washer and use a thin stick (nothing sharp) to push the piston in and out until the washer comes loose.
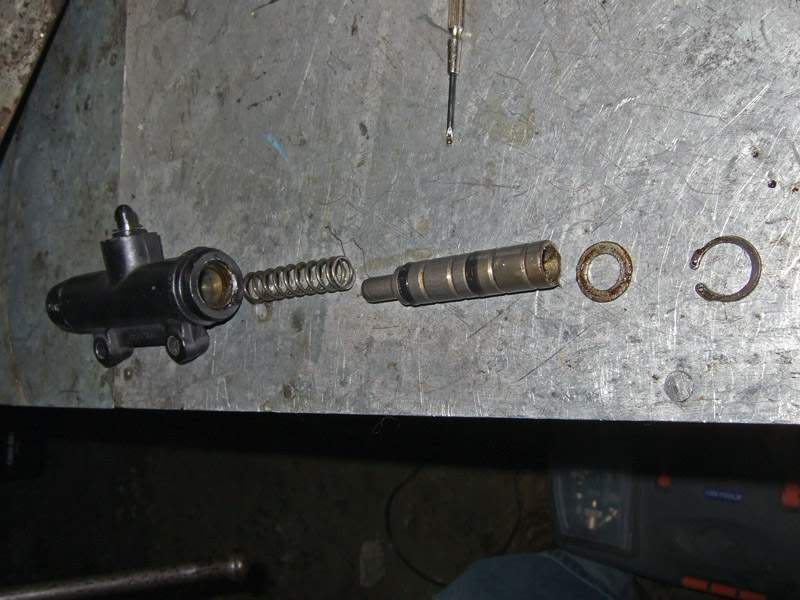
As some were unsure when rebuilding their clutch or brake pumps... The larger side of the seal always has to show inwards or it won`t build up any pressure. (Maybe it helps the ones to remember if thinking of a parachute )
All parts were rinsed inside and out to avoid any damage by the brake fluid.
The parts after their ultrasonic bath. In case the pistons have a dirt edge on the outer side you can use NEVRDULL or some other polishing wadding to remove it. If you ride very little and the brake pads are worn the pistons don`t retract as far into the caliper as they would with new pads. Theoretically the dirt building up on this "overhang" could ruin the seals over time if the pads are replaced with new ones which will push the pistons farther into the caliper again. Plain theory
In general it is NOT necessary to do all this, specially if the brakes don`t leak. I did it with every single bit of the bike so it would`ve been inconsequent not to do the brakes, too.
All internals of the calipers were clean just the brake pump (like most clutch and brake pumps) had some crystaline build up.
As no caliper leaked I`m reusing all the seals. (Except to the rear - non Paso - black caliper which will need a total rebuild). Also I split two sets of front calipers as I`m having them powdercoated from gold to black. I never liked my black rear with the newer golden front calipers. I wonder how they will look when finished.
G.
Being the only parts on the whole bike I didn`t strip I did that with the brakes, too. Even though rather simple I wouldn`t recommend this to anyone who isn`t sure about what he`s doing. It`s unnecessary in most cases, too!
The 907ie/851 calipers:
To get the pistons out I used a thin steel plate with an old sock over it. A piece of wood will be fine, too. The thinner the better as the more the pistons will come out the easier it will be to remove them.
Better wrap a rag around the nozzle to prevent brake fluid to be sprayed all around. If a piston doesn`t move out enough try spraying some WD40 in the gap, wait and press it back in; by hand or with a screw clamp. (In case of a screw clamp put some rag under not to scratch the housing).
Try again, if it doesn`t move more than before try again and push it in and out until it comes out. If the calipers are fine such a problem won`t occur.
The four bolts removed, the calipers split, o-ring saved. The pistons can be pulled out by hand with some wiggleing. Do not use pliers as chances are very high you will damage the piston.
Each cylinder has two seals. A larger one on the inside and a double lip one as dust seal.
Use a needle or a very thin screwdriver in a flat angle to get in the seal groove and lever it out carefully. Don`t pinch it if you don`t replace it and don`t slip and scratch the cylinder wall!
If reusing all parts store them in brake fluid and don`t let them dry as you may have problems when assembling.
The newer type Brembos. Basically the same but with different sized pistons for better brake response.
After the calipers were removed and the brake fluid was drained, the brake lines were secured to prevent any fluid getting on the rims or fender.
A rear caliper from another bike. Internals always the same; two seals per cylinder and an o-ring.
If one pistons is seized the other one will pop out so you can secure this one with a screw clamp and try again. A thin piece of wood should be put inbetween so the piston won`t hit the screw clamp in case it does finally move. This one didn`t. The only way to get it out is to attach it to a brake or clutch pump and try it hydraulically as this`ll create a much higher pressure.
The rear brake caliper. Being the old type it has only one seal in the cylinder and a dust seal plus two o-rings. Other than on many car brake calipers there`s no spring to secure the dust seal which eventually will punch a hole in it when trying to get it off. This seal comes off very easily. It`s important it is ok and not rottened dry as entering brake dust may cause piston seizure sooner or later. In worst case the brake will lock or become smoking hot. (May not be bad to replace these even though they look ok. Afterall they are from 86)
The rear brake pump. Don`t remove the plastic ellbow if it isn`t really necessary, you`ll just mess up the paint and mark the pumps surface.
Remove the rubber boot and the circlip. If you don`t have circlip pliers use a thin screwdriver put it in the circlip groove, in the gap between its two ends and try to lift one end out of the groove. If that works use some flat pliers to pull this end towards the other and it will come out.
If the piston doesn`t come out it`s because the washer has rusted and is sticking to the housing.
Do NOT try to hammer anything through the opposite side to push the piston out as there`s only a very tiny hole ! Spray some WD40 on the washer and use a thin stick (nothing sharp) to push the piston in and out until the washer comes loose.
As some were unsure when rebuilding their clutch or brake pumps... The larger side of the seal always has to show inwards or it won`t build up any pressure. (Maybe it helps the ones to remember if thinking of a parachute
All parts were rinsed inside and out to avoid any damage by the brake fluid.
The parts after their ultrasonic bath. In case the pistons have a dirt edge on the outer side you can use NEVRDULL or some other polishing wadding to remove it. If you ride very little and the brake pads are worn the pistons don`t retract as far into the caliper as they would with new pads. Theoretically the dirt building up on this "overhang" could ruin the seals over time if the pads are replaced with new ones which will push the pistons farther into the caliper again. Plain theory
In general it is NOT necessary to do all this, specially if the brakes don`t leak. I did it with every single bit of the bike so it would`ve been inconsequent not to do the brakes, too.
All internals of the calipers were clean just the brake pump (like most clutch and brake pumps) had some crystaline build up.
As no caliper leaked I`m reusing all the seals. (Except to the rear - non Paso - black caliper which will need a total rebuild). Also I split two sets of front calipers as I`m having them powdercoated from gold to black. I never liked my black rear with the newer golden front calipers. I wonder how they will look when finished.
G.
-
Andrew2
- paso grand pooh-bah
- Posts: 574
- Joined: Thu Oct 27, 2011 7:47 am
- model: 750 Sport
- year: 1988
- Location: Wollongong,Australia
Re: my Paso - a never ending (love) story ...
Just finished reading all this G.Nice job.Can't wait to see the end result.
Cheers
A2
Cheers
A2
-
Rhino
- paso grand pooh-bah
- Posts: 519
- Joined: Wed Oct 20, 2010 5:19 pm
- model: 907 I.E.
- year: 1992
- Location: Pembrokeshire
Re: my Paso - a never ending (love) story ...
God Almighty - just found this and it's taken me a while to read it. (Don't understand half of it!)
My first Ducati was a 750 Paso which I remember with GREAT fondness but I'm not so stupid that I do not realise that it was far from perfect. Never wanted another - perfectly happy with my stock 907. I just have one thing to say Paso 750 and PLEASE take this for the compliment that it is:
If EVER you decide to sell your 750 let me know and I'll send you the cheque
Last edited by Rhino on Sun Jul 14, 2013 10:35 am, edited 1 time in total.
Rhino
If God rides a Harley . . .
Then the Devil rides a Duke!
If God rides a Harley . . .
Then the Devil rides a Duke!
-
paso750
- paso grand pooh-bah
- Posts: 5574
- Joined: Sun Jul 18, 2004 12:00 am
- model: 750 Paso
- year: 1987
- Location: southern Germany
Re: my Paso - a never ending (love) story ...
Rhino, would you still be interested if I told you I don`t have a complete and new original tool kit ?
G.
G.
-
JoKing
- Posts: 362
- Joined: Mon Jun 20, 2005 12:00 am
- model: 750 Paso
- year: 1992
- Location: Northern Germany / Kiel
Re: my Paso - a never ending (love) story ...
What G shows us here, shows me, that i do not make any progress. I am trying to do the work in a similar quality (while i am trying to keep it as much original as possible (exept the engine  ), and G. improves his bike where possible), but with this aim I`ll need more than a year...
92` Ducati 907 i.e. - ST3-Conversion --> Burned down with my barn
78` Ducati 900 SS - Bevel --> Sved her by risking my life
90` Cagiva Freccia C12R - Paso`s smaller sister --> Burned down with my barn
86` Ducati 750 Paso
96` Cagiva 750 AC Elefant
78` Ducati 900 SS - Bevel --> Sved her by risking my life
90` Cagiva Freccia C12R - Paso`s smaller sister --> Burned down with my barn
86` Ducati 750 Paso
96` Cagiva 750 AC Elefant
-
paso750
- paso grand pooh-bah
- Posts: 5574
- Joined: Sun Jul 18, 2004 12:00 am
- model: 750 Paso
- year: 1987
- Location: southern Germany
Re: my Paso - a never ending (love) story ...
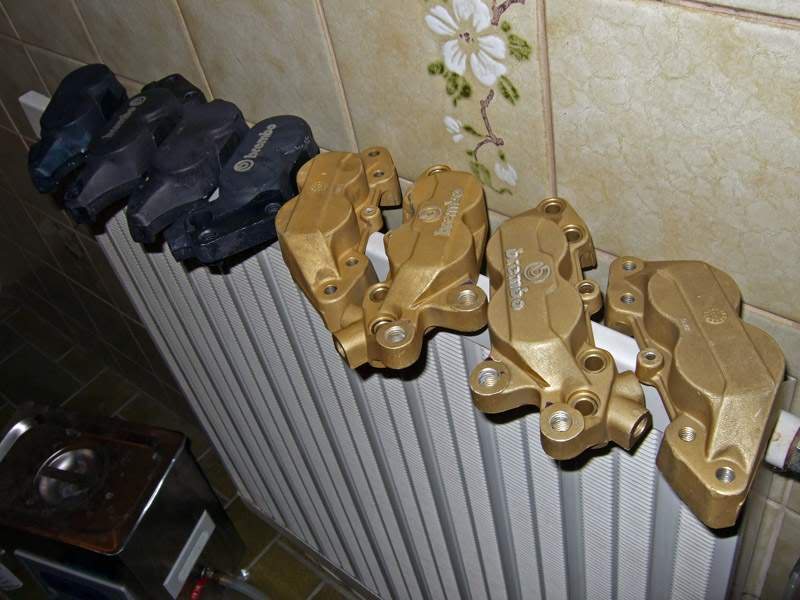
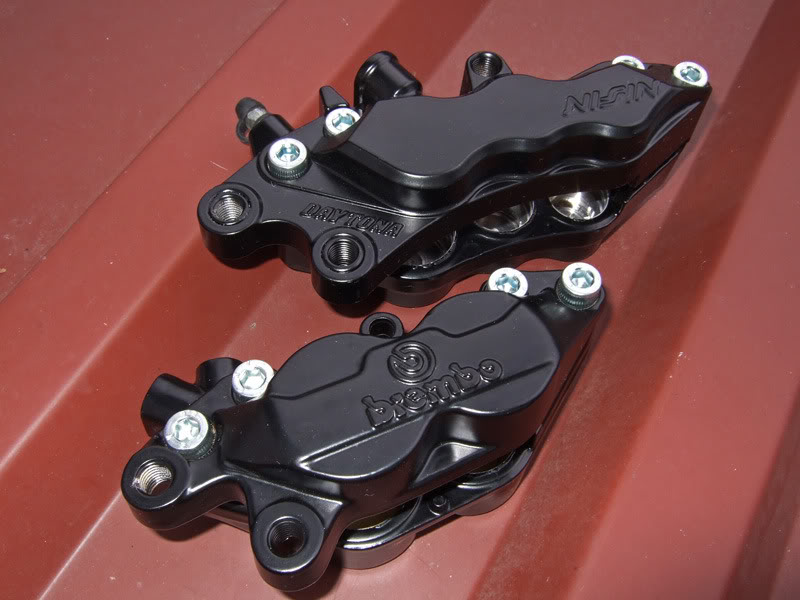
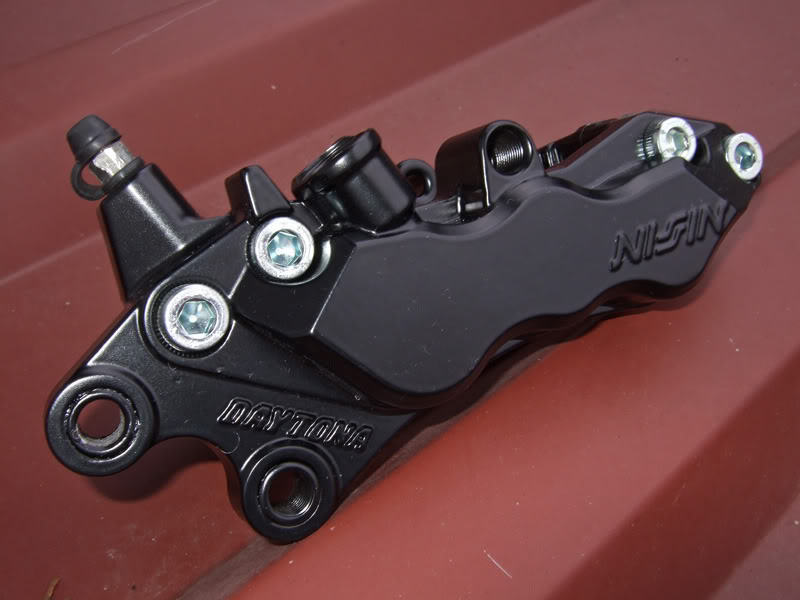
The old black Brembos were meanwhile sold and after a few weeks of waiting I finally got my calipers back from powder coating. They look so good, actually too good. I will have to get the original rear caliper done, too now. The good part, waiting for weeks did reduce the price quite a bit (and it was inexpensive from the start ) Unluckily I found a little oil spot under the Paso, wonder were that comes from, that`s new.
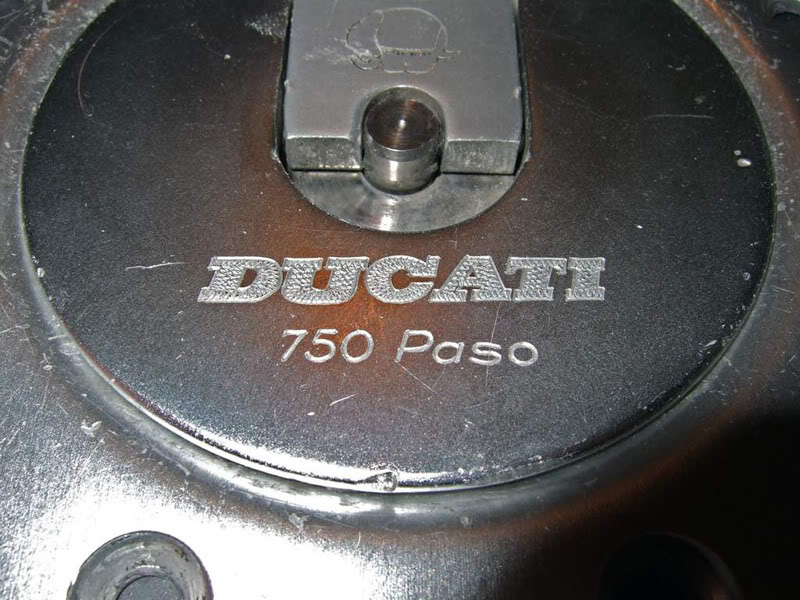
Actually by accident this tank cap fell into my hands. A bit marked but a nice little detail.
G.
Actually by accident this tank cap fell into my hands. A bit marked but a nice little detail.
G.
-
paso750
- paso grand pooh-bah
- Posts: 5574
- Joined: Sun Jul 18, 2004 12:00 am
- model: 750 Paso
- year: 1987
- Location: southern Germany
Re: my Paso - a never ending (love) story ...
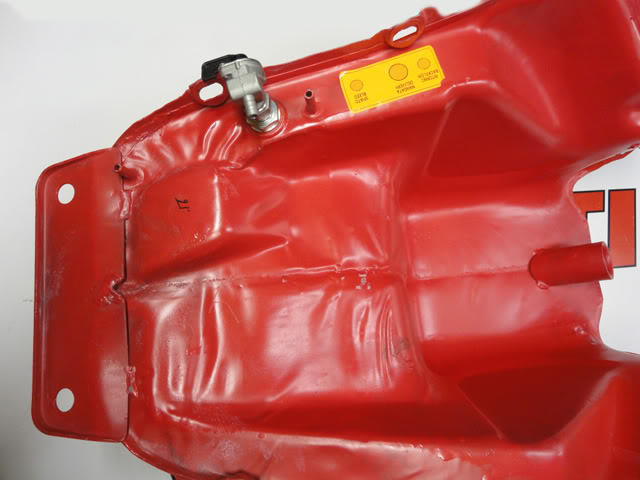
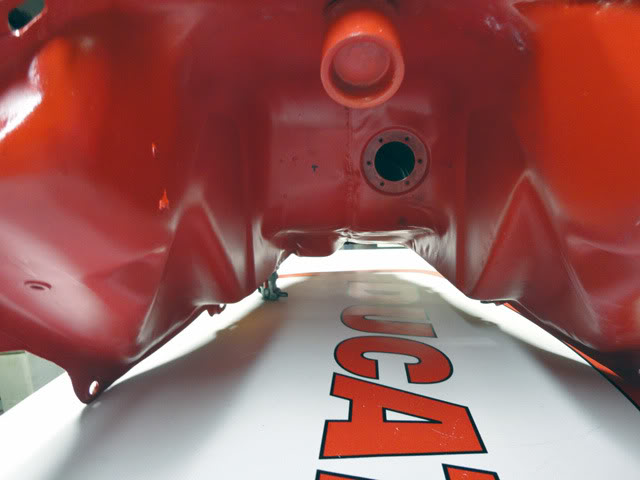
Just noticed that there are different tanks for the P750. I didn`t know that. This is my old one:
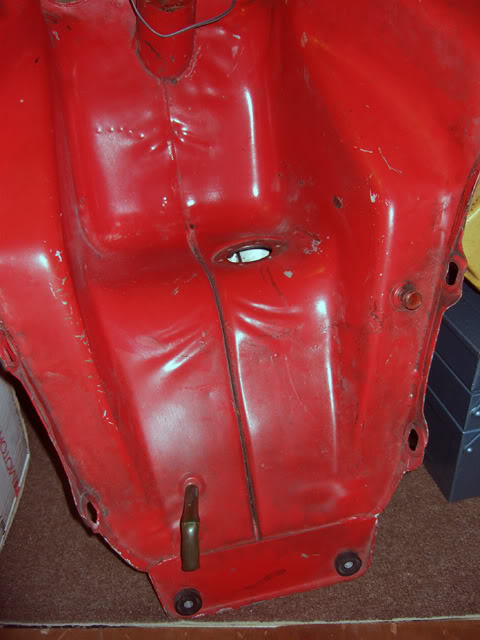
and this one I saw on ebay. It has a bulge on the lower bottom, the fuel petcock has a lever and like the breather and return connections it`s in a completely different position. Even the area around the airbox and the lower/outer edge is shaped a differently. Mine is a very early tank, don`t know what model year this is from.
G.
-
JoKing
- Posts: 362
- Joined: Mon Jun 20, 2005 12:00 am
- model: 750 Paso
- year: 1992
- Location: Northern Germany / Kiel
Re: my Paso - a never ending (love) story ...
This is very interesting, i think the 907 tank is shaped even different.... i have to check that...
92` Ducati 907 i.e. - ST3-Conversion --> Burned down with my barn
78` Ducati 900 SS - Bevel --> Sved her by risking my life
90` Cagiva Freccia C12R - Paso`s smaller sister --> Burned down with my barn
86` Ducati 750 Paso
96` Cagiva 750 AC Elefant
78` Ducati 900 SS - Bevel --> Sved her by risking my life
90` Cagiva Freccia C12R - Paso`s smaller sister --> Burned down with my barn
86` Ducati 750 Paso
96` Cagiva 750 AC Elefant
-
paso750
- paso grand pooh-bah
- Posts: 5574
- Joined: Sun Jul 18, 2004 12:00 am
- model: 750 Paso
- year: 1987
- Location: southern Germany
Re: my Paso - a never ending (love) story ...
The 906 tank that is on my bike looks just like my early P750 tank.
The 907ie tank will be different because of the different airbox, the fuel pump in the tank etc.
G.
The 907ie tank will be different because of the different airbox, the fuel pump in the tank etc.
G.
-
JoKing
- Posts: 362
- Joined: Mon Jun 20, 2005 12:00 am
- model: 750 Paso
- year: 1992
- Location: Northern Germany / Kiel
Re: my Paso - a never ending (love) story ...
So wich one allows the bigger airbox? Maybe i should swap to a 750-Tank?
92` Ducati 907 i.e. - ST3-Conversion --> Burned down with my barn
78` Ducati 900 SS - Bevel --> Sved her by risking my life
90` Cagiva Freccia C12R - Paso`s smaller sister --> Burned down with my barn
86` Ducati 750 Paso
96` Cagiva 750 AC Elefant
78` Ducati 900 SS - Bevel --> Sved her by risking my life
90` Cagiva Freccia C12R - Paso`s smaller sister --> Burned down with my barn
86` Ducati 750 Paso
96` Cagiva 750 AC Elefant
-
ducapaso
- paso grand pooh-bah
- Posts: 1097
- Joined: Sun Aug 01, 2004 12:00 am
- model: 750 Paso
- year: 1988
- Location: siena, italy
- Contact:
Re: my Paso - a never ending (love) story ...
JoKing, 907 requires a diffrerent tank because of the fuel pump inside and a different airbox because of fuel injection. I don't think there're great differences between 906 and 2nd 750 fuel tank (the one with the fuel return close to the petcock)
have a nice ride, Nicola
Black "DUKE" 751582
ex...Red "smooth" 753349
Black "DUKE" 751582
ex...Red "smooth" 753349
-
persempre907

- paso grand pooh-bah
- Posts: 3312
- Joined: Tue Dec 06, 2005 12:00 am
- model: 907 I.E.
- year: 1992
- Location: Roma, Italia
Re: my Paso - a never ending (love) story ...
...uuuhmmm, it seems to me custom made.paso750 wrote: Actually by accident this tank cap fell into my hands. A bit marked but a nice little detail.
Very nice, however
Ciao
Francesco
Ducati 907IE 1992 Rosso
Ducati 907IE 1993 Nero
Moto Guzzi Galletto 1960 Sabbia
BMW R Nine t 2019
Ducati 907IE 1992 Rosso
Ducati 907IE 1993 Nero
Moto Guzzi Galletto 1960 Sabbia
BMW R Nine t 2019
-
PasoRoo

- Posts: 113
- Joined: Wed Feb 18, 2009 12:44 pm
- model: 750 Paso
- year: 1987
- Location: Canberra, Australia
Re: my Paso - a never ending (love) story ...
Hey G, I didn't realise at first, but looking at the pics of your brakes I see that you have 4 piston Brembos with the original disks (and the 6 piston Nissins). Am I right in assuming that they are 40mm calipers with an adapter to mount them on the fork leg? Any other modifications? What pads do you use?
Winter is coming in this hemisphere so I'm planning to use the time to do some work on the Paso. I doubt whether I'll reach your level of commitment though.
Cheers,
Mike
Winter is coming in this hemisphere so I'm planning to use the time to do some work on the Paso. I doubt whether I'll reach your level of commitment though.
Cheers,
Mike
-
paso750
- paso grand pooh-bah
- Posts: 5574
- Joined: Sun Jul 18, 2004 12:00 am
- model: 750 Paso
- year: 1987
- Location: southern Germany
Re: my Paso - a never ending (love) story ...
The 4 piston Brembo calipers (40mm mount) are original ones as used on the Supersport, 851/888 and numerous other bikes like Laverdas etc. The adapters I have are from MotoQuality/Brembo and you find the drawings and CAD files in the FAQs.
I got the calipers with good original Brembo pads and they worked very well.
The only other change I did with the new brakes is swap the brake pump with a PS16 as this is recommended. This complete modification is an easy thing to do.
G.
I got the calipers with good original Brembo pads and they worked very well.
The only other change I did with the new brakes is swap the brake pump with a PS16 as this is recommended. This complete modification is an easy thing to do.
G.