Page 6 of 7
Re: Left engine cover removal
Posted: Thu Jan 05, 2012 10:23 am
by paso750
I don`t see the alignment marks on the outer part of the center body. There`s a square instead of two lines.
from section 8-22 (many other detailled photos there)
http://www.box.com/public/oq4fober14
Re: Left engine cover removal
Posted: Thu Jan 05, 2012 11:41 am
by Harry
Yes the only alignment marks are down at the bottom if you look at the picture i posted and there are none at the top aside from those on the End Cap. I took the starter to an Auto Electrician and he had it turning clock- wise on the Bench and in the mean time i got a second hand one and fitted it and run it. I have not heard back from the Auto Electrician but will contact him in the morning.
Re: Left engine cover removal
Posted: Thu Jan 05, 2012 11:44 am
by paso750
The marks on the center housing that can`t be seen must be on the rear side which would mean the end cap isn`t mounted right. At least there should be some. As mentioned a square not two lines like on the other parts.
Assuming your new one works correctly did you check it for the marks ?
Re: Left engine cover removal
Posted: Thu Jan 05, 2012 8:41 pm
by higgy
Re: Left engine cover removal
Posted: Thu Jan 05, 2012 8:59 pm
by paso750
so the marks in the front and rear are on the opposite side and Harry`s endcap is reversed.
Re: Left engine cover removal
Posted: Thu Jan 05, 2012 10:19 pm
by higgy
Yes..............
Re: Left engine cover removal
Posted: Fri Jan 06, 2012 1:20 am
by Harry
Yeh i should of mentioned that i did get the Bike going with the secondhand Starter it only cost me $20 because it had been sitting in a parts bin for a long time so i was happy with that purchase and i have talked with the Auto Elec that i gave the original Starter too he said that at some stage the Starter has been reconditioned totally and that the way it goes back together to turn in the correct rotation does not have any relation to the Marks that are on it? im not sure how that works but he has it re-assembled and has put new alignment marks on it so that when i pick it up it will become a spare i did read somewhere that when they recondition that they will totally rebuild Starter Motors with new windings and Magnets etc so yes i wonder if the owner before me had done this and he was the one that new how it went back together. Next job on the list is coil replacement with Dyna Coils should i run 3 ohm or 5 ohm.
Re: Left engine cover removal
Posted: Fri Jan 06, 2012 6:41 am
by Duc906
Harry wrote:Next job on the list is coil replacement with Dyna Coils should i run 3 ohm or 5 ohm.
3 ohm coils are what you need.
Re: Left engine cover removal
Posted: Fri Jan 06, 2012 9:23 am
by paso750
Harry, when you pick up your repaired starter would you post some pictures of it again ?
G.
Re: Left engine cover removal
Posted: Fri Jan 06, 2012 11:34 am
by Harry
Yes i will post pictures
Re: Left engine cover removal
Posted: Sat Jan 07, 2012 1:22 am
by jayh
Re: Left engine cover removal
Posted: Sun Jan 08, 2012 8:10 pm
by higgy
Re: Left engine cover removal
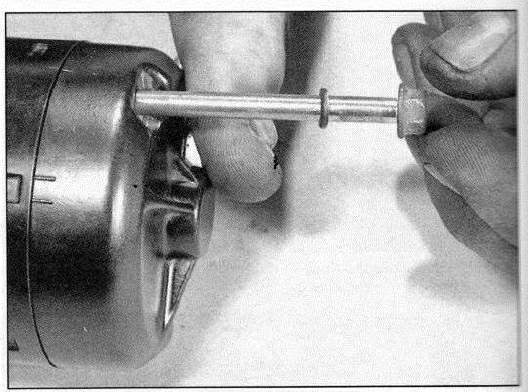
Posted: Mon Feb 06, 2012 10:02 am
by Duc906
The starter sprag in my 906 packed it in the other day. I pulled the sprag out and found the spring had stretched & let go. I took the spring down to the local bearing supplier and he matched it up with one from an oil seal for me. This is the second time I've had to replace the spring, the last one has lasted 20,000+ kms and the seal only cost me $15. Apart from the spring the sprag looked ok so I'm hoping to get the same life out of this spring.
Re: Left engine cover removal
Posted: Fri Mar 02, 2012 9:25 pm
by Desmo_Demon
I just ran across some old pictures I forgot I had and figured I'd post another alternative for future reference...
All you need is a piece of plate steel, two fairly long bolts (M5?) with one nut each, and a bolt to fit into the end of the crank. Drill the two holes large enough that the two bolts easily slide through them...

To use it, place the one bolt in the end of the crank, place a nut on each smaller bolt, put the plate in place, install the bolts, and then evenly align the nuts so the puller is parallel with the cover (Note - make sure that the long bolts are several turns into the cover but not far enough to bottom out on the flywheel so that you don't accidentaly strip out the threads).
To remove the cover, simply turn each nut about 1/2-turn each while preventing the bolts from turning with another wrench, alternating back-and-forth between them to evenly draw the cover off the engine. Once the cover is far enough off the bike and stator rotor, you can use the puller as a handle and pull the cover off...

Re: Left engine cover removal
Posted: Sat Mar 03, 2012 10:00 am
by Derek
The cover screws are M6 and the thread in the end of the crank is M8. Instead of an engine turning tool you can fit an M8 screw with a locknut to the end of the crank and use it for turning the engine with a spanner, easy if the spark plugs are removed. Very useful when fitting new belts etc.

