Hi all,
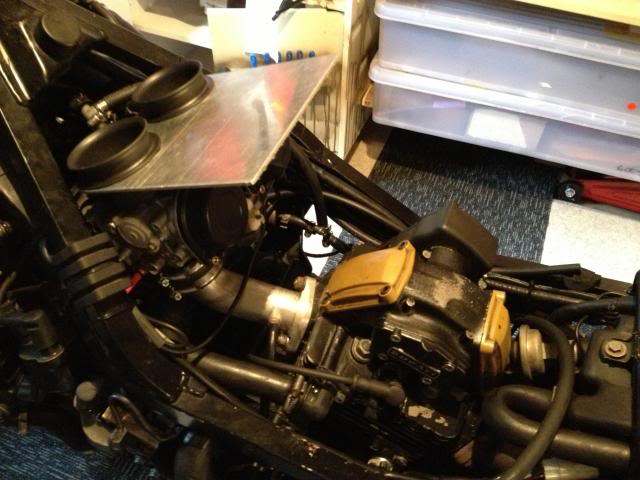
So I've been running with Mikuni CV carbs on my 906 for a while with a serviceable conversion of the Paso air box. The bottom was cut out and a flexible rubber mat glued to the air box with a couple of holes cut for a tight fit around the carb mouths. While that worked, it was only ever intended to be an interim fix...... that was 2 years ago!
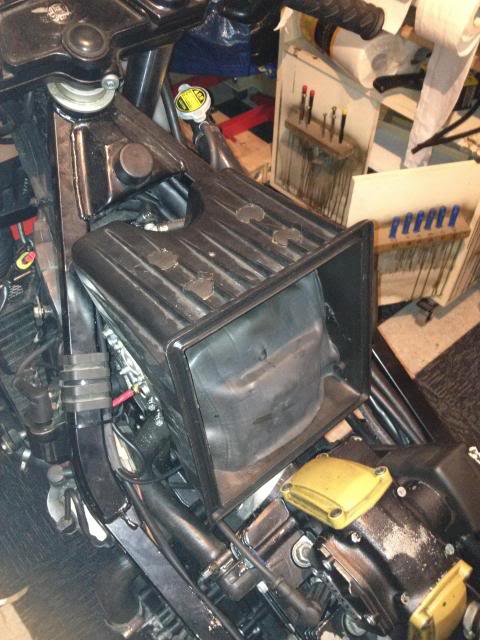
So finally I built up the energy to make a proper version that used the OEM rubber intakes for the Mikuni carbs as per the 400/600/750/900 SS family.
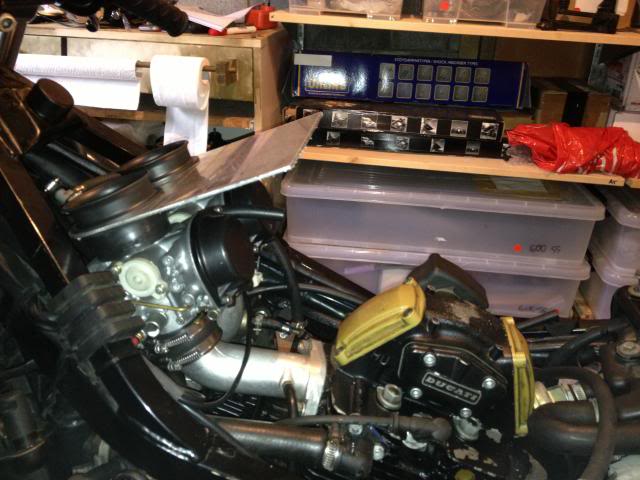
Made an aluminium plate to located the carb intake holes, and bent it to clear the carbs.
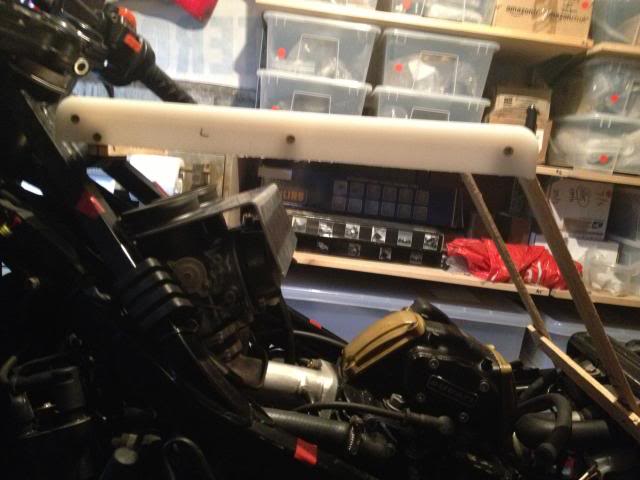
Made a fibreglass mould of the bottom of the tank, locating on the rear bolt holes and front rubber stop.
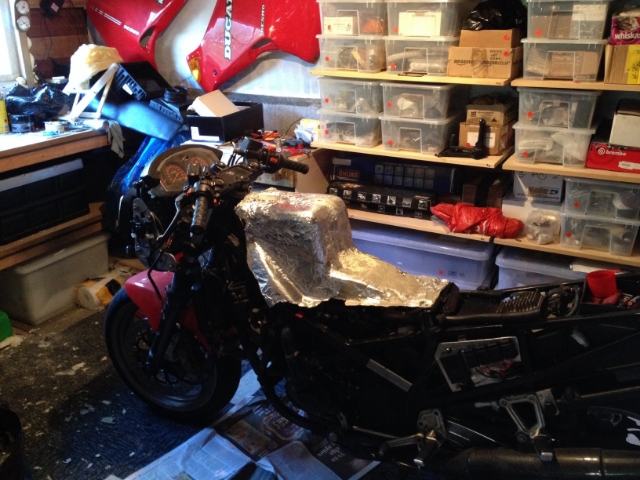
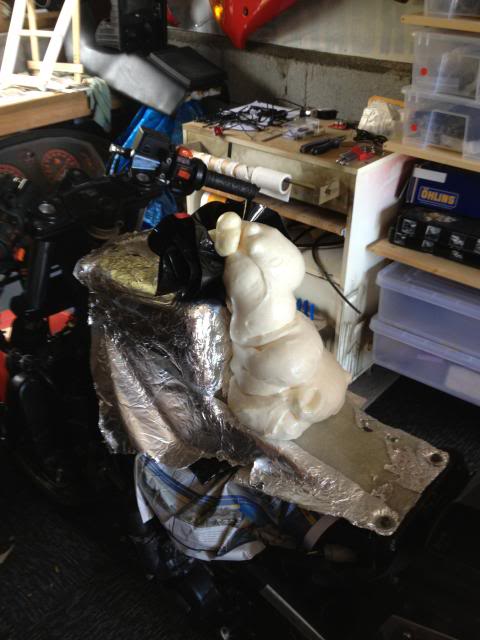
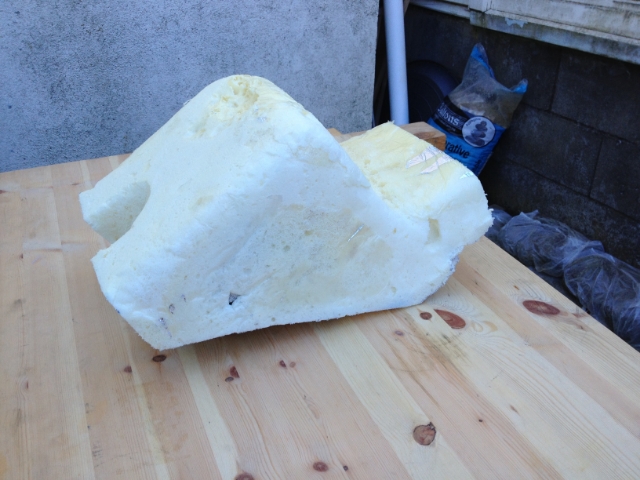
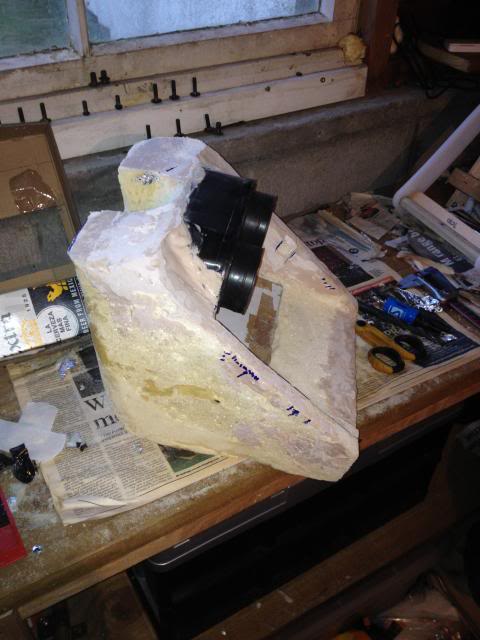
Made a cardboard box to cover the carb intakes, covered the bike and carb box with newspaper and used expanding foam injected through a hole in the top of the fibreglass tank template to cast a copy of the void space.....well the first attempt I forgot to plug the hole after injecting the foam.......!
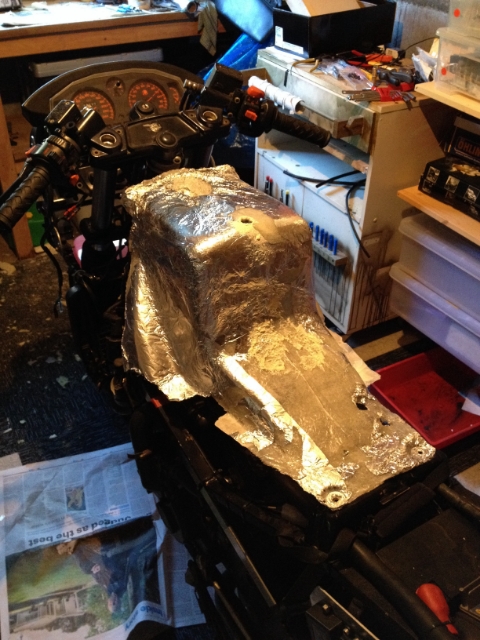
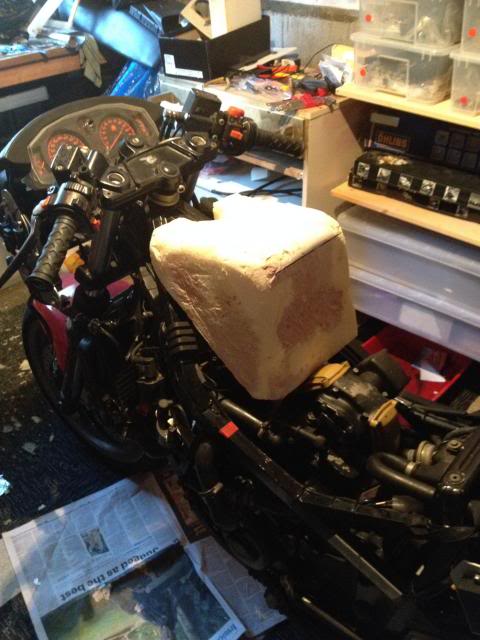
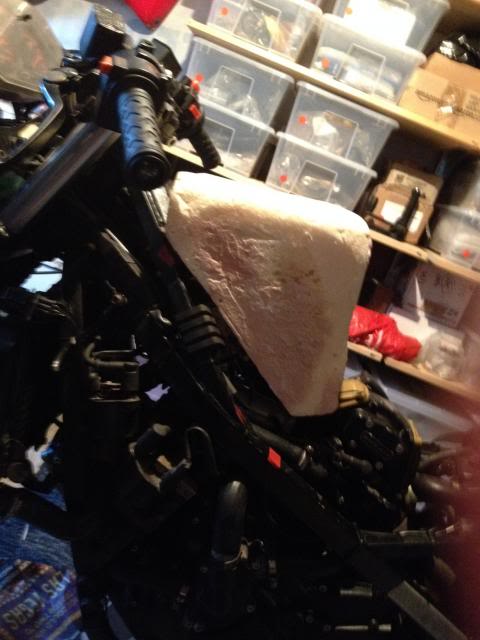
Eventually I got a foam piece that was worth working on....
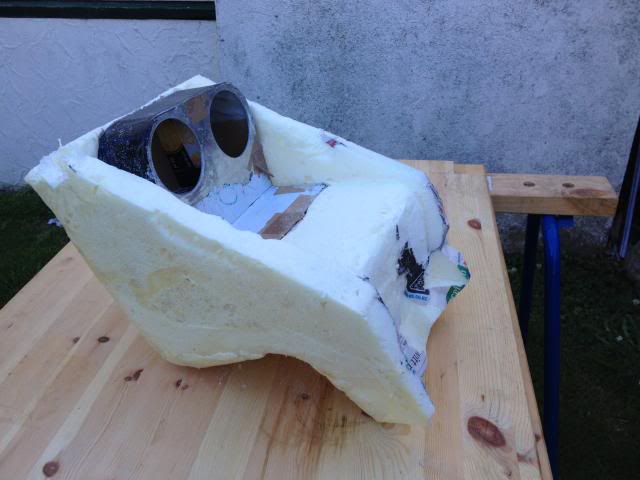
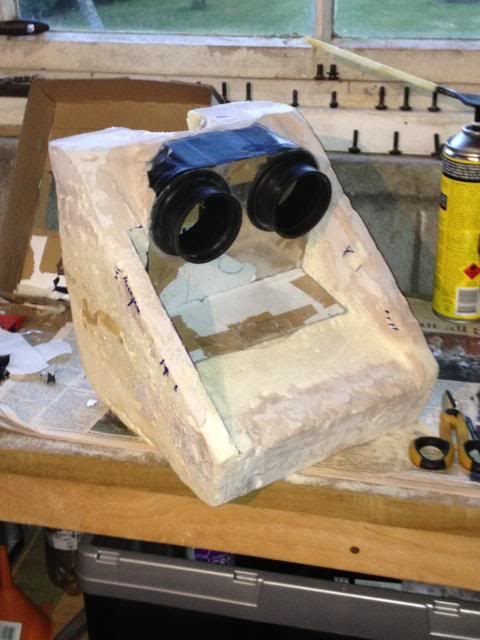
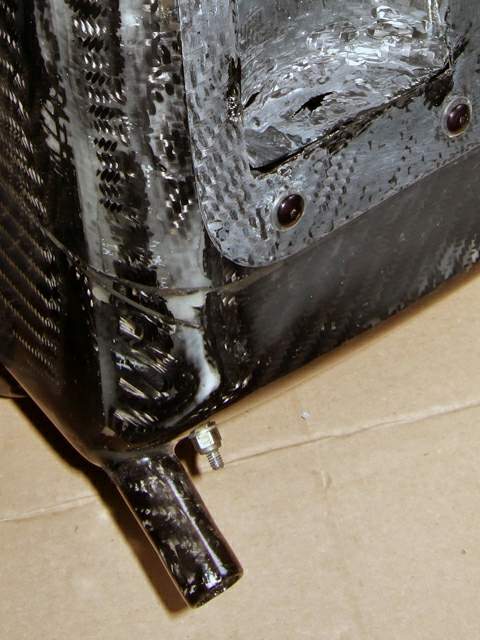
Next, sanding and using the foam plug to make up a mould and finally the fibreglass or carbon fibre airbox.......
Cheers,
Mick
Mikuni Airbox Mark 2
- micklm
- Posts: 103
- Joined: Fri Jun 05, 2009 8:53 pm
- model: 906 Paso
- year: 1989
- Location: Taranaki, New Zealand
Mikuni Airbox Mark 2
906 Paso 1989 w/ 17in wheels
- englishstiv
- paso grand pooh-bah
- Posts: 1111
- Joined: Wed Apr 09, 2008 9:57 pm
- model: 907 I.E.
- year: 1992
- Location: Manchester, England.
Re: Mikuni Airbox Mark 2
This is why I love this site. Great photo's and clear instructions looking forward to seeing the finished mod.
DUCATI 907ie 1992
HARLEY DAVIDSON ELECTRA GLIDE CLASSIC 1991
- paso750
- paso grand pooh-bah
- Posts: 5558
- Joined: Sun Jul 18, 2004 12:00 am
- model: 750 Paso
- year: 1987
- Location: southern Germany
Re: Mikuni Airbox Mark 2
Mick,
nice job. There are some problems coming towards you you may not have considered.
I`ll shoot you a pm.
G.
nice job. There are some problems coming towards you you may not have considered.
I`ll shoot you a pm.
G.
- paso750
- paso grand pooh-bah
- Posts: 5558
- Joined: Sun Jul 18, 2004 12:00 am
- model: 750 Paso
- year: 1987
- Location: southern Germany
Re: Mikuni Airbox Mark 2
Thinking about it it might be ineresting for everyone who also wants to do this...
When I made my first airbox I started similar to you. I used a sheet metal which I cut in shape of a T. It looked like yours but it had a "wing" on each side. I placed the cut original airbox on it and made a mark on each side. Then I bent the wings so these touched the inner side of the airbox, drilled holes and riveted both together.
This was my base to then lay some glasfibre mats on the bottom part. That´s probably the easiest way to modify the airbox.
What you did with the foam was my airbox #2. This is of course the more difficult option.
The issues that will occur are:
- the foam is porous so you need to filler it but you need to be careful not to build up material!
- you made a glasfibre copy of the inner side of the tank. The material thickness of this mould is the max. thickness you´re allowed when laying mats on your mould or the tank will not properly sit on it. So maybe you may consider sanding some material from the foam box before you start
- keep a recess on the rear side so the box doesn´t hit the electric terminals of the fuel sensor
- where will you place the airfilter and where the snorkels ?
- how will you get the foam out of the laminated airbox ? You will have to cut it open somewhere. Either you cut of the rear part if you want to copy the original airbox and scratch the foam out which will be a dirty job or you will have to cut the box in several pieces to remove it from the foam part
- if you cut off the rear part to make a lid how will you fixate it later ?
- and then there`s the hose connector for the crankcase breather tube
There might be some more things you`ll notice along the way.
I experienced numerous of these points the hard way
G.
- micklm
- Posts: 103
- Joined: Fri Jun 05, 2009 8:53 pm
- model: 906 Paso
- year: 1989
- Location: Taranaki, New Zealand
Re: Mikuni Airbox Mark 2
Hi G,
Good points. I'm planning on sanding the foam plug down quite a bit as you suggest to make sure the tank fits well with allowance for the next layer. I've used some epoxy filler in places already to fill parts of the foam plug where the foam didn't set or expand into.
Once I've got the plug right, I'll wrap it in fibreglass, drill some locating holes, then cut the end off to start on forming a lip for the air filter to locate in. Then I'll cut it all open in half as you suggest - unless I can get the plug out some other way. This shell will actually be the mould/s rather than the final airbox. I'll make the air box up in two halves using these mould/s, then use the locating holes as the means to align the two halves for joining. Or so goes the theory...
For the lid I'll use an open OEM or K&N filter with a frame to hold it in place. Maybe aftermarket like this http://www.racingairfilters.eu/?ids=kop3/sub5 or something simple based on the OEM lid.
You're right that I'll need to make up some attachment points for the clips.......this still needs some thinking but I hope to use the OEM clips with some attachment points made up on the air box ......then there's the crankcase breather hose to connect (I need to get this modification certified, meaning original emissions design needs to be retained).
Hmm....a long way to go yet!
But I'm doing this the hard way as I'm trying to learn the skills to make a more complicated air box for my SS which has split single FCRs - the plan there is to make an airbox that has the carbs inside and seals around the intake stubs....
Cheers,
Mick
906 Paso 1989 w/ 17in wheels
- paso750
- paso grand pooh-bah
- Posts: 5558
- Joined: Sun Jul 18, 2004 12:00 am
- model: 750 Paso
- year: 1987
- Location: southern Germany
Re: Mikuni Airbox Mark 2
That´s a good idea.Once I've got the plug right, I'll wrap it in fibreglass, drill some locating holes, then cut the end off to start on forming a lip for the air filter to locate in.
Due to the shape you´ll have to cut from side to side and not from front to backThen I'll cut it all open in half as you suggest - unless I can get the plug out some other way.
Why are you doing this step ? It will ensure the clearance to the tank that´s sure. Will you then join the parts from the in or outside ?This shell will actually be the mould/s rather than the final airbox.
I wouldn´t do that unless you manage to do it like in the 907ie airbox, chop off the top part of the airbox and place the filter there. the snorkels and the shape of the airbox lid serve the purpose to direct the airstream from the front to the airfilter on the rear. If you remove the rear lid and snorkels the air streaming by may cause an underpressure even reducing the amount of air that gets to the carb which performancewise would be counterproductive. Imho it would ruin all the effort put in building an airbox.For the lid I'll use an open OEM or K&N filter with a frame to hold it in place. Maybe aftermarket like this http://www.racingairfilters.eu/?ids=kop3/sub5 or something simple based on the OEM lid.
That´s easy. Find a metal tube that has the inner diameter of the original hose connector. Wax that and wrap it with a sheet of soaked glasfibre mat. Do not apply resin to the complete mat but only half or 2/3. Later remove it and pull the strands of the parts you left untreated apart. (This will take a woven fabric of course). Make a hole in your new airbox, insert the new part from the inside and laminate it on......then there's the crankcase breather hose to connect (I need to get this modification certified, meaning original emissions design needs to be retained).
I`ve done that but with split single carbs that sounds a lot more difficult.But I'm doing this the hard way as I'm trying to learn the skills to make a more complicated air box for my SS which has split single FCRs - the plan there is to make an airbox that has the carbs inside and seals around the intake stubs....
You were lucky btw with the foam you used. The foam I used was a two component foam specially for moulds which came in different grades of porousness. When that was used up I used insulating foam which I regretted for a long time as that was some terribly sticky shit that also didn`t harden through completely in some spots making sanding it a miserable job. It all ended in some curses and scratching it all of.
Btw I heard of some special foams that can be dissolved.
-
- paso grand pooh-bah
- Posts: 1878
- Joined: Wed Dec 05, 2007 12:35 am
- model: 906 Paso
- year: 1990
- Location: Newzealand
Re: Mikuni Airbox Mark 2
I have been giving this a bit of thought as I too have the mikuni's which I would like to fit .
You can buy sheets of fiberglass ( or parts there of ) which is about 2mm thick which you can " origami" up into various shapes . I have done a lot of work on re foaming fridges and have found that the density of the cured foam can be controlled by how well it is contained as it cures ,IE if you restrict the area it has to expand into it tends to be quite dense but if you just tip it out and let it cure uncontained it will blow larger bubbles , and you cant beat a flap wheel or wire wheel for removing it or shaping it when cured
Here is an early prototype
Note high flow filter and cunning use of low budget commonly found construction materials
I wish I was young again............Id be heaps smarter than last time
- Fraser
- Posts: 334
- Joined: Tue Jan 17, 2006 12:00 am
- model: 750 Paso
- year: 1986
- Location: Lower Hutt, New Zealand
Re: Mikuni Airbox Mark 2
Hamish,
Too late mate, am already using that one.
Cheers,
Fraser.
Too late mate, am already using that one.
Cheers,
Fraser.
750 Paso
1980 Moto Morini 500 Sport
-
- paso grand pooh-bah
- Posts: 1878
- Joined: Wed Dec 05, 2007 12:35 am
- model: 906 Paso
- year: 1990
- Location: Newzealand
Re: Mikuni Airbox Mark 2
Cant remember where I got the image from , but its actually a box that was attached to some old guys bike in the 50's ( probly wasn't old then ) to keep his ferrets in
I wish I was young again............Id be heaps smarter than last time