my Paso - a never ending (love) story ...

discussions specific to the 750 Paso

Moderators: paso750, jcslocum

User avatar
paso750
paso grand pooh-bah
Posts: 5560
Joined: Sun Jul 18, 2004 12:00 am
model: 750 Paso
year: 1987
Location: southern Germany

Re: my Paso - a never ending (love) story ...

Post by paso750 »

except to progressive fork springs and thinner oil it`s original. (Unless the usual rusting stop rings which I replaced with some in stainless steel I had made)

So that was the story from 1998 to end of 2009.
Beginning of this year I decided I didn`t like to lose the most of the most of the range/possibility to adjust the chain tension and swapped to a new 907ie swingarm I`d gotten years back when thinking about the wheel conversion. Clearances wouldn`t be any issue (except to tire chain) and I could play with the bikes geometry by having the possibility to move the wheel back, extending the wheel base and lowering steering angle a bit by the same time.
For keeping 16" wheels this is the option that requires the most parts fabricated incl. wheel and bearing spacers due to the different size axle. (having all the parts except wheels I now could do a 17" wheel conversion in less than one hour if I ever wanted to)
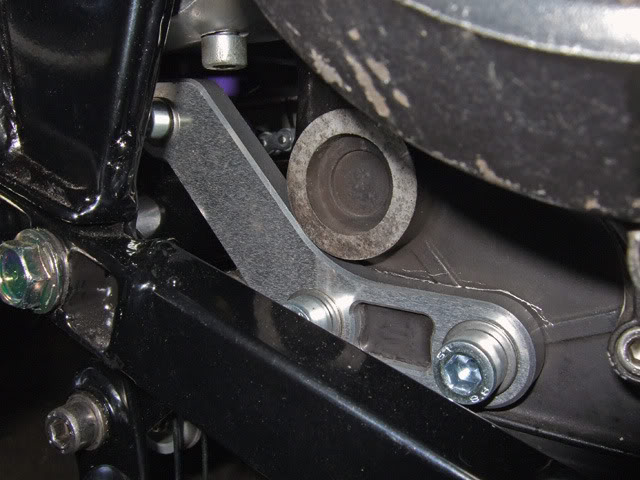
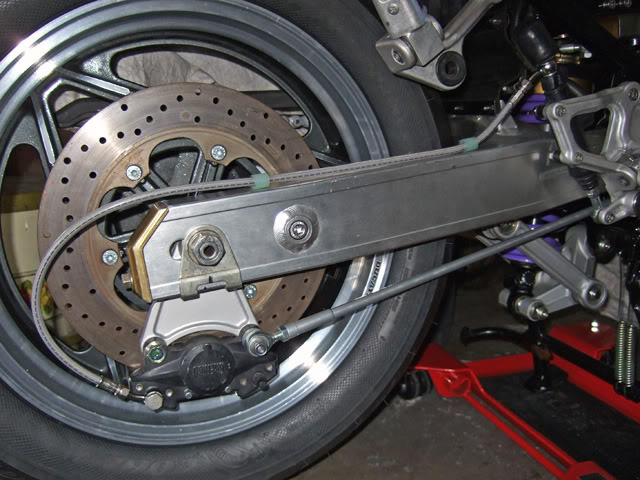
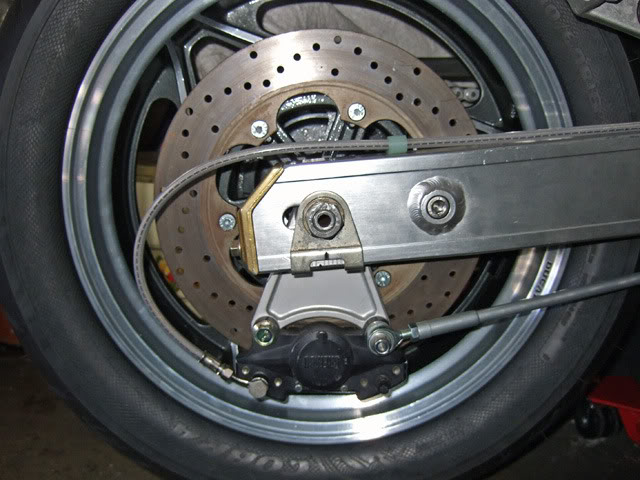
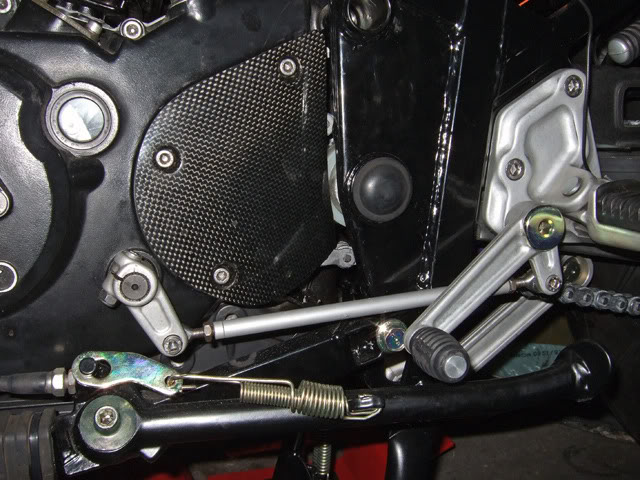
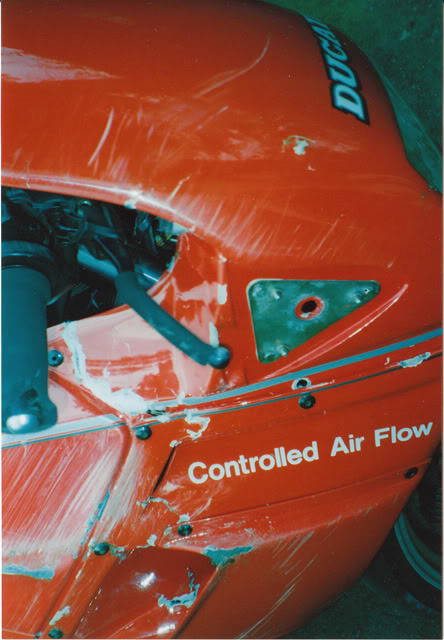
Also the rear brake caliper bracket won`t fit anymore and the one of a 907ie wouldn`t go with the 16" rim as it`s made for a 245mm brake disc which you can`t mount on the Oscam rim. Therefore the rear brake had to be modified, too which I had intention to do anyway. Luckily a friend helped me out doing some calculations for the front mounting bracket I had designed and choosing the right material.
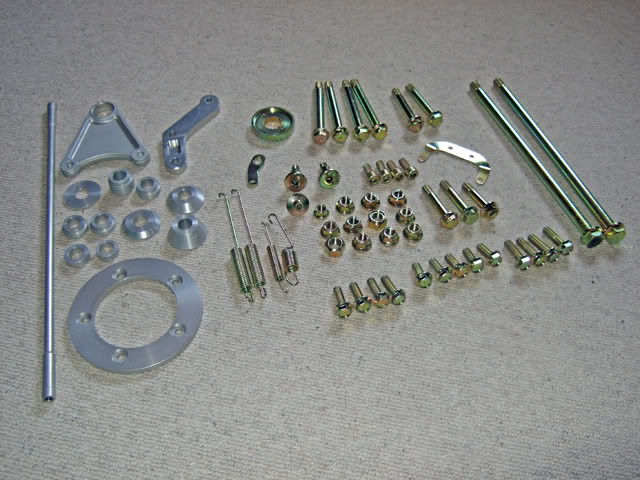
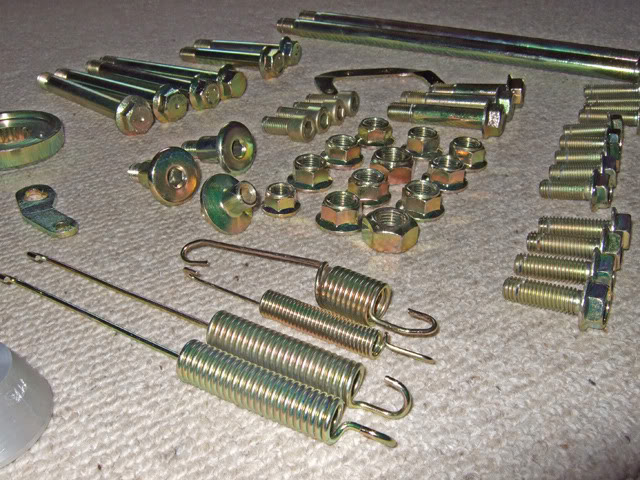
During the engine rebuild all engine bolts were replaced with new ones and I had continued that when rebuilding the frame the last time. All small bolts & nuts were replaced with stainless steel parts, the ones for brake and fork with new zinc plated steel bolts. As a consequence when all parts for the new wheel/swingarm combination were machined and send to anodizing I had all the original/special bolts of frame and swingarm zinc plated & yellow alodined, too.
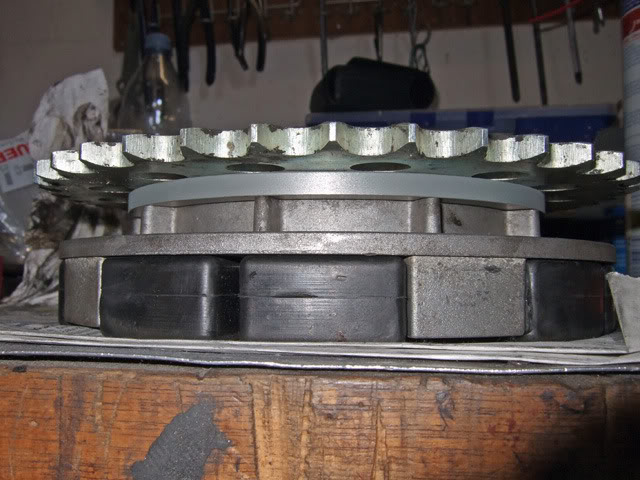
Looking scary big
Image
Image
If someone is wondering those are the bolts for 2 complete swingarms and not all those spacers on the left were for this project
Image
Image
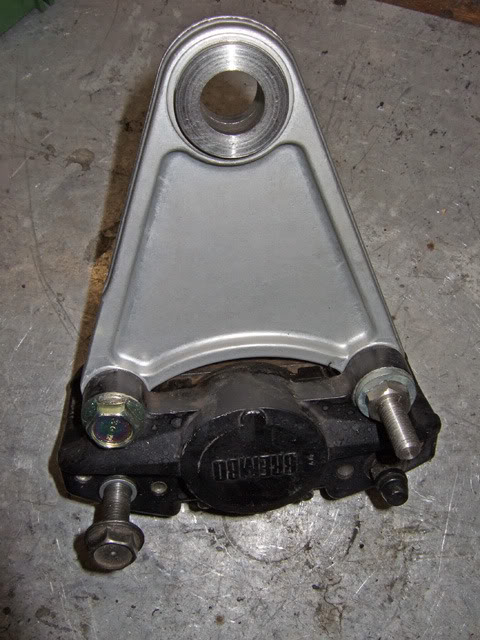
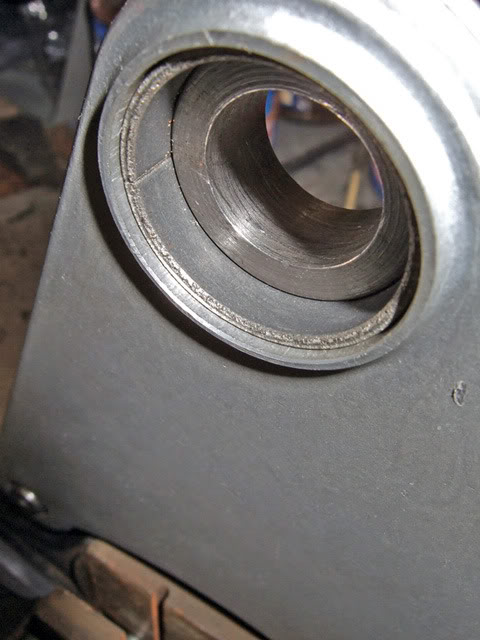
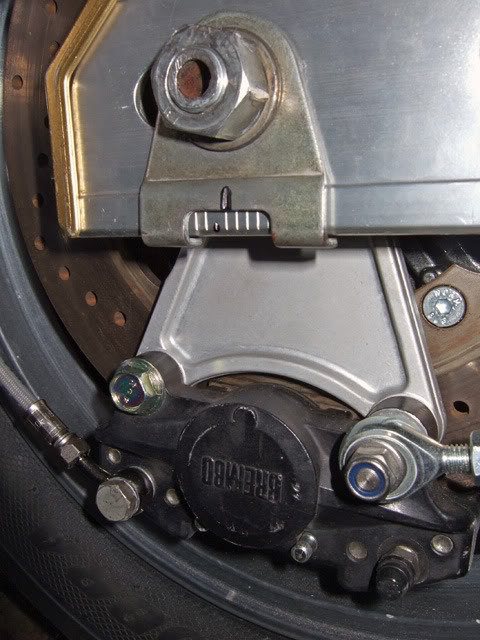
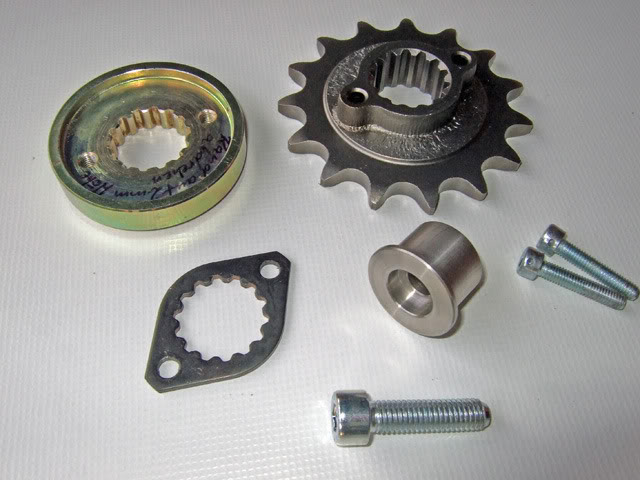
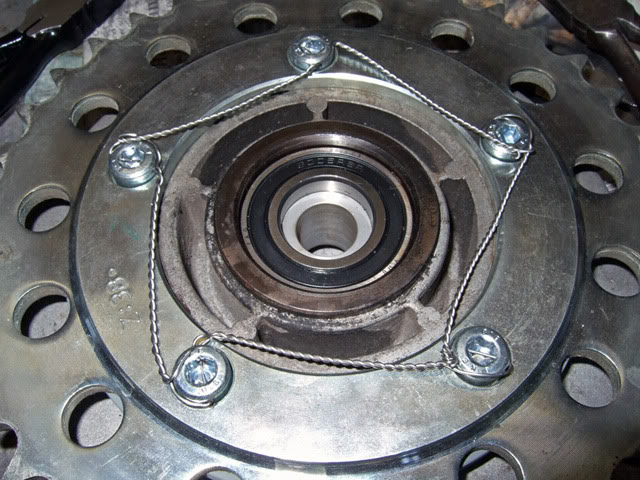
M10 to M8 adapter bolt & modified brake caliper plate
Image
Image
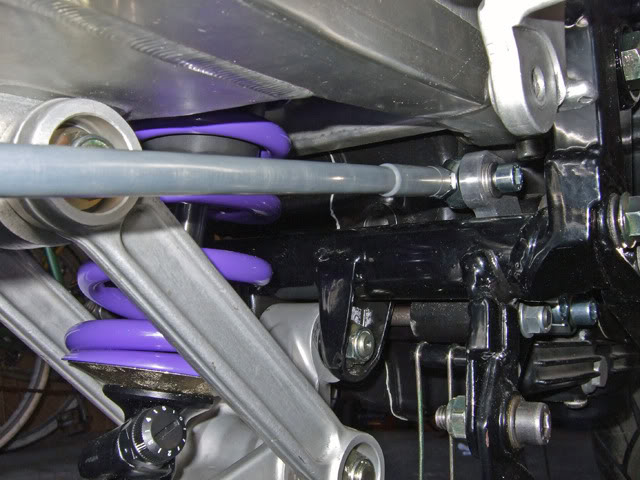
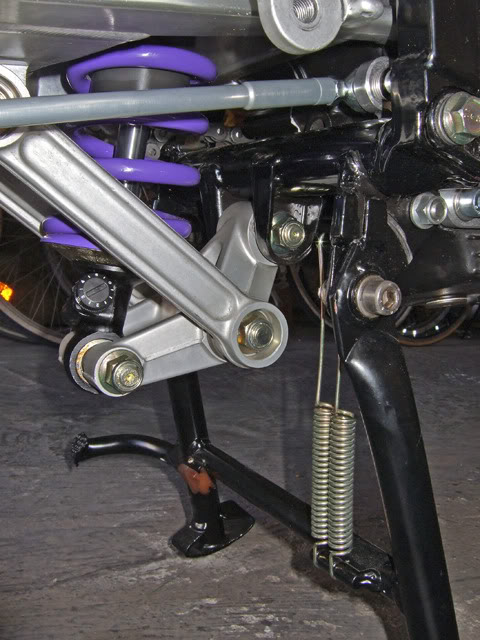
In case you`re wondering using parts from a Superlight won`t work no matter if you have a P750 or a 907ie. The Superlight has a shorter swingarm and no lower frame tube from one side to the other. Hence the front mounting adapter is too short and the connecting rod also.
Image
Image
Image
Image
Image
Image
Image
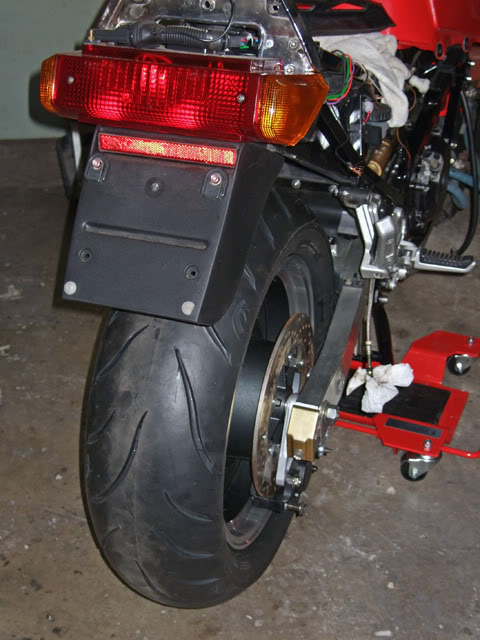
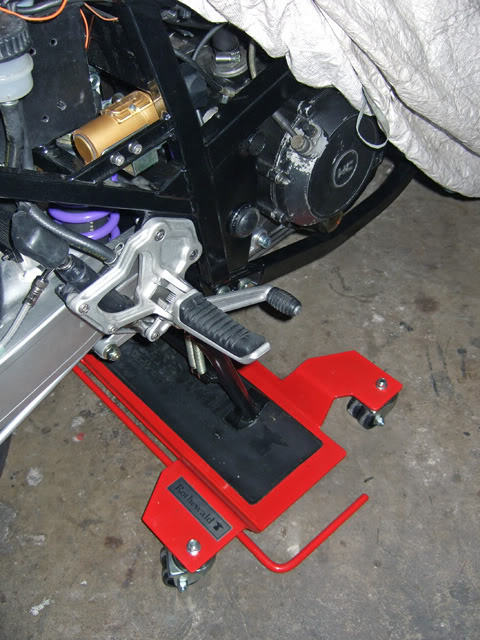
The trolley or whatever it`s called I got meanwhile is a blessing for a narrow garage (it requires an even flloor though because of its small wheels). I wouldn`t have made it though to put it under the centerstand myself. I had to use a rear bike stand to lift the bike, then position the trolley and let the bike down. To get the bike off it is easy, to get it on it is hard.
Image
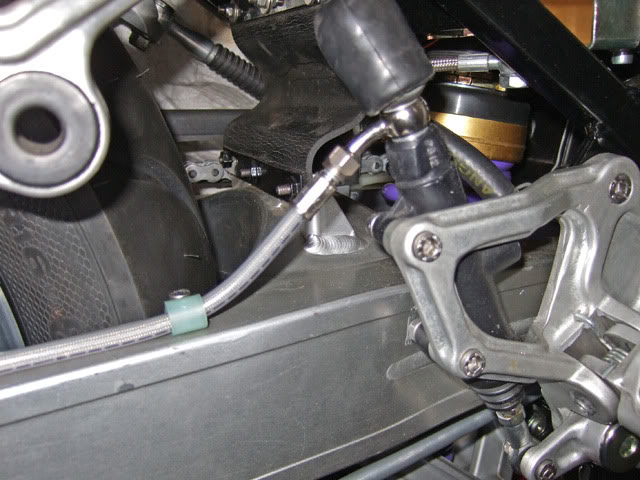
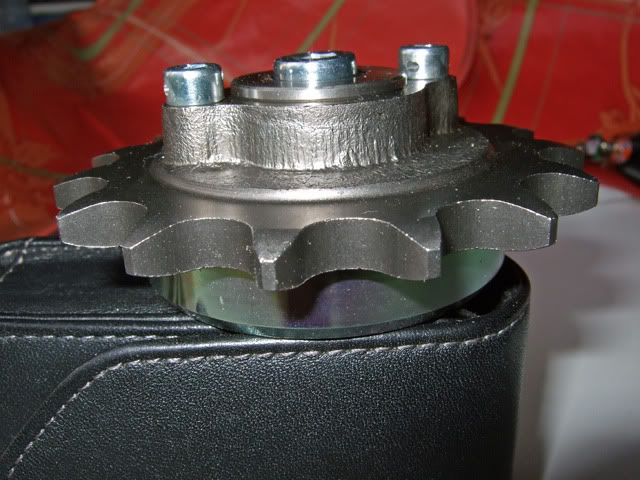
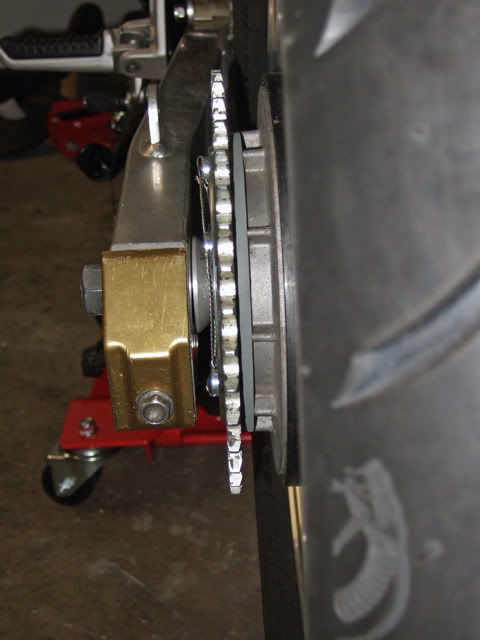
Offsetting the chain.
Image
Image
Image
Image
Image
Image
Image
Image
User avatar
persempre907
paso grand pooh-bah
Posts: 3312
Joined: Tue Dec 06, 2005 12:00 am
model: 907 I.E.
year: 1992
Location: Roma, Italia

Re: my Paso - a never ending (love) story ...

Post by persempre907 »

What a clean bike :thumbup: :thumbup: :thumbup: :thumbup: :thumbup: :thumbup: !!!!
So, you MUST to repaint the clutch cover!!!!
Ciao
Francesco
Ducati 907IE 1992 Rosso
Ducati 907IE 1993 Nero
Moto Guzzi Galletto 1960 Sabbia
BMW R Nine t 2019
User avatar
paso750
paso grand pooh-bah
Posts: 5560
Joined: Sun Jul 18, 2004 12:00 am
model: 750 Paso
year: 1987
Location: southern Germany

Re: my Paso - a never ending (love) story ...

Post by paso750 »

:) that`s only for the TUV inspection, after that I`ll put the open cover back on. I don`t know how much the noise level has changed only by the big valves so currently I put all the original/ TUV approved parts on. Then I will change bit by bit and check if I`m still within legal noise emission limits.
Tamburinifan
paso grand pooh-bah
Posts: 1527
Joined: Thu Jun 21, 2007 12:00 am
model: 907 I.E.
year: 1991
Location: Gothenburg, SWEDEN

Re: my Paso - a never ending (love) story ...

Post by Tamburinifan »

You`re a freak, G, but the good kind. :lol:

Keep it coming! :thumbup:

I guess you`ve considered pods,
why did you do a new airbox?
Gert

907 I.E. -91
M900 -97
MTS 1100s -07
joeltje

Re: my Paso - a never ending (love) story ...

Post by joeltje »

Where did you get the offset parts for the chain? I'dd love to be able to just order them somewhere, as I have no machining capabilities...

You have a very clean bike indeed! And this is one of the best post on any bike forum!
User avatar
paso750
paso grand pooh-bah
Posts: 5560
Joined: Sun Jul 18, 2004 12:00 am
model: 750 Paso
year: 1987
Location: southern Germany

Re: my Paso - a never ending (love) story ...

Post by paso750 »

I guess you`ve considered pods, why did you do a new airbox?
I actually never did, maybe shortly at the very beginning when I swapped the Weber with the standard Mikunis as that would`ve been the easiest solution.
I don`t think pod filters are good performancewise at least they do work quite differently depending on the bike they`re used on. Furthermore they make more noise (which some may mistake with more power). Also a correct carbs setup can become more difficult. I saw the results on Baukes modified Paso 906 (it was no diy job but done by Biggelaar and StarTwin in NL)
An airbox is always the better option. With the airfilter it will work as a buffer and also calm down the turbulences of the intaken air. Already in the 60s and 70s car tuners started to use airboxes instead of trumpets only. This Alfa GTA is one example:
http://www.alfabb.com/bb/forums/attachm ... airbox.jpg
Also if you check the history of Superbikes and racing you see that in some seasons there were only very small modifications to the engine but the one thing that changed was the size of the airbox.
A good concrete example for me is a friends Cagiva Elefant. He`s the one riding a ST2 engine with Keihin flatslides. The airbox is quite a bit smaller and differently shaped on the Elefant than it is on the ST2. As a consequence you can see a remarkable difference when you compare the dyno charts.
Hence I figured it ran good with the old airbox and can only run better with a much bigger one, specially after the engine mods done.

Joeltje, I don`t have either. I had all parts made by 3 different machine shops. I made all drawings myself and provided them. What I did with the chain and swingarm is more than can be seen on the photos. Maybe if Terry gets all his other projects under control he will post what he did, which is basically the same but he kept the old swingarm.
If you can`t wait - there are limitations to what you can do as there are only 3 different offset options for the front sprocket (I can think of) on a P750 unless you have an offset sprocket made which is rather expensive. I guess we can help you through the process. As the alternative tires seem to have quite some width difference (ie the Shinko and the Avon) a good point to start with would be to get a tire and put it on the bike. Try to find an old 520 chain (maybe a bike shop around still has one in the trash) and wash it (cut it if it`s an endless chain). Get 1,5mm washers and put them below the rear sprocket. Try 3 (4,5mm offset is what Terry and I have). Remove the clip of the front sprocket and move it outwards by the same amount. Put on the chain and then the bike in gear. Rotate the rear wheel clockwise to tension the chain and check its clearance to the tire. If it touches the tires edge by a hair that will still be fine. As was mentioned in some other thread you can also remove 1 or 2mm from it w/o having any concern. If you do that and have a result we can do the rest alltogether. You`ll just have to find a machine shop then, but believe me there are plenty around. (I live in a 15.000 people town and there are 5. I would have never believed before I started really looking for one. By experience they are quite different though. Less regarding quality than price. Some calculate precisely by machine hours and are therefore more expensive and small shops often do it by rule of thumb or even for a few € in the coffee kitty. Those are my favorites :) )
User avatar
paso750
paso grand pooh-bah
Posts: 5560
Joined: Sun Jul 18, 2004 12:00 am
model: 750 Paso
year: 1987
Location: southern Germany

Re: my Paso - a never ending (love) story ...

Post by paso750 »

As the header(s) now also didn`t match the rest I had it sandblasted last year, which was a stupid mistake. I should have had it glasbead blasted instead or just sanded it by hand. The result looked nice and like new but it had an orange peel surface. Actually I had wanted the header to stay clean but with this surface dirt would`ve stuck to it even better and burn in making it ugly in no time.
So the sanding began starting off with 80 grit paper over 120, 180, 240, 320, 400, 600, 800 and 1200 at the very last. After that polishing with the drill and 3 different brushes (sisal, hard and soft cloth) and polishes. The polishing set was a €30 set that`s being sold in many bike shops, so nothing special.
The complete 2in1 header took 9,5 hours, the 2in2 7,5h not calculating lunch and coffee breaks. The result cannot be distinguished to chrome. The parts look to good to be used now but I didn`t care about the looks as they will discolour yellow and blue quite fast anyway, but just have an even surface which would stay clean longer.
My legal SHARK exhausts had some scratches and were very dull so I did them too starting with 240grit and doing everything like on the headers. Luckily that went much faster as I could use a machine for most of the rougher sanding.
I`d had preferred a silk shine to high gloss but the alloy covers are much softer than ie the header and even using a very fine glaze pad would roughen up the surface too much for my liking. Some day the covers may be changed to carbon ones anyway if I find some in the correct size and a reasonable price. (no matter if alloy is actually better)
This was a couple of weeks ago. The headers had meanwhile gone off to welding.
Image
Image
Image
Image
Image
Image
Image

G.
User avatar
higgy
paso grand pooh-bah
Posts: 3334
Joined: Tue Jul 29, 2008 9:50 pm
model: 907 I.E.
year: 1992
Location: Hilltown,Pennsylvania
Contact:

Re: my Paso - a never ending (love) story ...

Post by higgy »

Gerhard, You Pasoholic :thumbup:
Ducati,making mechanics out of riders since 1946
There's no problem so bad that a little fixing can't make it worse! : )
If it ain't broke keep fixin it till it is
88 750
90 906
92 907ie
User avatar
PasoRoo
Posts: 113
Joined: Wed Feb 18, 2009 12:44 pm
model: 750 Paso
year: 1987
Location: Canberra, Australia

Re: my Paso - a never ending (love) story ...

Post by PasoRoo »

Tamburinifan is right G, you are a freak! :lol: You put us all to shame with parts looking like that... My headers are fairly rusty and I have been toying with the idea to get them ceramically coated in black.

When you threw the Paso down the road, did you have cracks in the fairing? Although my Paso hasn't got any accident damage it does have some cracks around the holes in the fairing where the well-nuts go. What would be the best way to repair this and prevent any further cracks?

Great posting!

Cheers,

Mike
User avatar
persempre907
paso grand pooh-bah
Posts: 3312
Joined: Tue Dec 06, 2005 12:00 am
model: 907 I.E.
year: 1992
Location: Roma, Italia

Re: my Paso - a never ending (love) story ...

Post by persempre907 »

PasoRoo wrote:Tamburinifan is right G, you are a freak! :lol: You put us all to shame with parts looking like that... My headers are fairly rusty
I guess only the G.'s headers are so shining....
Ciao :beer: :beer: :beer: :beer: :beer:
Francesco
Ducati 907IE 1992 Rosso
Ducati 907IE 1993 Nero
Moto Guzzi Galletto 1960 Sabbia
BMW R Nine t 2019
User avatar
higgy
paso grand pooh-bah
Posts: 3334
Joined: Tue Jul 29, 2008 9:50 pm
model: 907 I.E.
year: 1992
Location: Hilltown,Pennsylvania
Contact:

Re: my Paso - a never ending (love) story ...

Post by higgy »

I plan to cover my headers with 2 inch exhaust tape, we use it at work so we dont have to wait for our stainless to cool before we change things around for the next test cycle.Our exhaust reach temps in the 1000+ degree range, taped up you can hold onto it with your hand and not get burnt. Big plus when you have twenty minutes to make changes for the next test cycle. Besides I have neither the time or the interest in polishing to the extent G has done :mrgreen: :mrgreen: :mrgreen:
Ducati,making mechanics out of riders since 1946
There's no problem so bad that a little fixing can't make it worse! : )
If it ain't broke keep fixin it till it is
88 750
90 906
92 907ie
joeltje

Re: my Paso - a never ending (love) story ...

Post by joeltje »

paso750 wrote: Image

G.
All I can say: :wacko: You realy take it to the max!

Thanks for the offset input, once realy needed (probably end of season) I'll just start, and see where I end up.. I won't be as specific as you though :shock:
User avatar
micklm
Posts: 103
Joined: Fri Jun 05, 2009 8:53 pm
model: 906 Paso
year: 1989
Location: Taranaki, New Zealand

Re: my Paso - a never ending (love) story ...

Post by micklm »

G,

Mate, you trouble me, you trouble me deeply. Suddenly my Paso looks old, dirty, worn and in need of powdercoating, autosol and zinc chromate......

I really like the front bracket for the full floating rear caliper setup. If you have a CAD drawing you'd be willing to share that would be great. My own rear brake adaptation (for a 17inch conversion) is yet to be tested and another option like yours makes me wish I had pursued the "full floating" idea in the first place! But completely understand if you want to hold off posting drawings till you've had a chance to road test the final product.

I've also heard that the pods can make the carbs harder to jet for the low and mid range rpm? No personal experience but heard it from a few people...

Cheers,

Mick
906 Paso 1989 w/ 17in wheels :)
User avatar
paso750
paso grand pooh-bah
Posts: 5560
Joined: Sun Jul 18, 2004 12:00 am
model: 750 Paso
year: 1987
Location: southern Germany

Re: my Paso - a never ending (love) story ...

Post by paso750 »

Mike, I`m not an expert on surface refinement. I talked to the guy at the polishing shop and with my mediablaster/powdercoater. Polishing seemed to be the best and by far cheapest option. Diy did cost a total of €40 and a weekend, while the shop would have taken 6-7x that much.
I definetely didn`t want chrome. I did have my first header nickel plated a couple of years back. (with modified cross and lambda sond collet. All that just to notice then it was a 906 header :banghead: )
Image
Nickel plating did cost €60, the last time I asked it was almost twice as much.
Ceramic coating would`ve been one of my favorites. Very nice in flat black like on some Harleys or flat white as on some old race cars. But I cancelled it from my options list as I got to know what ceramic coating costs - ouch.
The guy also said that like with most coatings it could happen that some could chip off over time. Not only by the constant hot/cold but also due to damages by stone chipping. Temperature changes are no issue for ceramic but it`s more sensible to damages. Maybe that`s of no concern on a Paso as the header is almost completely hidden anyway.

Higgy, the polishing was a one time job and only necessary because of the sandblasting result. :roll: The more perfectly even the surface is the longer the header will remain in that condition. The colour will change to something like the nickel plated header after some time.
I`m also using exhaust tape. As can be seen on the pics I used it for the silencer on the Gilera, but only because it almost touched the side carbon fairing and its clear coat would get yellowish and show dull stains after some time. On the Paso I`m using it on the middle section of rear header tube only to keep away some heat from the shock. Some wrap the complete exhaust but as always there are some pro and cons.
Image
pro: less heat heat emission of the header (mostly important in a tuned cars engine bay, I`d say). You can touch the header after a much shorter cooling down time
con: header (and maybe even the cylinder head) will heat up more as it can`t emit the heat. I read in some car forums that some guys reported about headers to red heat (one guy also mentioned a crack in a welding due to the additional stress to the material. Of course I don`t know if it was an aftermarket or an original cast iron header or if it was a traverse mounted engine which exhaust usually vibrate more). The silencer will heat up more and specially if you have an reflection or absorbtion (hence no straight through glass packed) silencer with a carbon cover it could happen that this may get soft spots and then break in some place. Of course over time, not instantly.
pro: according to the manufacturers hot gases move faster hence more power (doubt that will make any difference. Might be valid for a race car or bike)
cons: some tapes pick up humidity which is no problem if the bike is used but if it stands for some time the header may start to rust faster
When you threw the Paso down the road, did you have cracks in the fairing?
haha - yes, one or two :lol:
Image
The side and headlight fairing are glasfibre (the oil cooler conveyors some kind of plastic) so they can be repaired with glasfibre easily. How you repair cracks depends on what your intentions are with the fairing. If you want to repaint the whole thing sand off the paint, mix some liquid glasfibre, try to bend/warp the part slightly (very gently!) if possible so the cracks open a bit. Apply the glasfibre and let loose. Remove excessive glasfibre. Depending on size of the crack it`s sometimes good to make it a little wider with a rotary tool (Dremel).
If you have no intention to repaint it`s difficult. If the cracks are hair cracks I`d just leave them as is. If you can`t get glue or glassfibre in the crack it doesn`t make sense. Of course you can try to repair as mentioned above. Remove the part. Clean the area you want to fix from wax. (Use wax/grease remover no Acetone, thinner or so. You could use Isopropyl alcohol. You can get it for almost nothing in a pharmacy). Warp the part and apply very little liquid glassfibre with a fine paint brush and remove excessive material instantly (not wiping it all over) after letting the part loose. When it`s hardened get the finest sanding paper you find 1000 or 1200 grit and carefully remove the glassfibre that`s still on the clear coat. (Sand wet of course). Then polish that area to get the gloss back. One thing to take care of is to use glassfibre that hardens clear. Some become blue, some yellow also depending on the hardener used.
Thinking of it you can also apply some form release agent (that`s used when working with moulds) around the area you`re working on before you start. Glasfibre won`t stick to it and you can wash some off with water. You could use normal car wax also or tape it off.
Generally I`d say you`re fastening the fairing bolts too much. Those rubber fairing grommets have a nut at their end so the rubber expands when you tighten the bolt. If you overtighten the nut often works itself to the front. If you see that that`s a sign.
When you put on the fairing try to use only every second or third bolt at first and look at the holes. If they don`t match with the rubber grommets behind you can file the holes a bit. I personally noticed this only on the oil cooler conveyors.

Guys, if you think I`m a freak you should see the pics I didn´t post :mrgreen:
I also have polished conrods. I wanted to use them at first (cheapest option) but then had the opportunity getting some reasonably priced Carillos. :truck:

Mick, at least you`re riding your bike - I envy you. I couldn`t even if it was finished. It`s constant 11°C and for the last week it rained continously.
Afterall my Paso is not a rebuild of a bike that was stored in a shed for years but it`s a ground up - to the very last bolt restoration (no restoration to the original obviously :mrgreen: ). It`s the only chance to have a new Paso. Unluckily they aren`t sold anymore. Just buying one would`ve been easier but probably less fun.
I don`t have a CAD drawing of that bracket. Of course I do have my sketch with all measurements though. PM me your email address and we can discuss this. Just handing out a drawing w/o any further explanation is always a bit risky. There`re numerous things to keep in mind.

G.
User avatar
fasterdammit
paso grand pooh-bah
Posts: 708
Joined: Wed Jan 19, 2005 12:00 am
model: 750 Paso
year: 1988
Location: CNY, US
Contact:

Re: my Paso - a never ending (love) story ...

Post by fasterdammit »

I'm with Mick & higgy ... my Paso looks awful dull and unloved now. :-( Man, just wow. Thanks for the intense write up and photo history, that's love, alright. Simply gorgeous!

And I just wanted to add - love the full-floating rear brake setup. :thumbup: I've been looking for the pieces & parts to put that on both my Paso and the Monster. Love everything else too! :)
Just because you're not dead doesn't necessarily mean you're living, either.
1988 Paso 750 #753965
1997 Monster 750
Post Reply